
Things are certainly moving along with the project now and in Part 3 we have a few more modifications on the cosmetic side, some repair work and the next modification to move towards bigger power!
The series
Working on cars isn't always about power gains and going faster or looking better, there's often quite a lot of money to be saved by doing things yourself too. In Part 3 I'm going to start of with what was a cheap repair that saved me a lot of money, a couple of aesthetic improvements and then the next big change getting the car ready for a lot more power.
Repair work
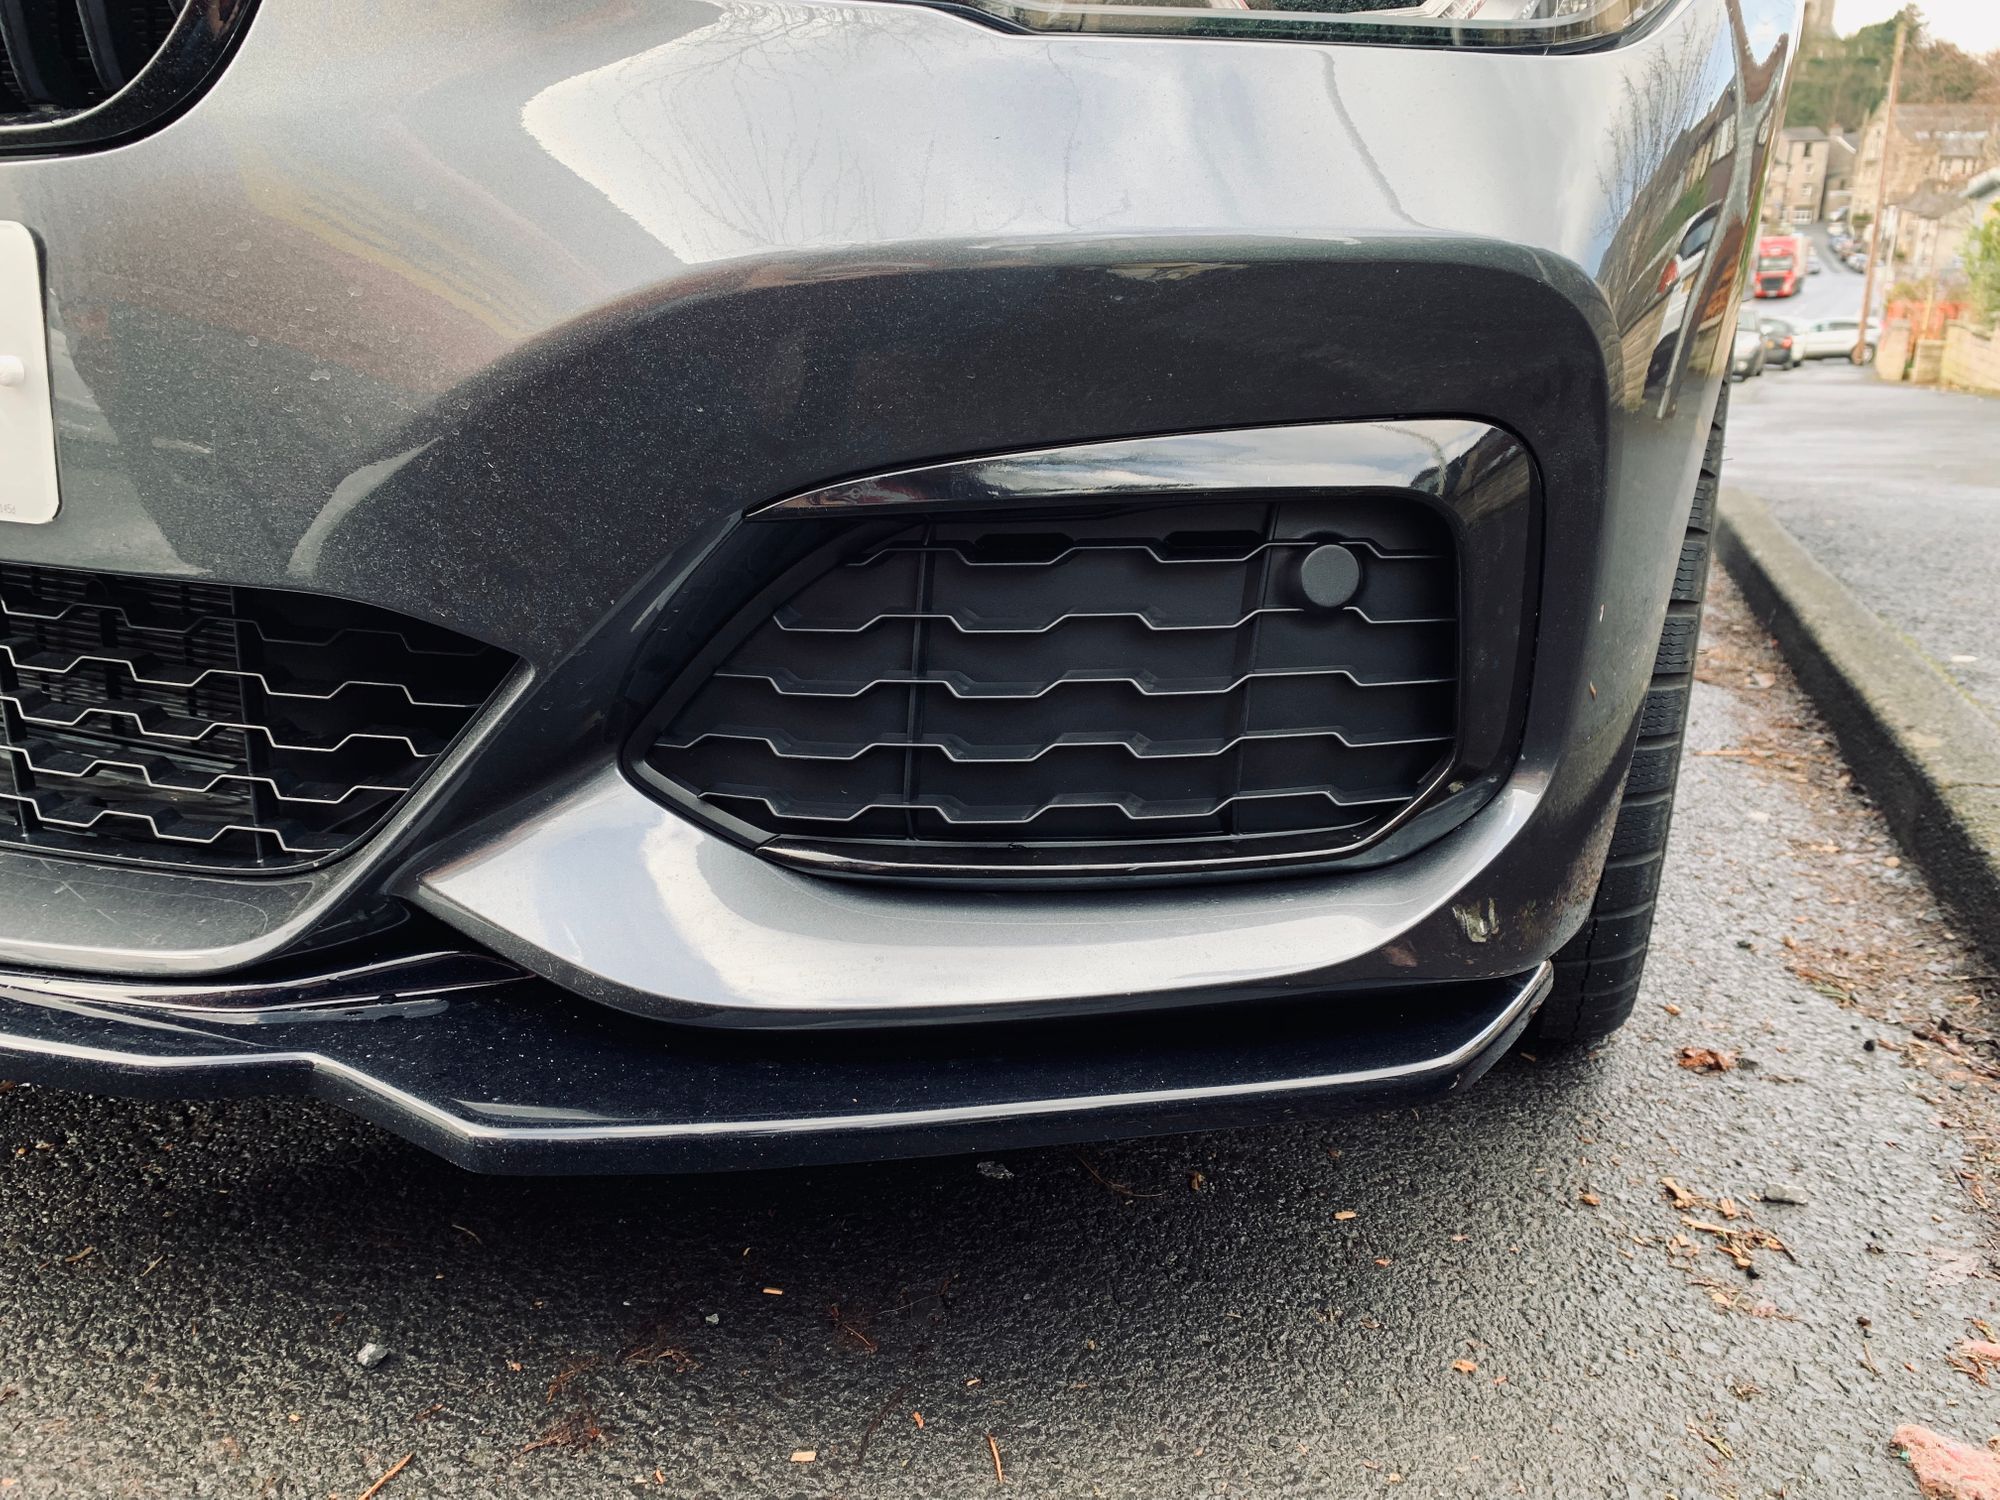
As my luck would have it, on the day I collected the car I was heading home and a car going the other way must have flicked up a small stone, or what sounded like a large meteorite in honesty, that managed to punch right through one of my front grilles. I'm really glad it wasn't the windscreen it punched through but I was still super pissed at the damage! You may have spotted the hole in an earlier photo and it's not too bad, but it is definitely visible. I'm also really lucky there wasn't anything significant behind this particular grille as had it been on the other side, it could have really damaged the oil cooler.
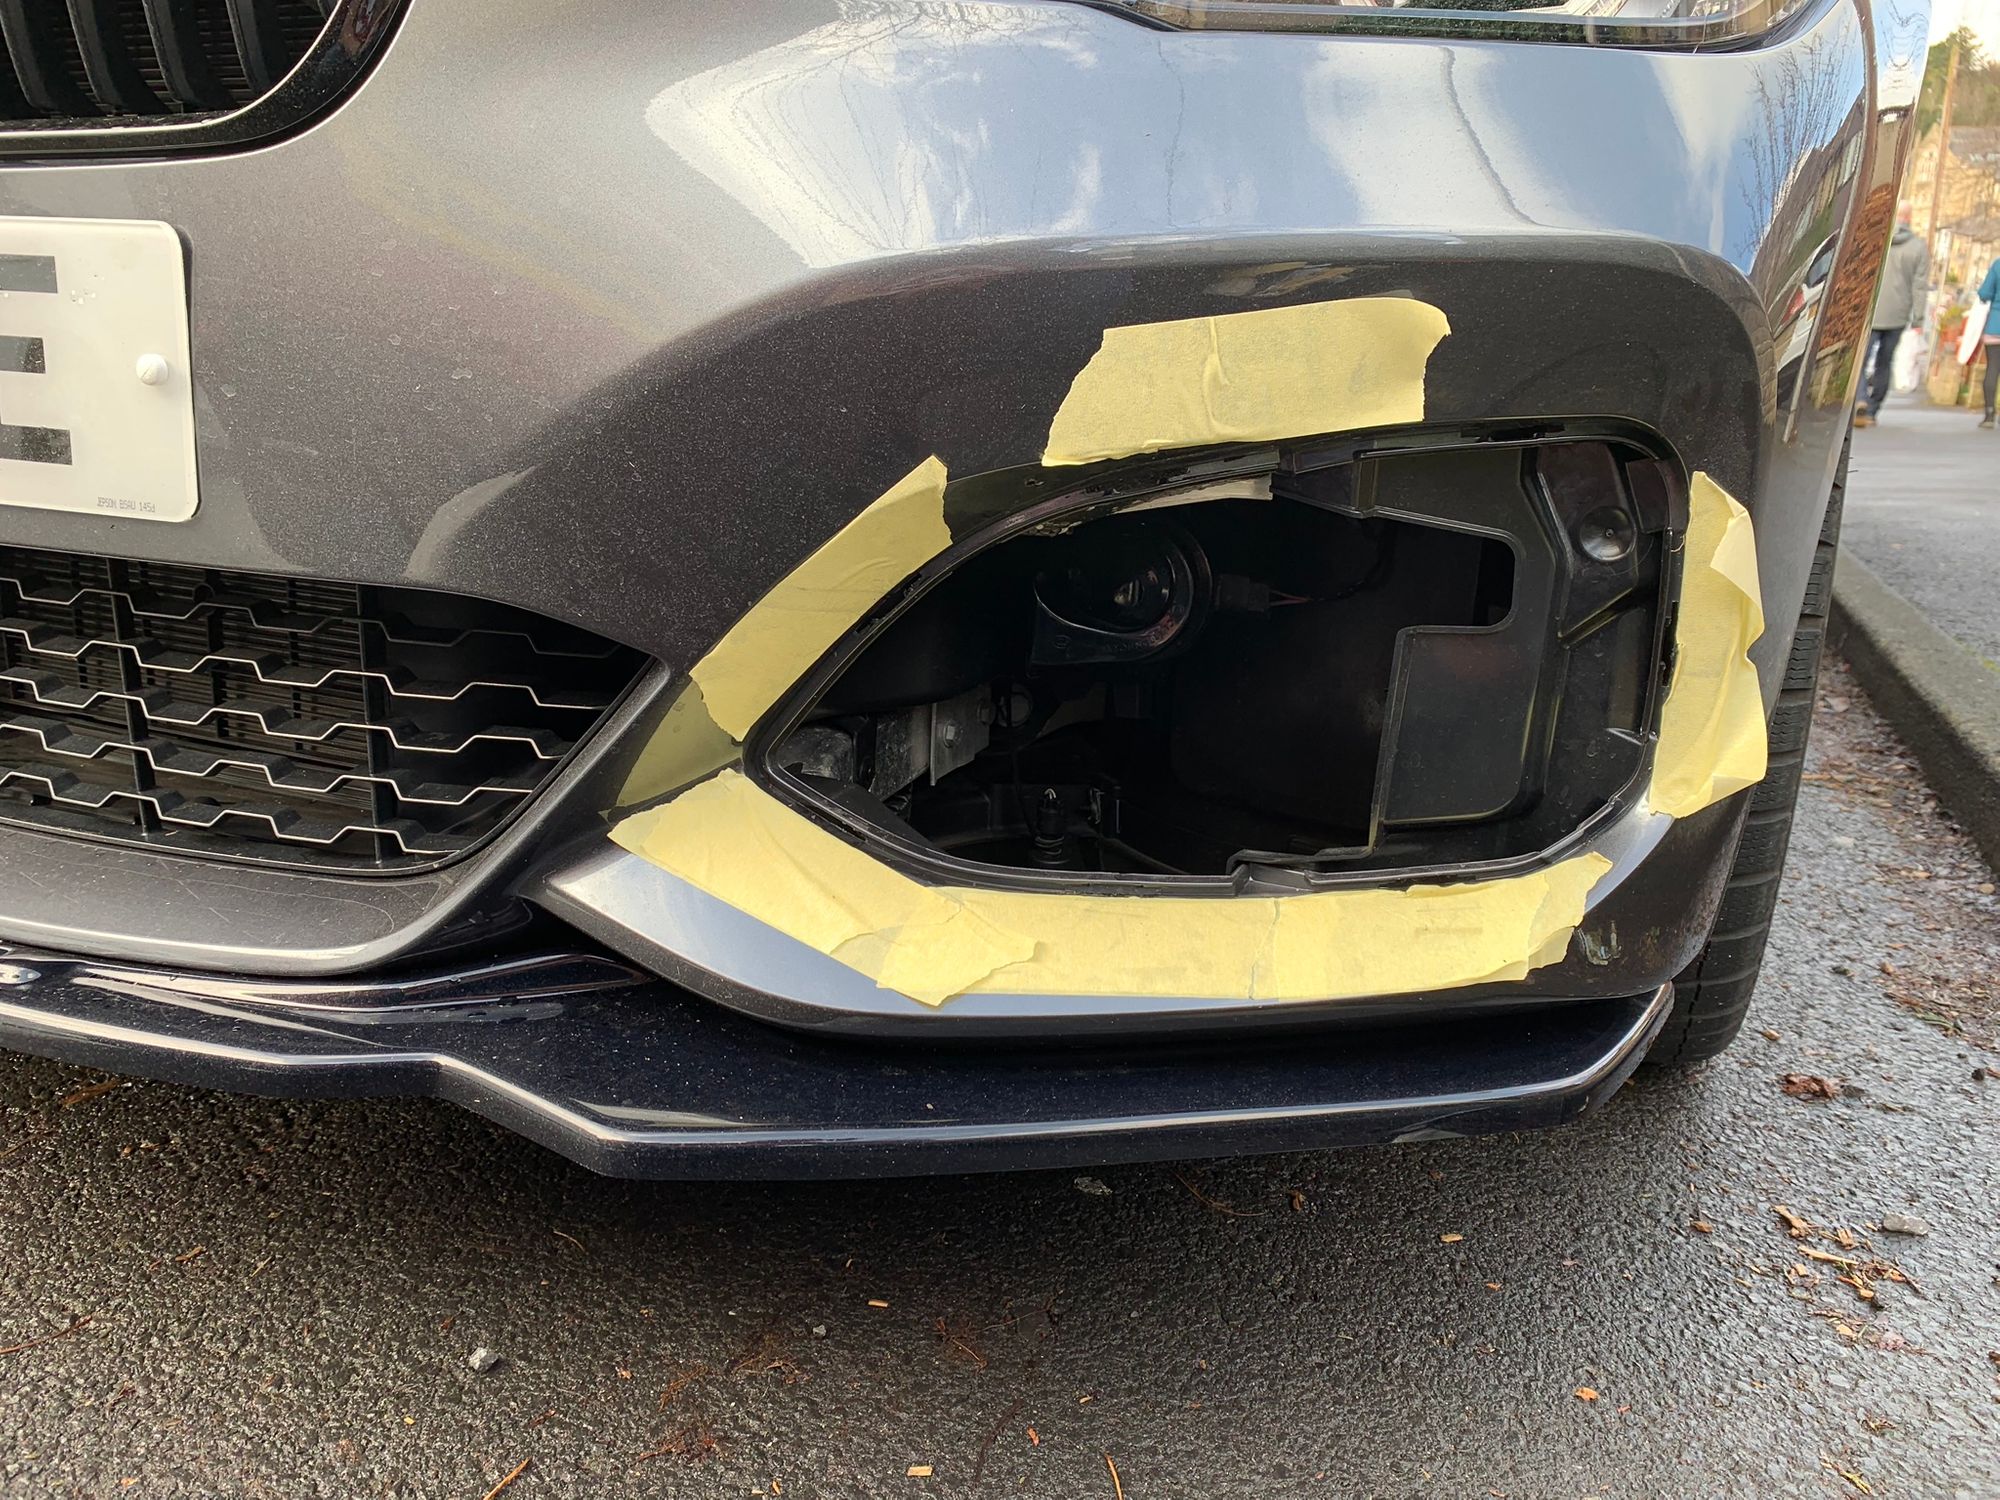
BMW said you needed to take the bumper off to replace it as all of the clips for the part are accessed from the rear side of the bumper and that was going to cost a lot of money in labour just to remove and refit it. I just couldn't get my head around the cost and the time they were quoting (hundreds of pounds) so I decided to buy the new part and look at it to see how it fitted in.
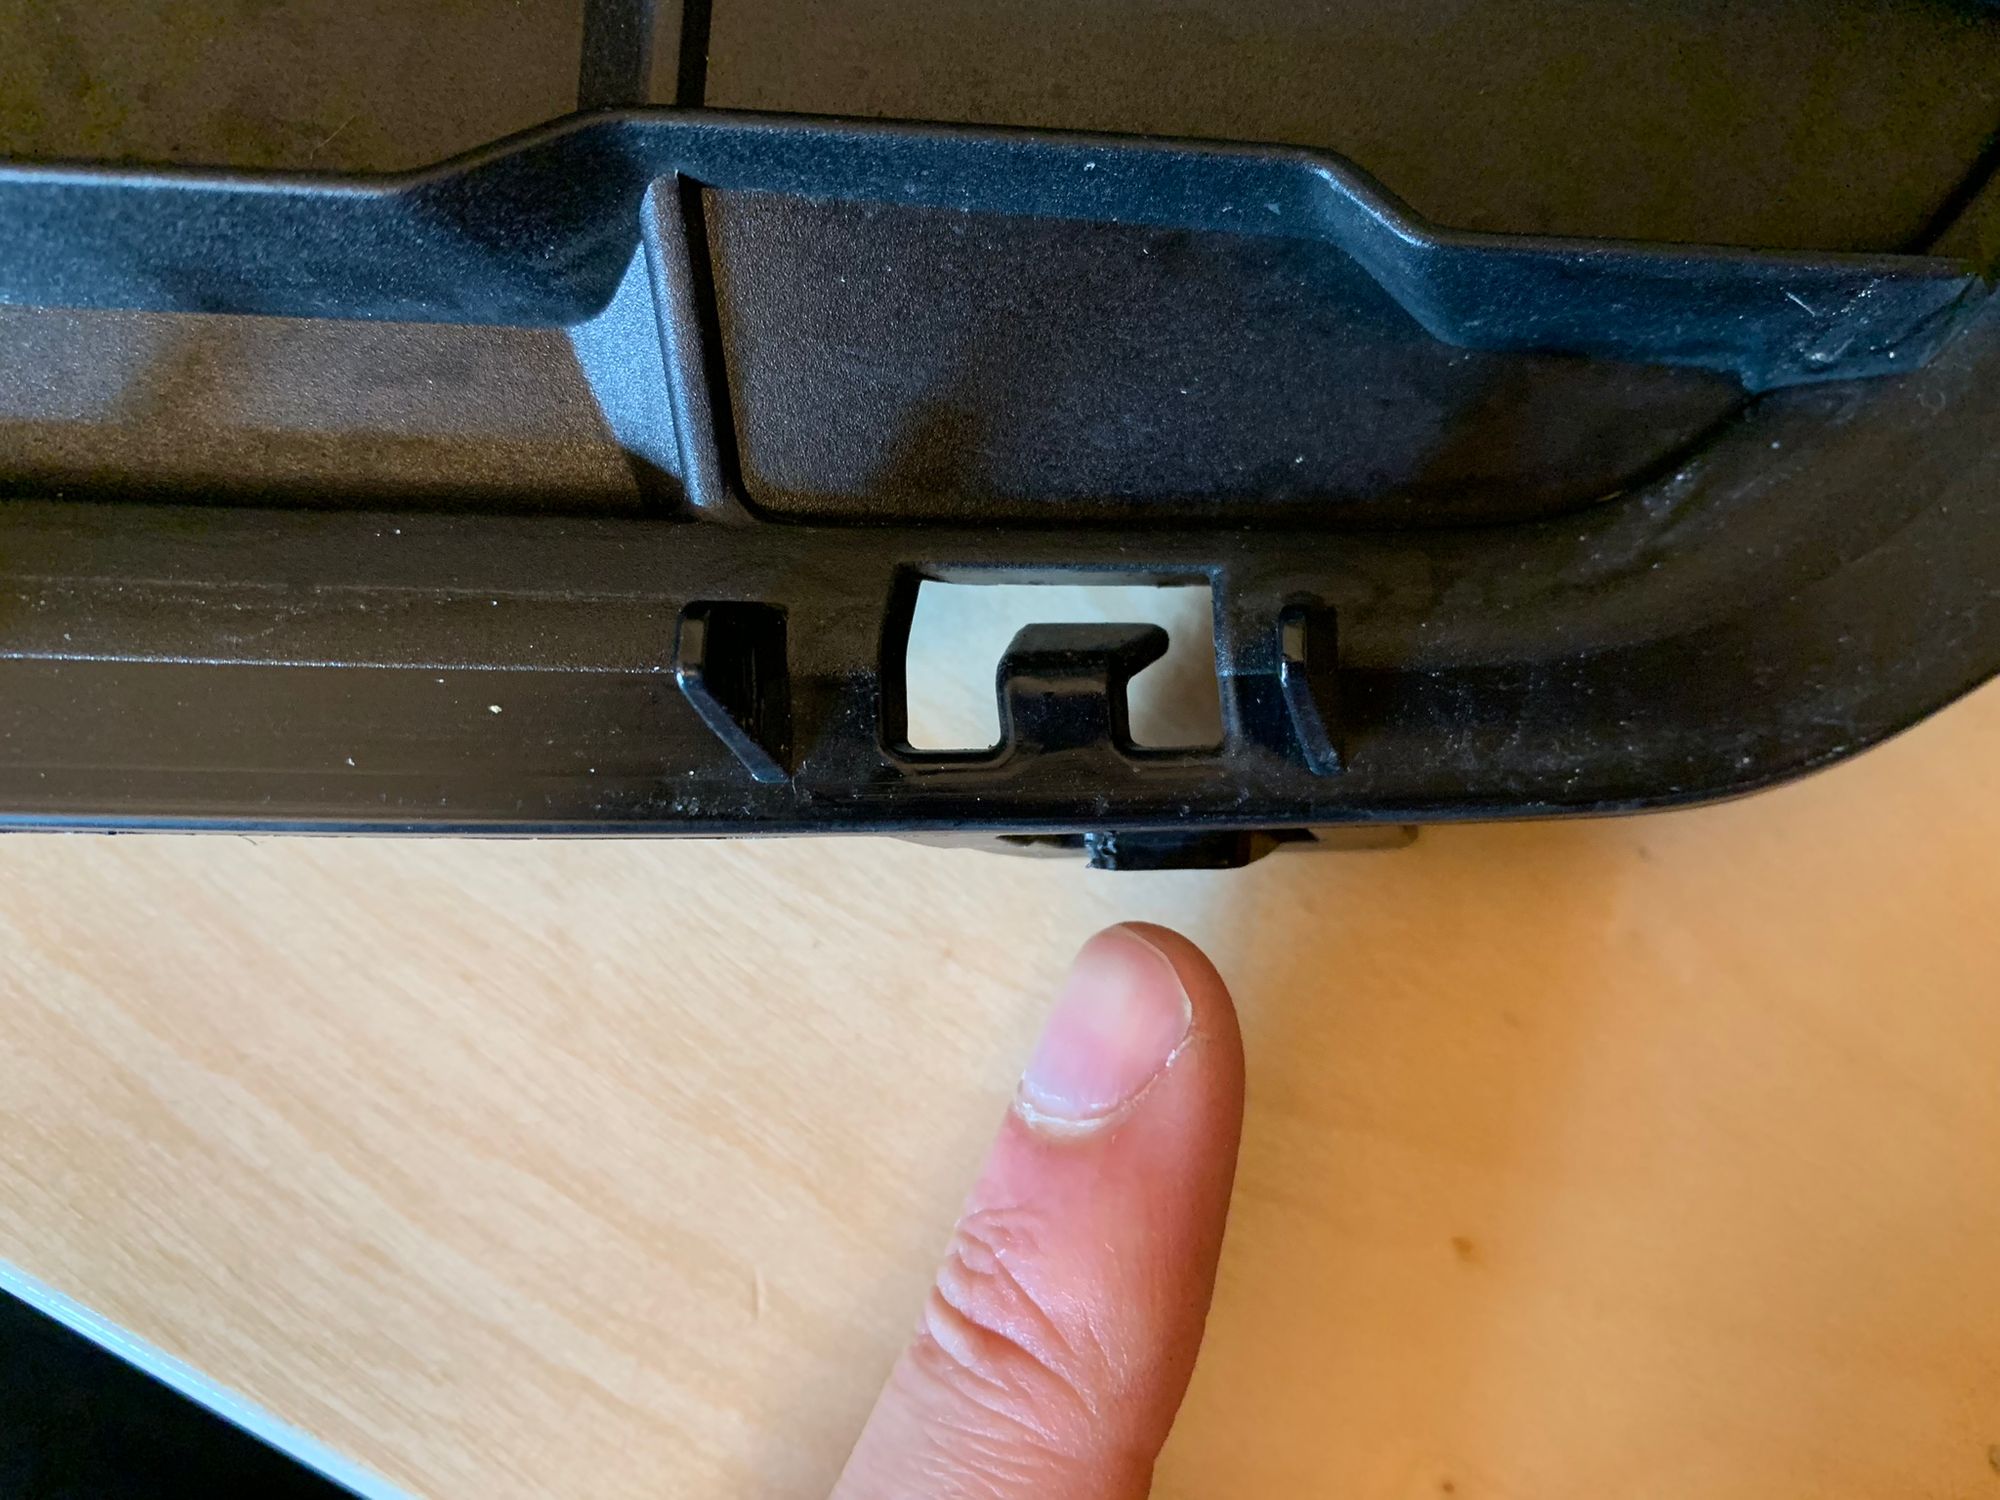
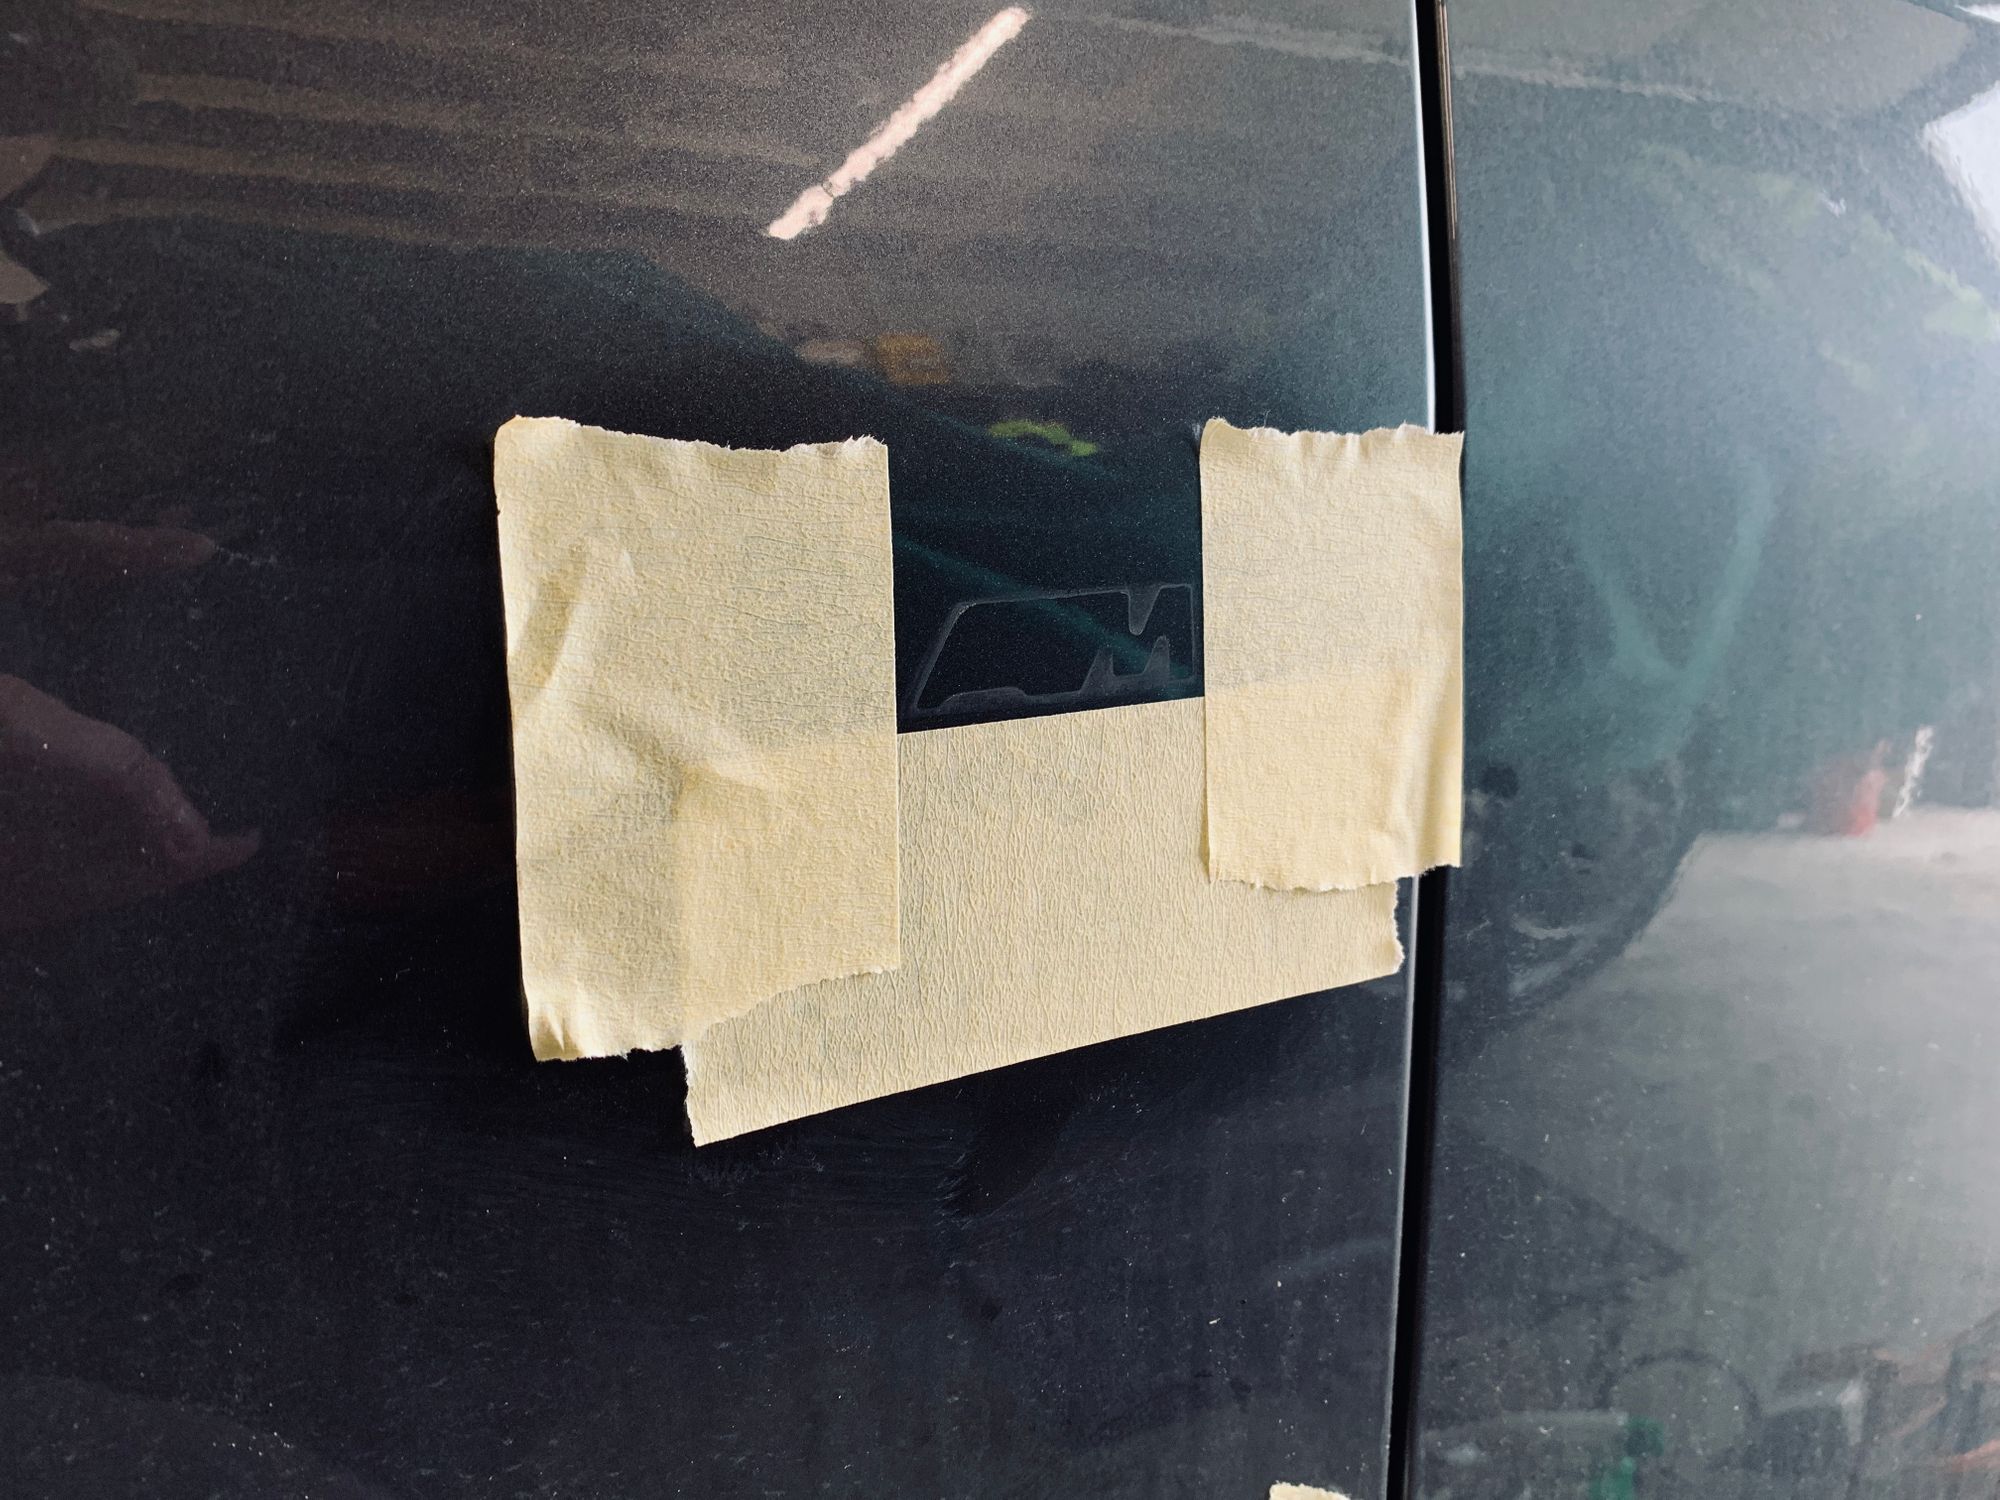
These little clips around the outside simply retract as you push the part into the bumper and then spring back out when in place, holding the part in. It looked to me like I could safely get to those from the front, though I could see how this would be easier from behind (if you overlook having to remove the entire bumper!) so I decided to give it a try. I was going to insert a trim tool down the side of the grille and see if I could pop each one of those little clips out myself. With some tape on the paint around the part to protect it, I got to work.
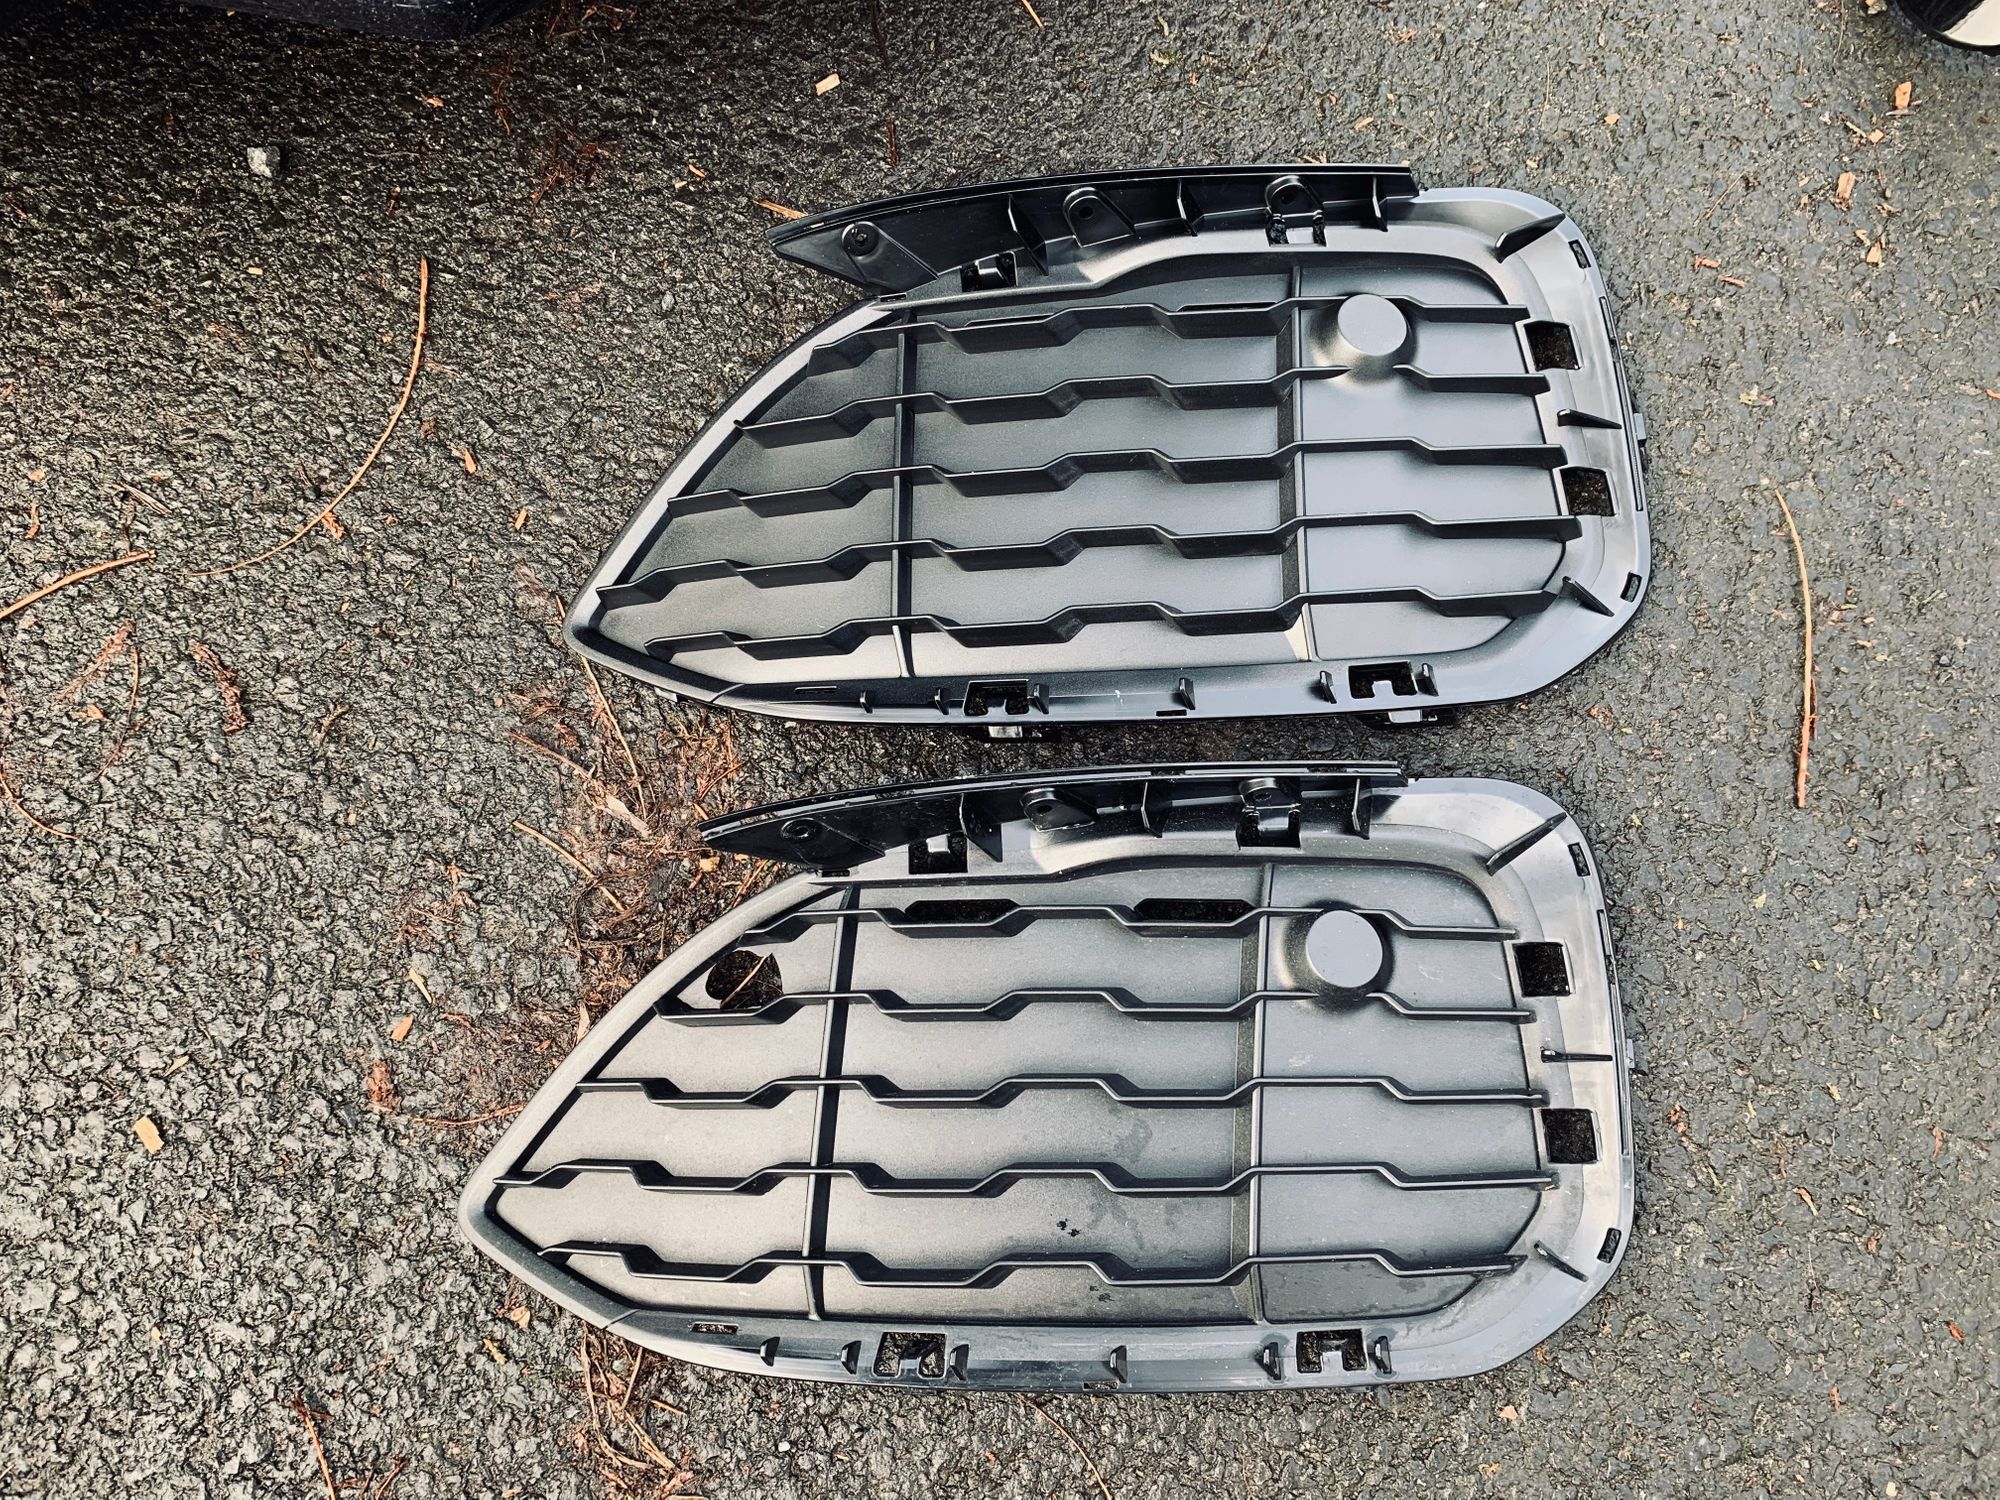
Turns out that it was easy to do this from the front of the bumper and took only a matter of minutes. Above you can see the new part at the top and the original part at the bottom with the hole punched through it by that stray stone. Fitting the new part was simply a case of offering it up and pushing it in until each clip clicked into place.
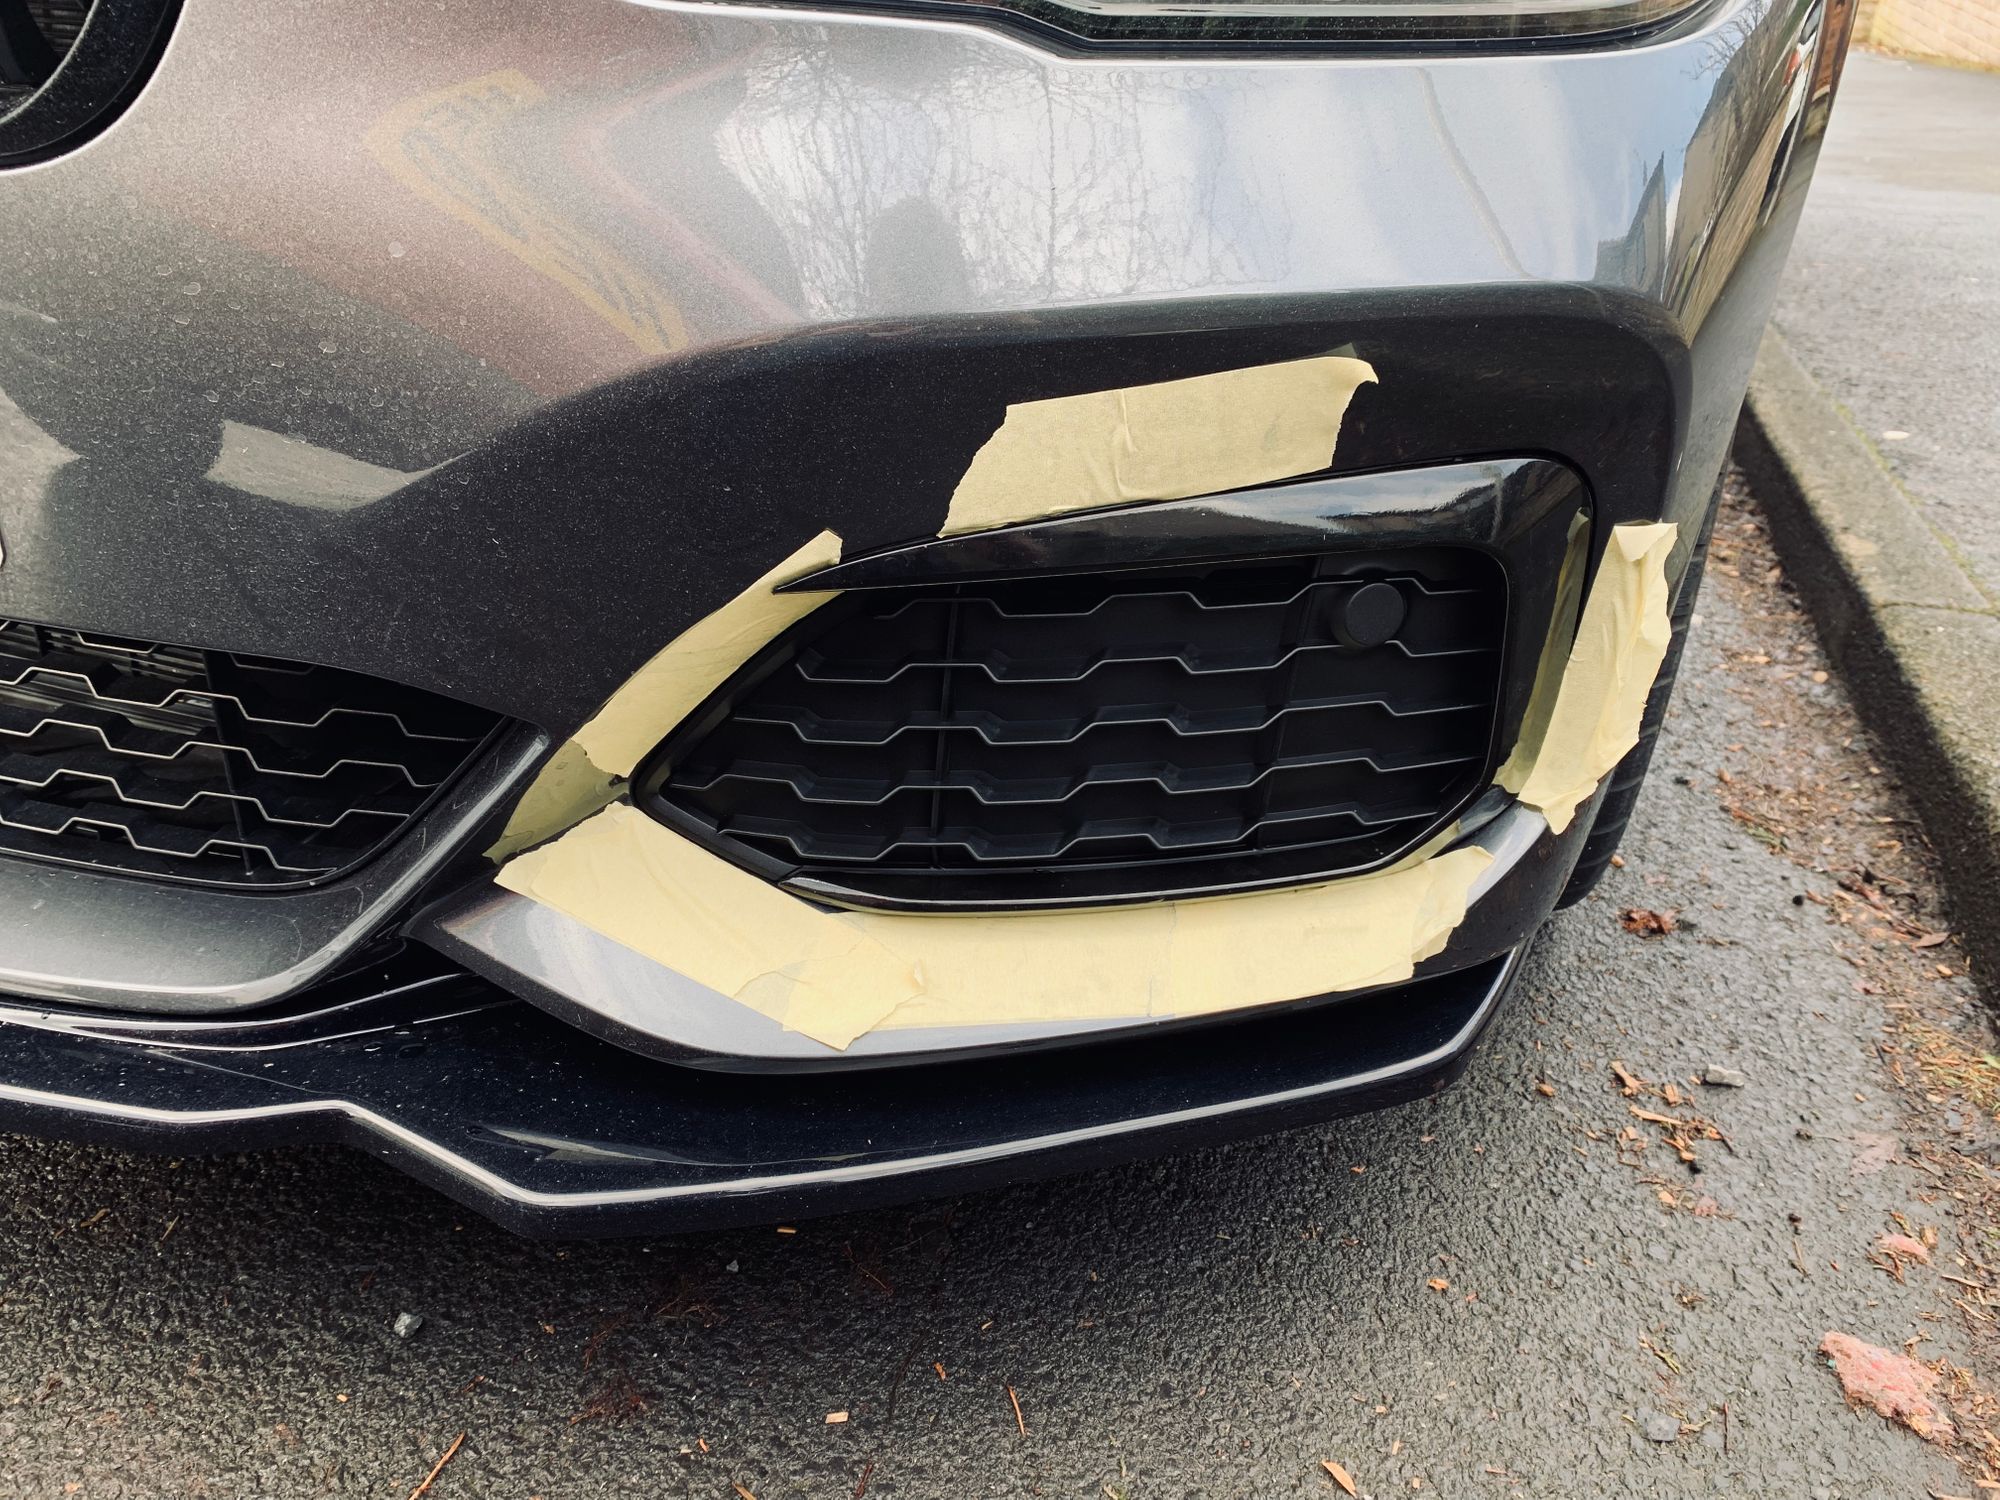
Once I'd removed the tape and cleaned up around the area, the new part looked good and the whole job had taken maybe 15 minutes, required some cheap trim tools and masking tape and the purchase of the replacement part. This was a tiny fraction of what the BMW dealership had quoted and meant I had more money to spend on better things!
De-chroming the headlights
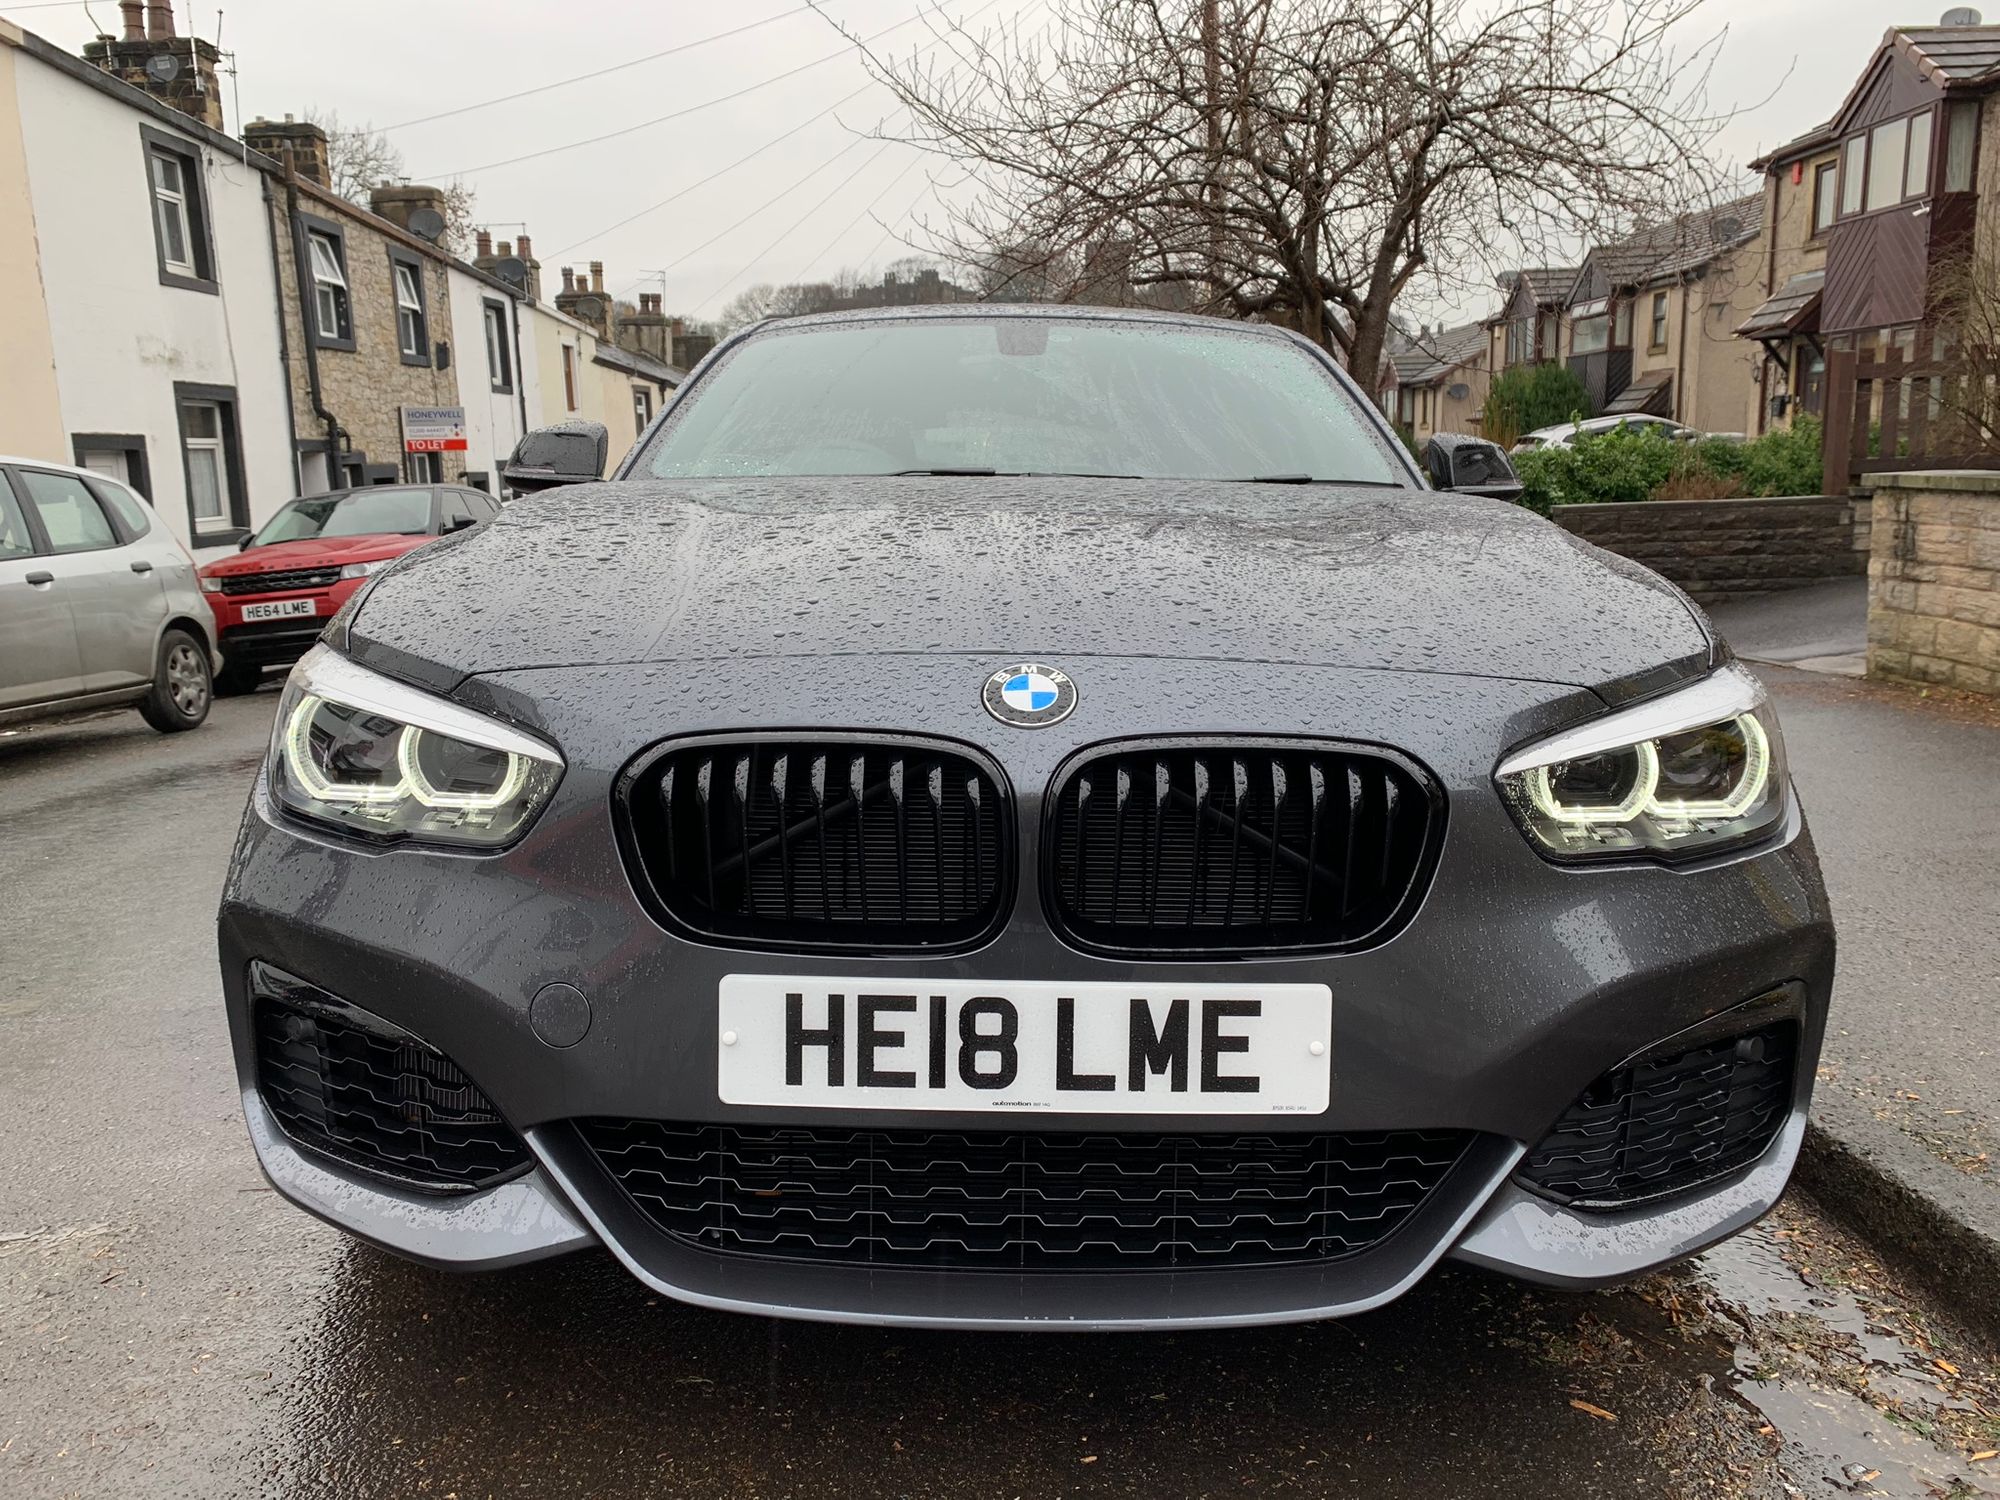
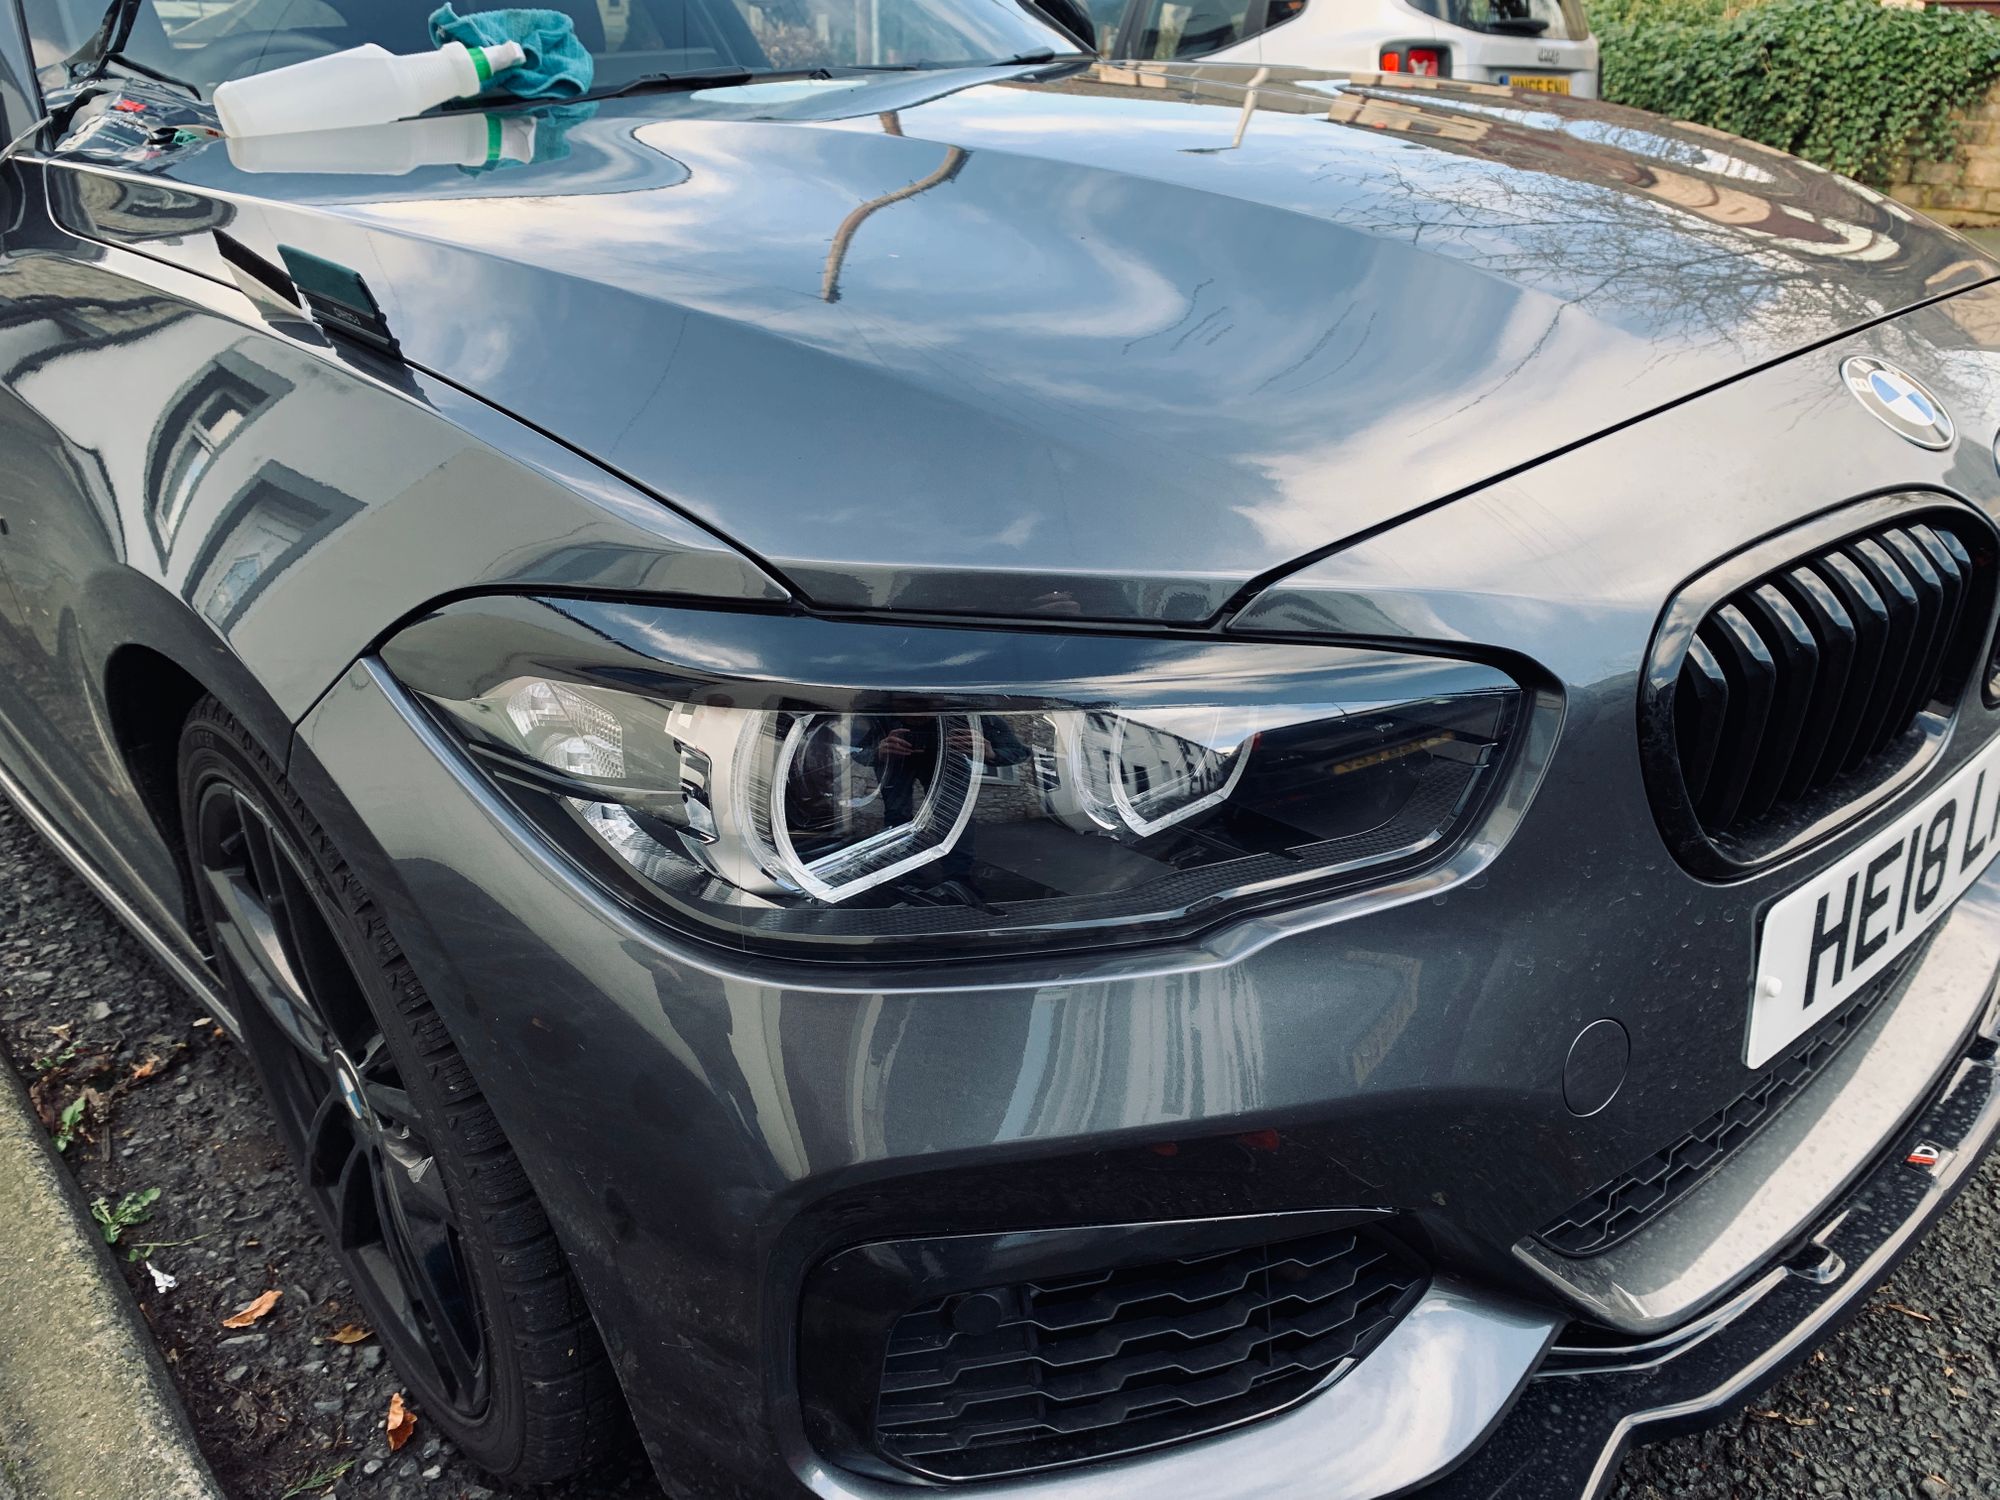
By this stage the front of the car is looking good, I think a lot better than stock, but there's still the big, chrome insert that runs along the top of the headlights. I don't know what it is, and maybe the car being a 'shadow edition' is part of this, but those big silver 'eyebrows' over the top of the headlights just weren't doing it for me. They stand out and they're too shiny, so it's time for them to go.
The problem I had is that the headlights are factory sealed units so there's no easy way to get inside them. That bit of silver/chrome trim is inside the headlight unit and I have the auto-adjusting, laser LED headlights which are not cheap. Each unit is £1,000+ ($1,300+) from BMW... yikes!
As the headlights are sealed units they are obviously assembled and then sealed together and apparently you can bake them in your oven to release the glue and open the units up. I can tell you right now, at £1,000+ each they sure as shit aren't going in my oven! The only option this leaves is to do something on the outside of the light unit as we aren't going to be getting inside. Thinking back to my experience with the black vinyl in Part 1 to wrap the mirrors, I wondered if something similar could be done here too.
My first idea was to stencil the outline using masking tape and then cut the vinyl to shape before applying but, that did not work well at all.
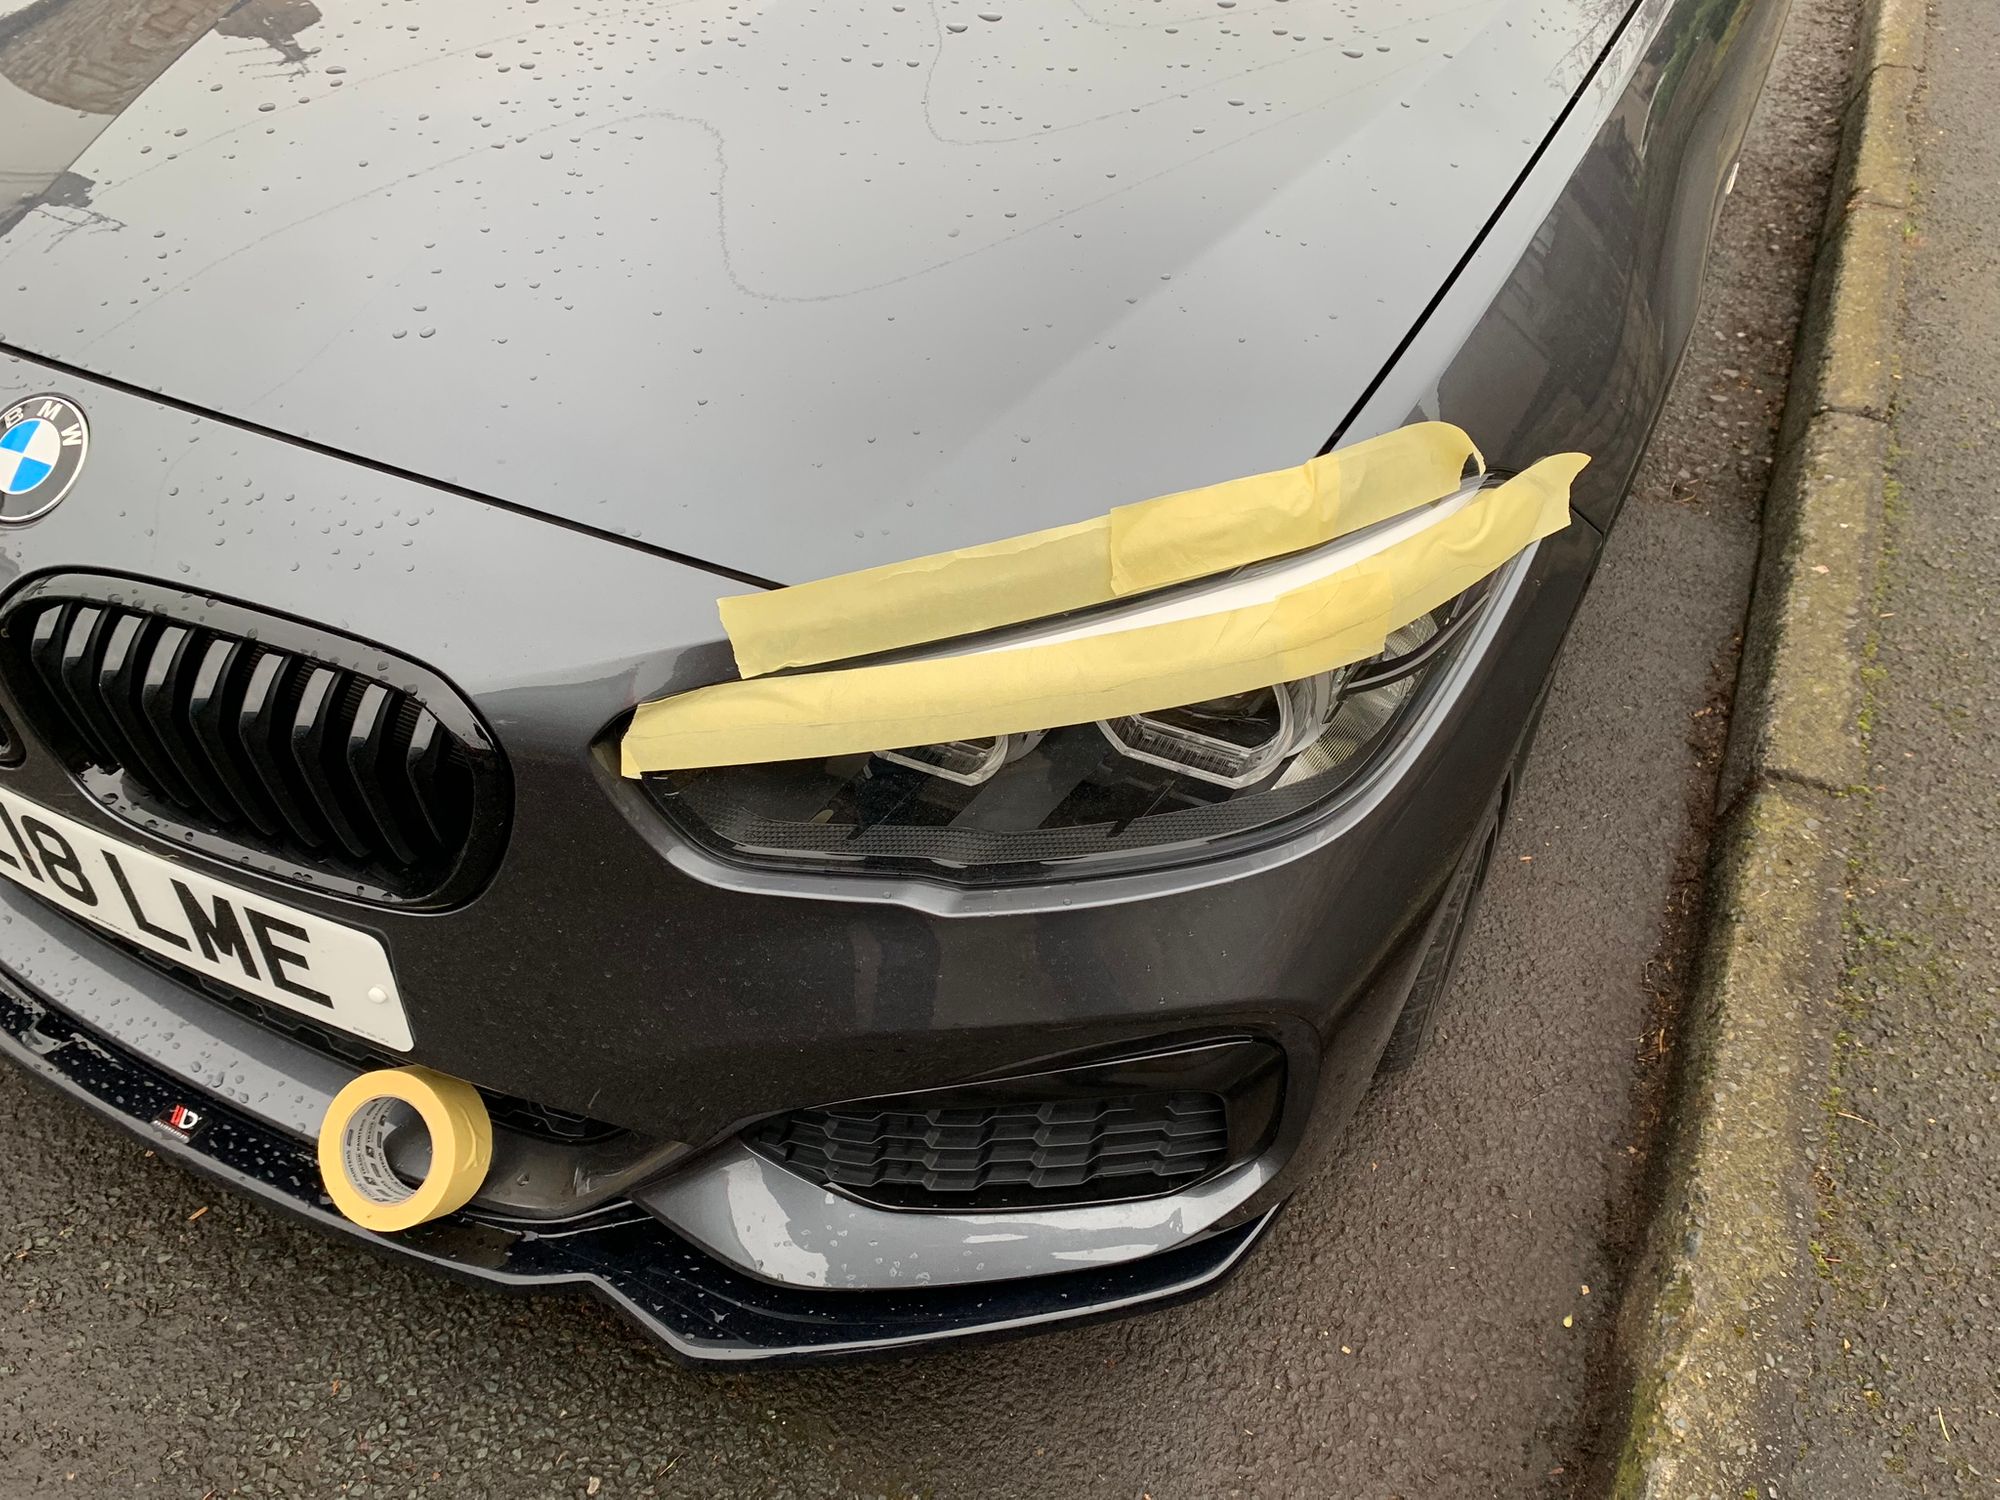
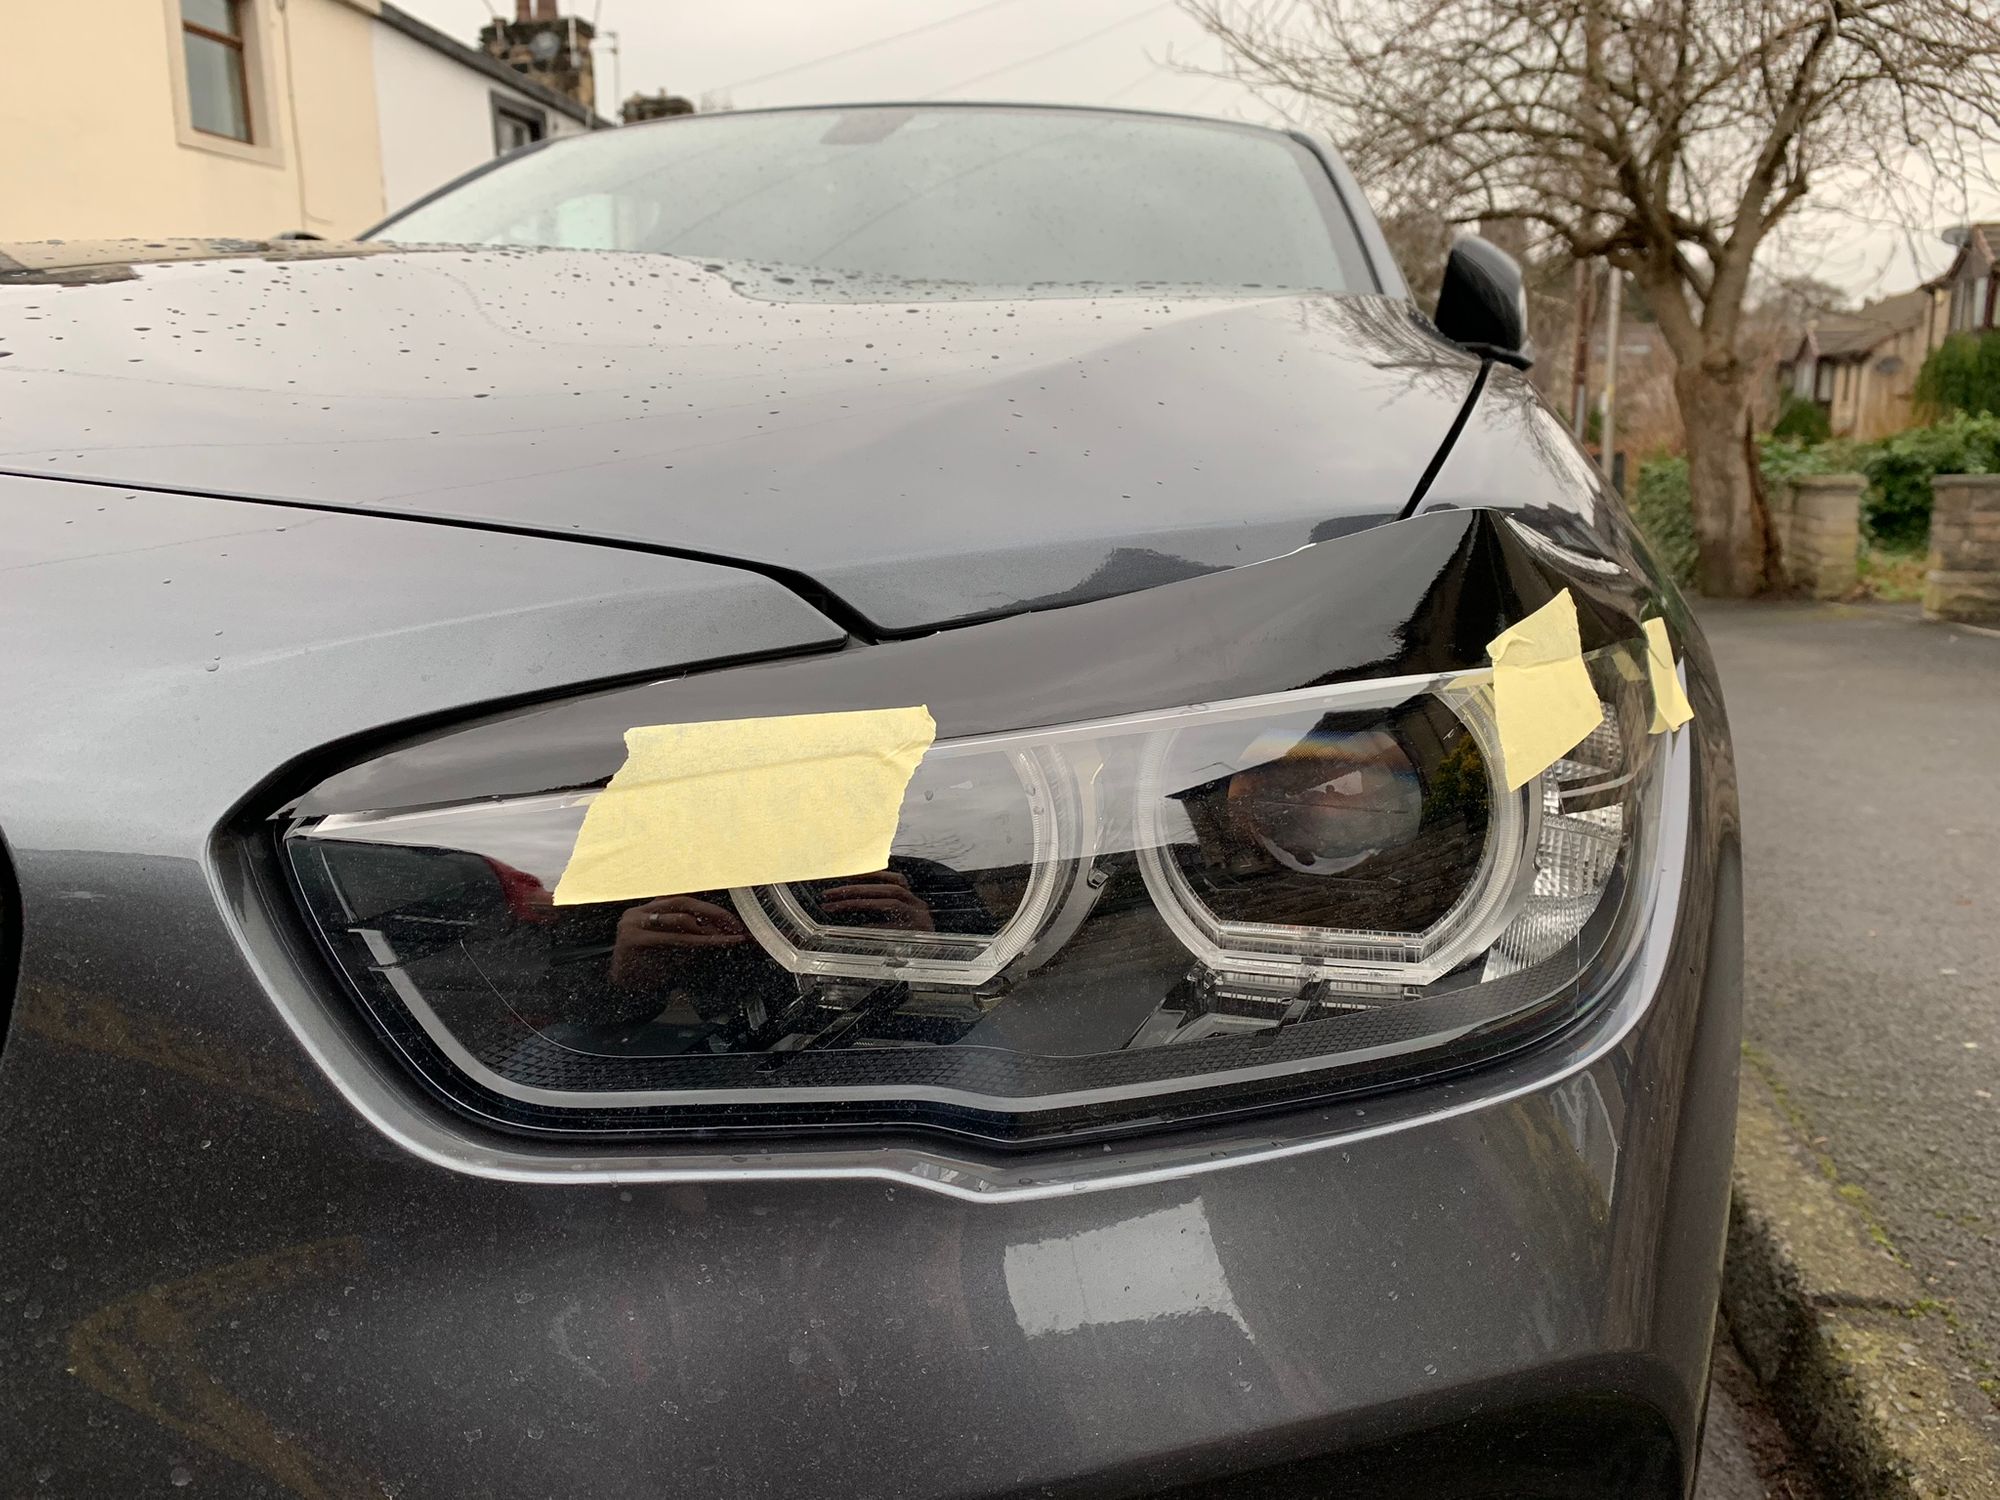
It was impossible given how curved the surface was, both as it wraps around the side of the car and up to the bonnet, to get a piece to fit and it was obvious that a lot of heating and stretching was going to be required. I still had to figure out how to get that clean edge across the front of the headlight though and the idea of running a scalpel along the edge to cut the vinyl was daunting to say the least.
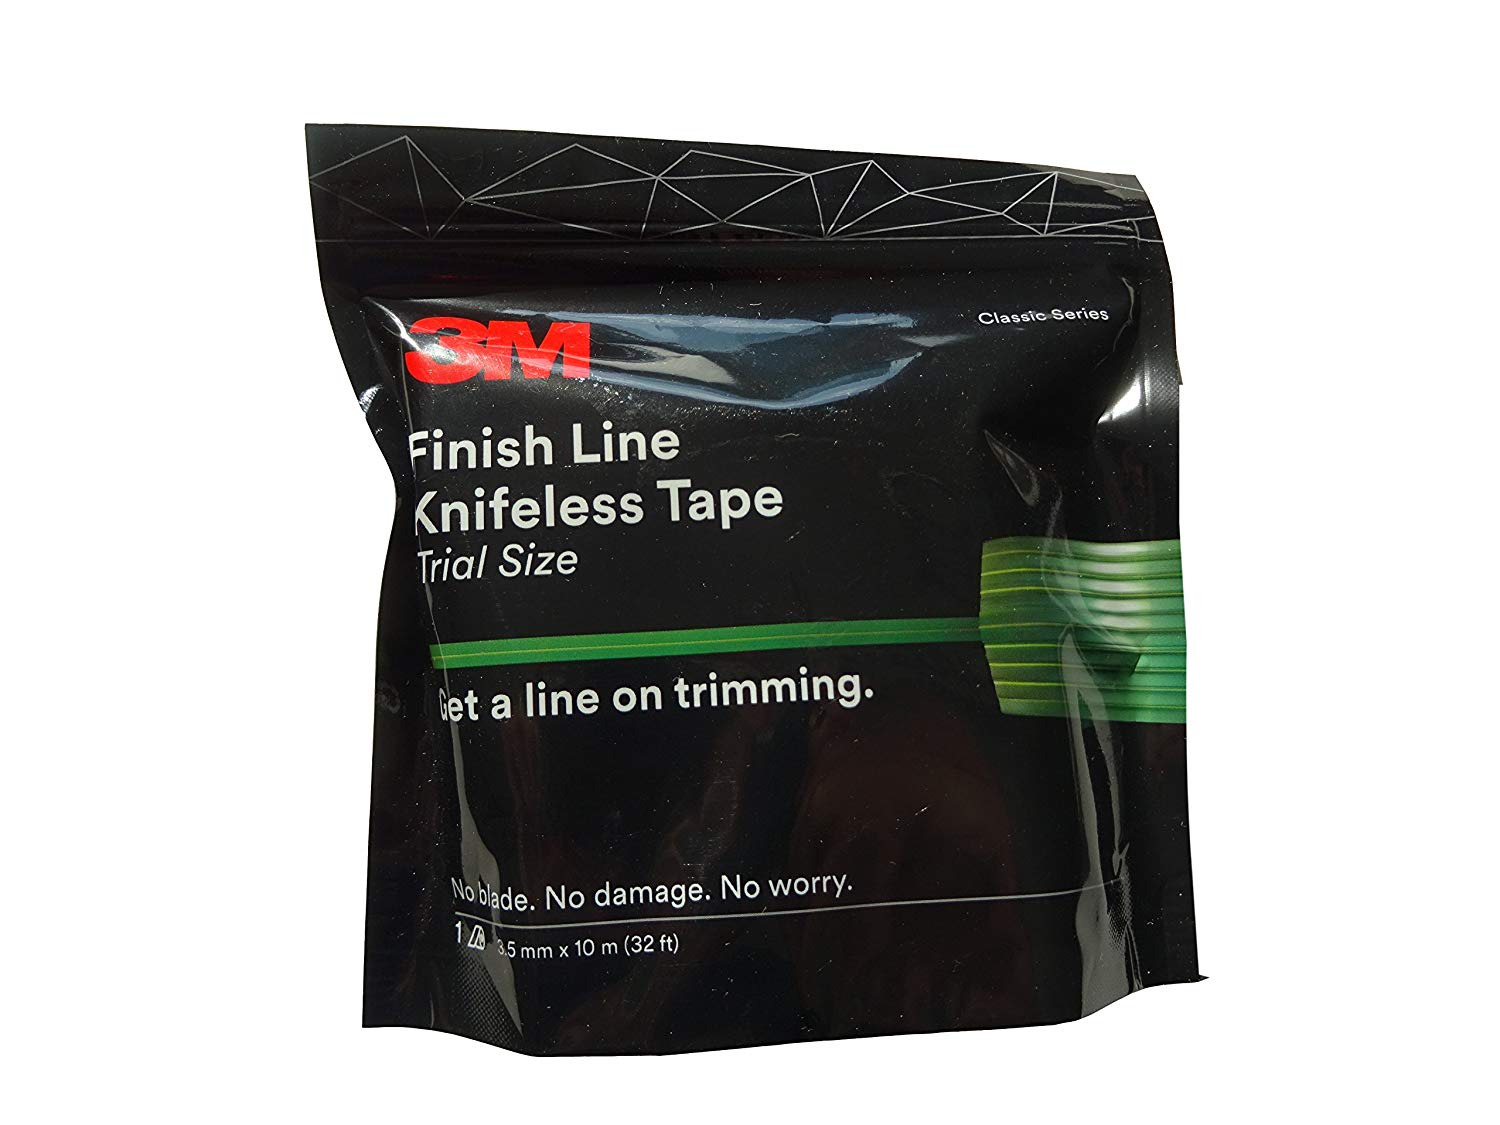
After some research I came across a safe way to do this with something called knifeless tape, and the 'knifeless' part was really attractive here! You lay down a thin line of this tape and put the vinyl over the top as if the tape wasn't there, you just stretch the vinly and fit it as usual. There's then a really thin wire inside the tape that you pull back through the vinyl to cut it, leaving a nice clean cut along where the tape was laid down. This process does not require that I run a scalpel along my headlights to cut the vinyl so yeah, this was an absolute winner! Here's the tape which is cheap enough for a short roll.
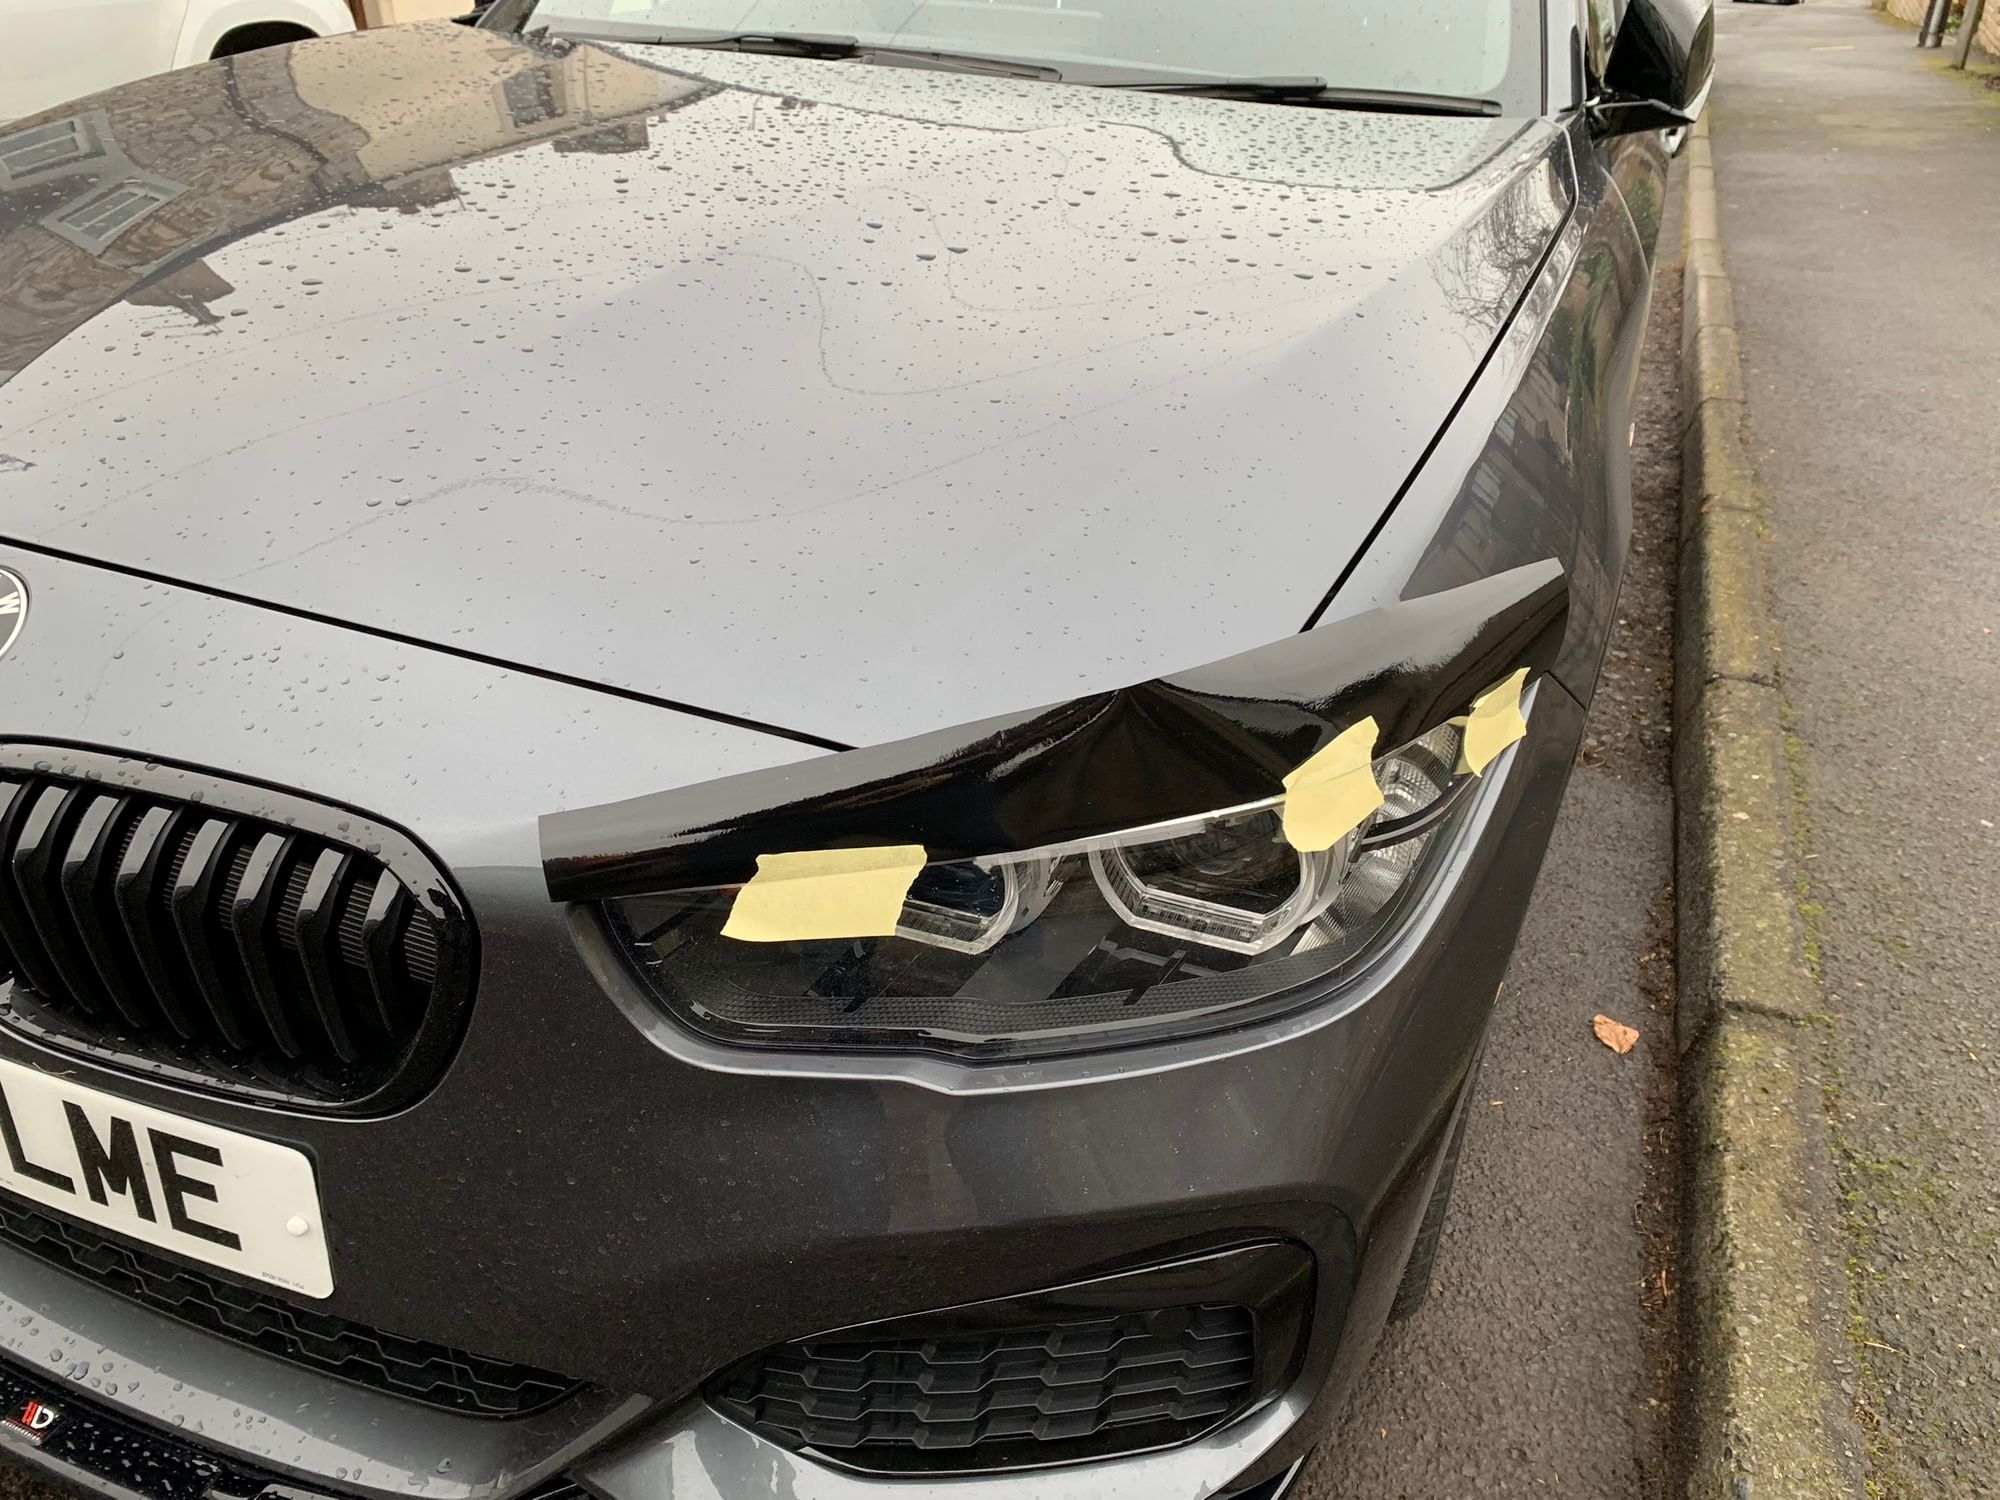
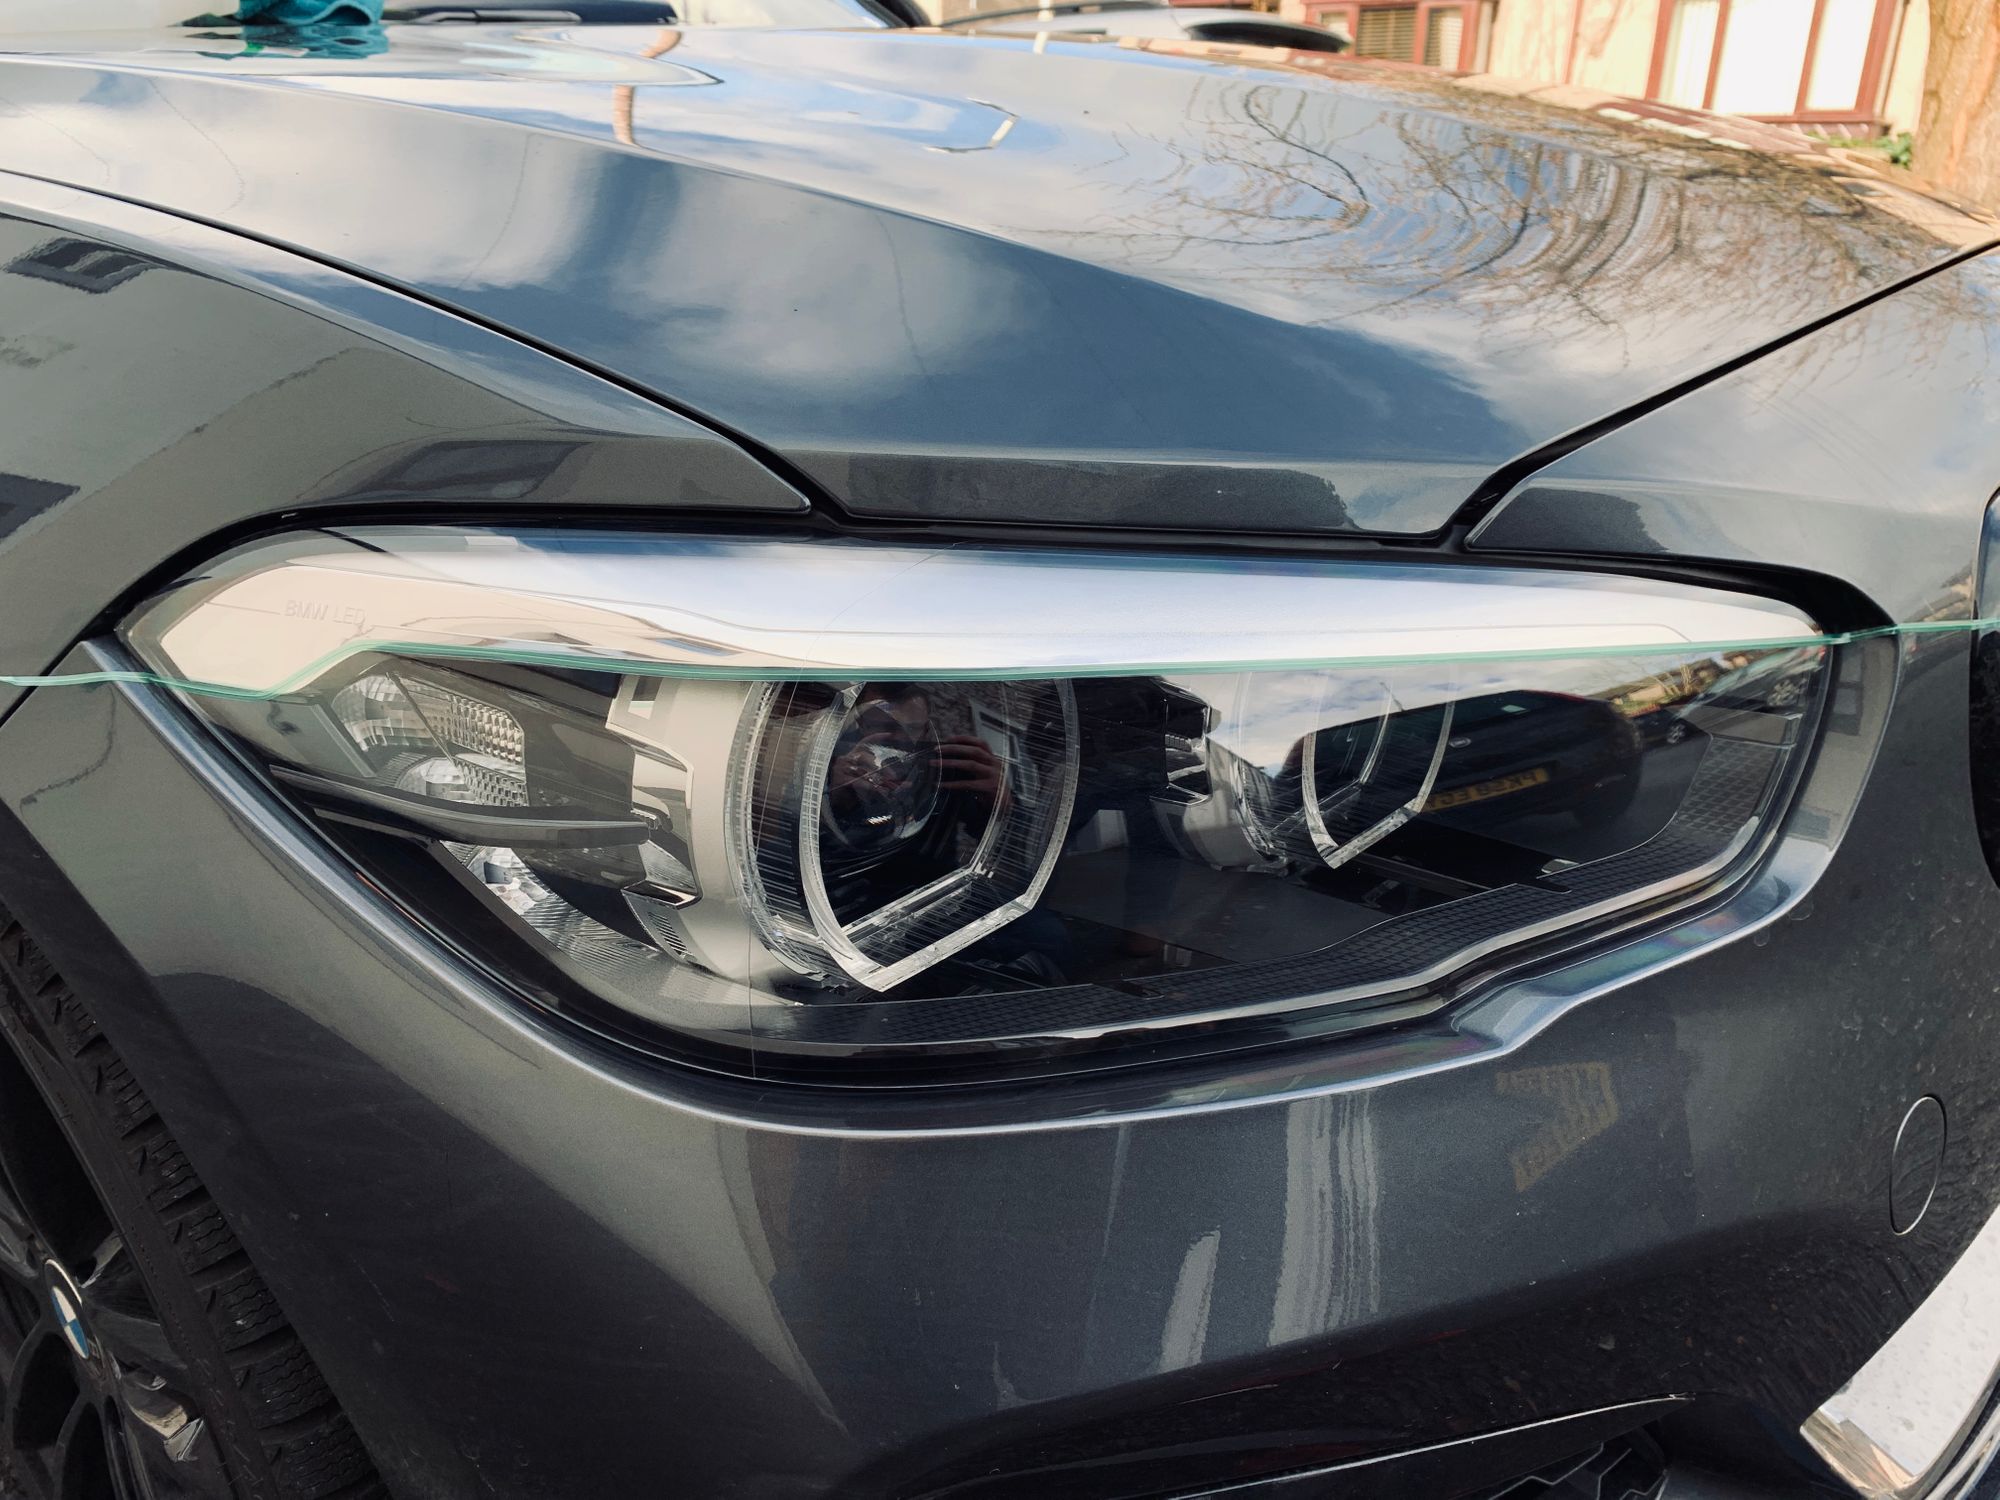
I laid the tape along the headlight following the chrome trim. It took me a couple of attempts to get this right but if you go slowly you can lift the tape back a short section to correct minor deviations. There's also a bit of trick to getting it to flow around corners smoothly like on the left side of the headlight here, but with a little work I managed to trace out the cut I wanted to make.
After this you just lay the vinyl over the top, stretch it and heat it where needed until it looks good.
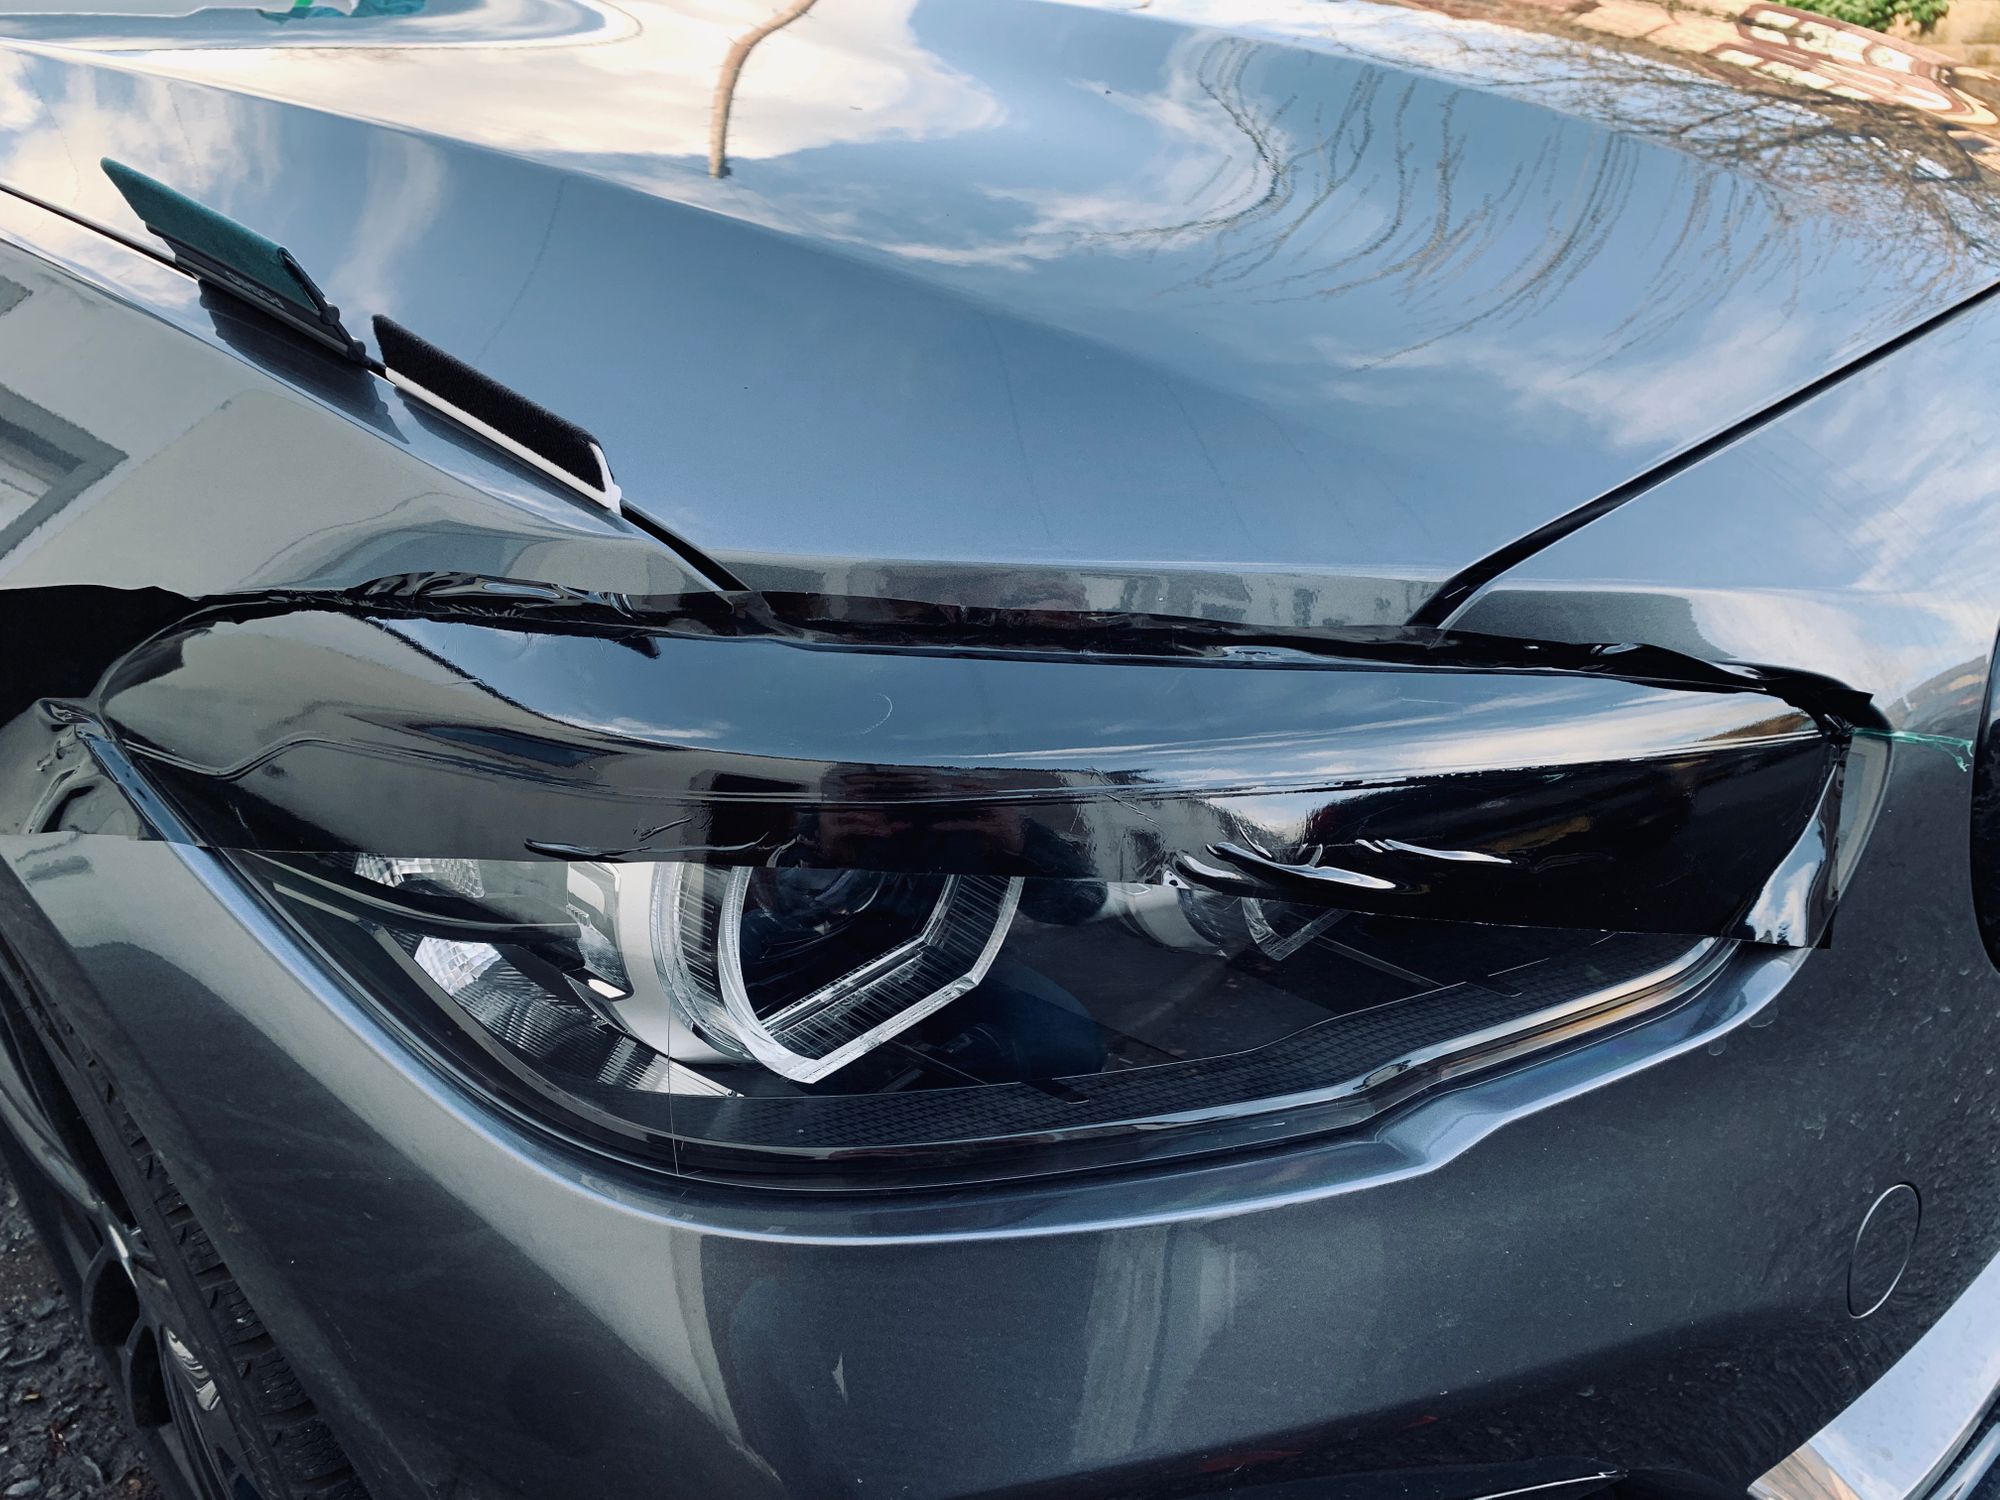
Once you're ready you just pull that thin wire that's embedded in the green tape back through the black vinyl and bam, a perfectly clean cut. Trimming around the outside was done as normal with a scalpel and then you just tuck the edges back so you can't see them. Here's the finished product.
Here's a shot with one covered and one standard to see the change between them. I think this highlights just how prominent that bit of chrome was and I much prefer the look with them covered up.
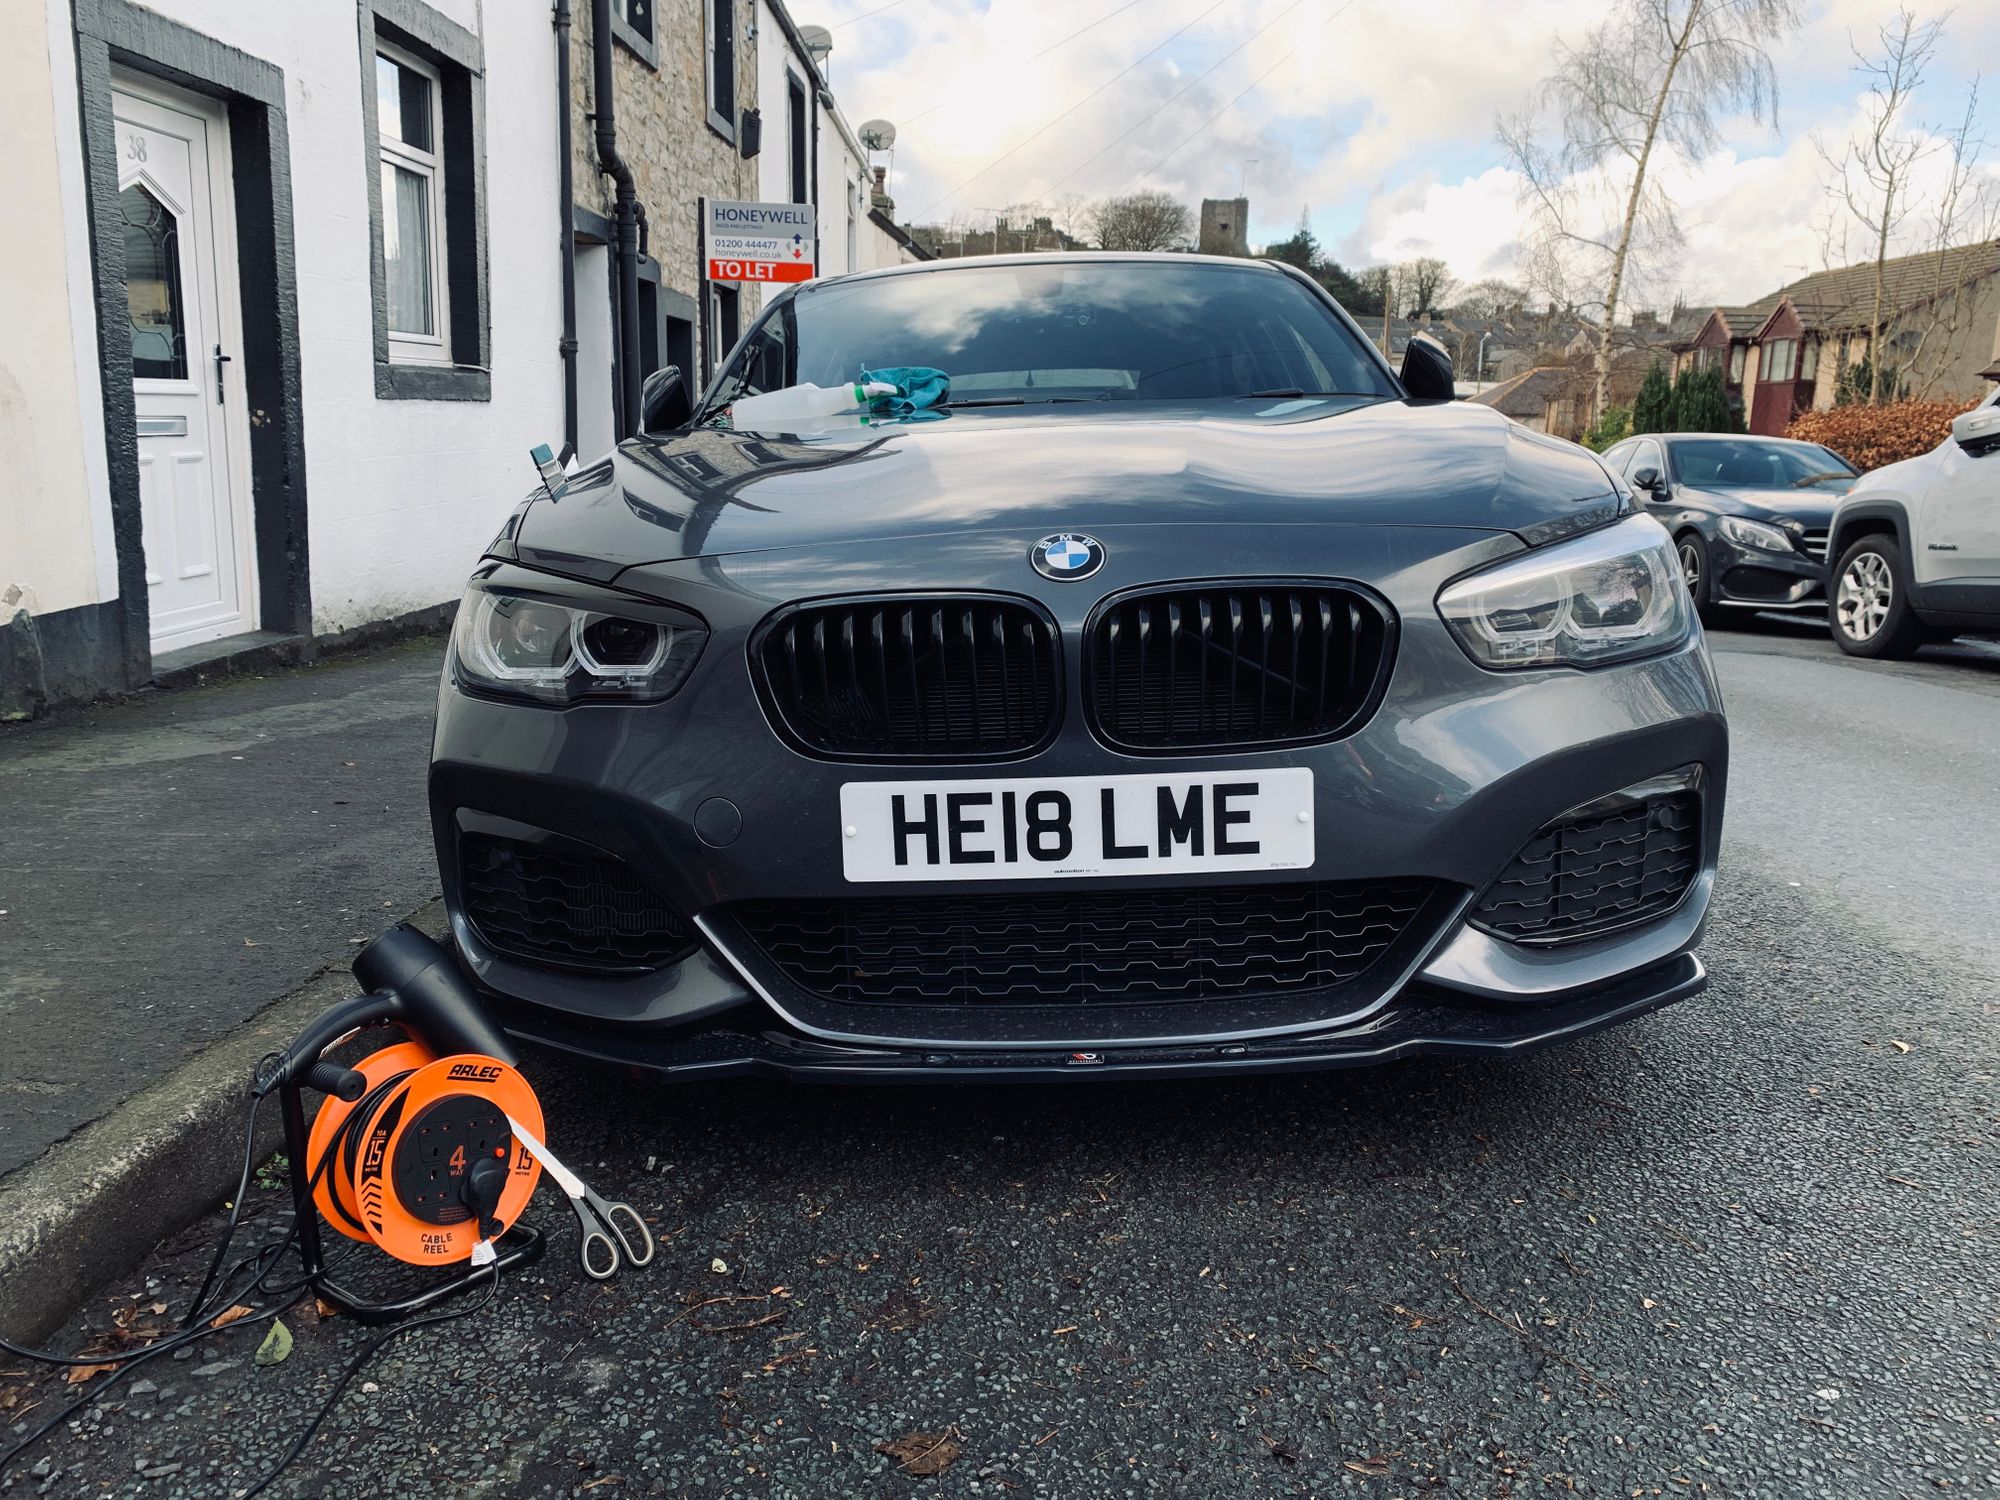
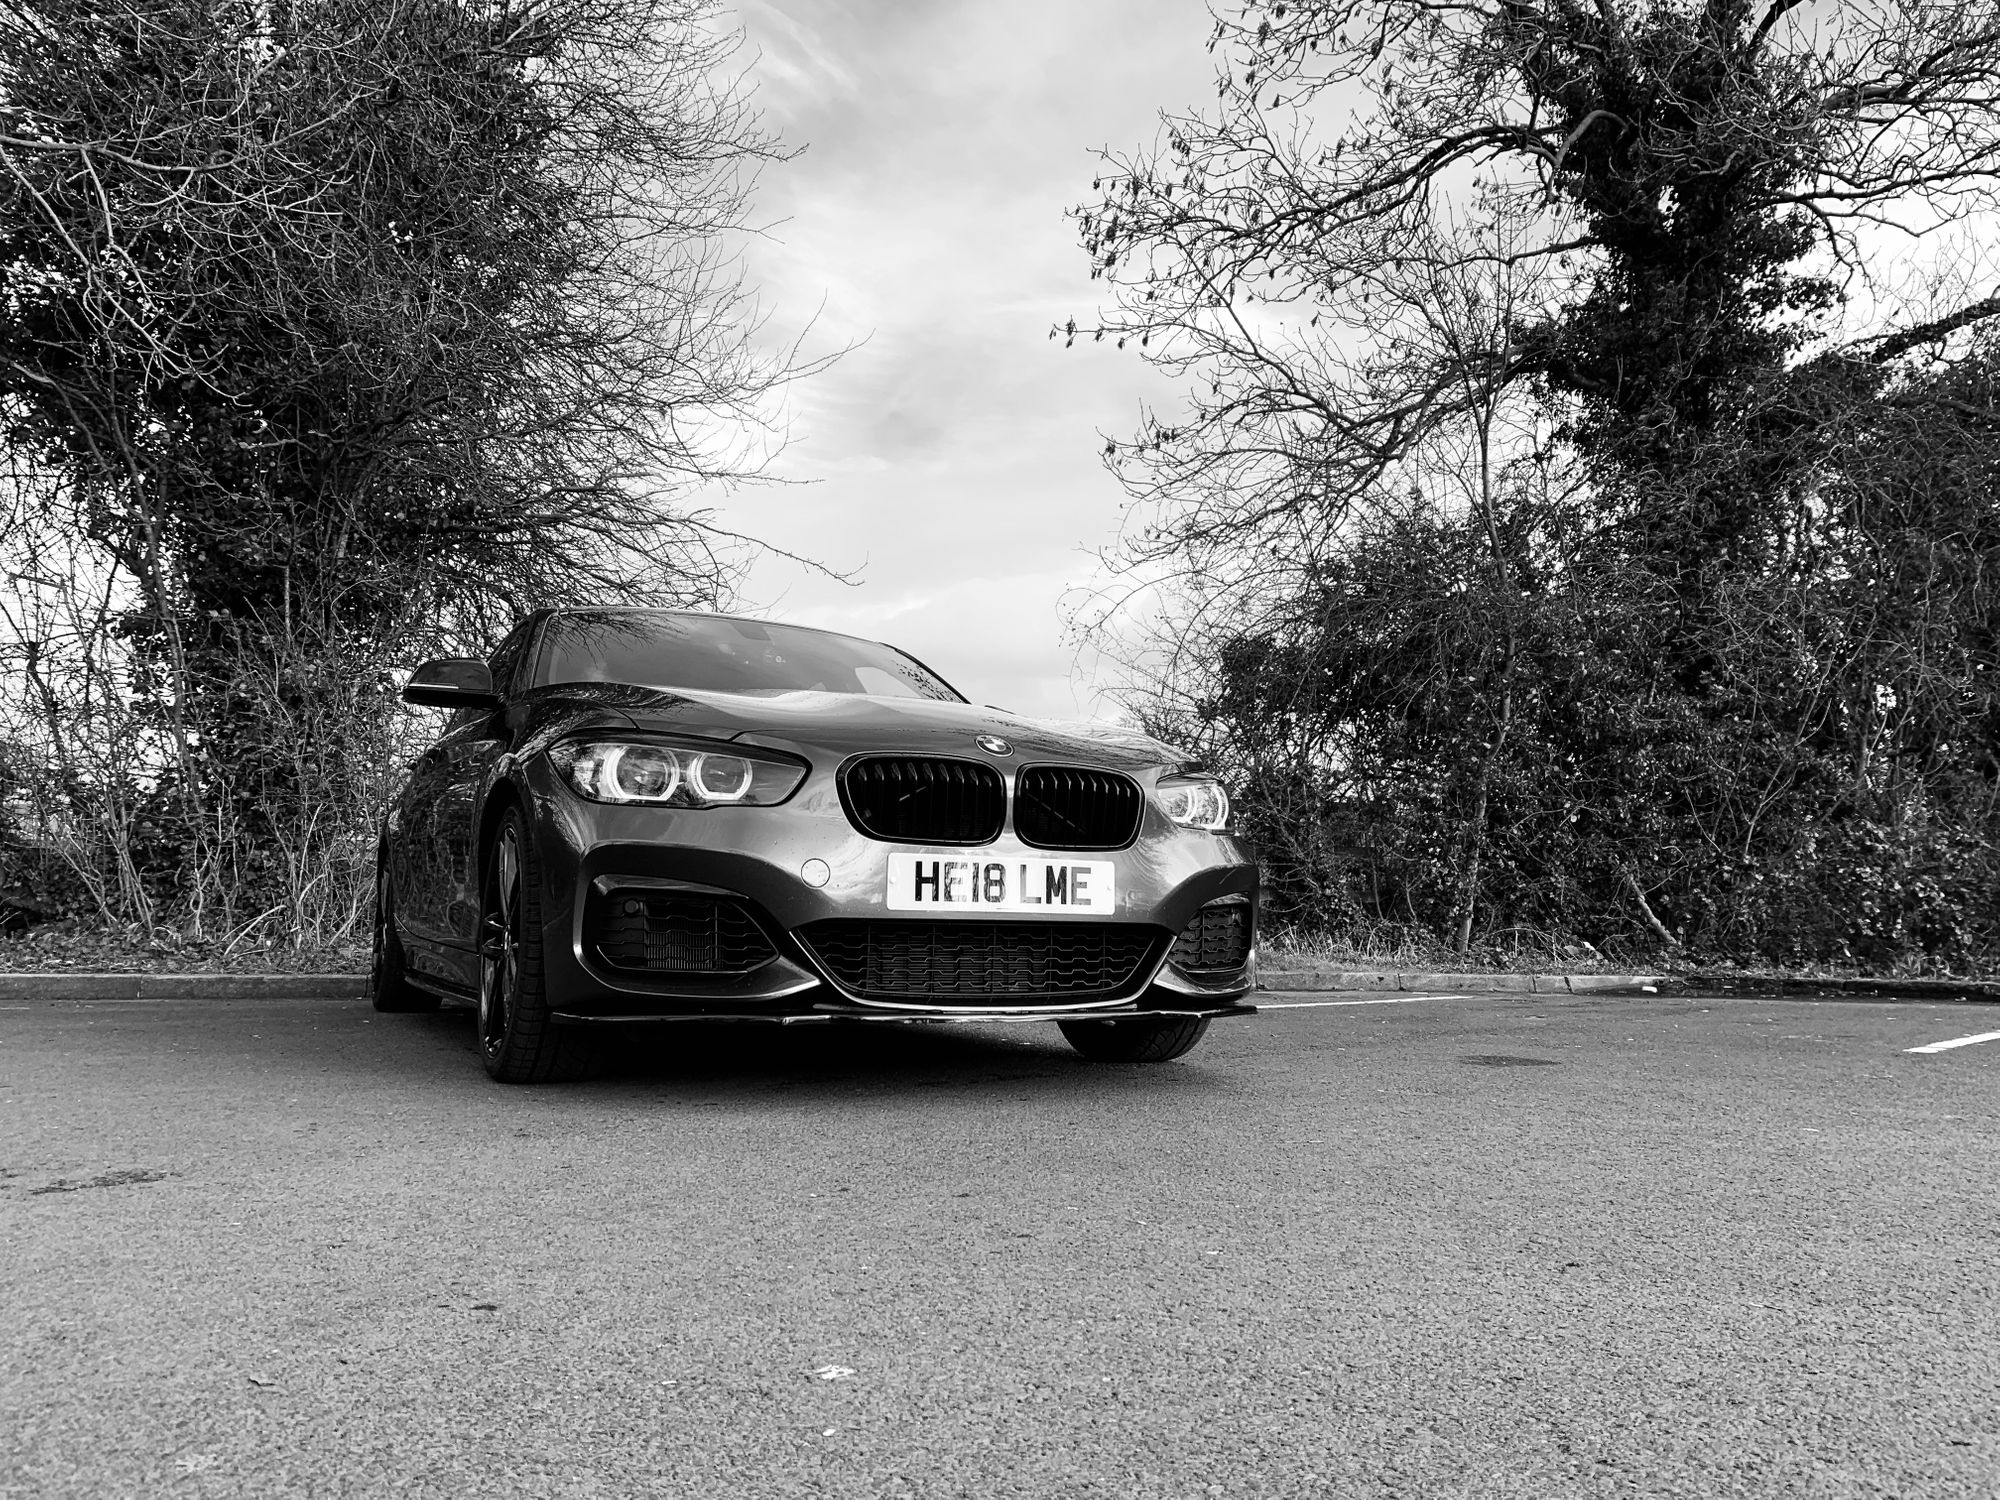
After this I think the car is really coming together well and aesthetically it's quite different to a standard car now. There's nothing drastic going on visually, but it's definitely different.
More black badges
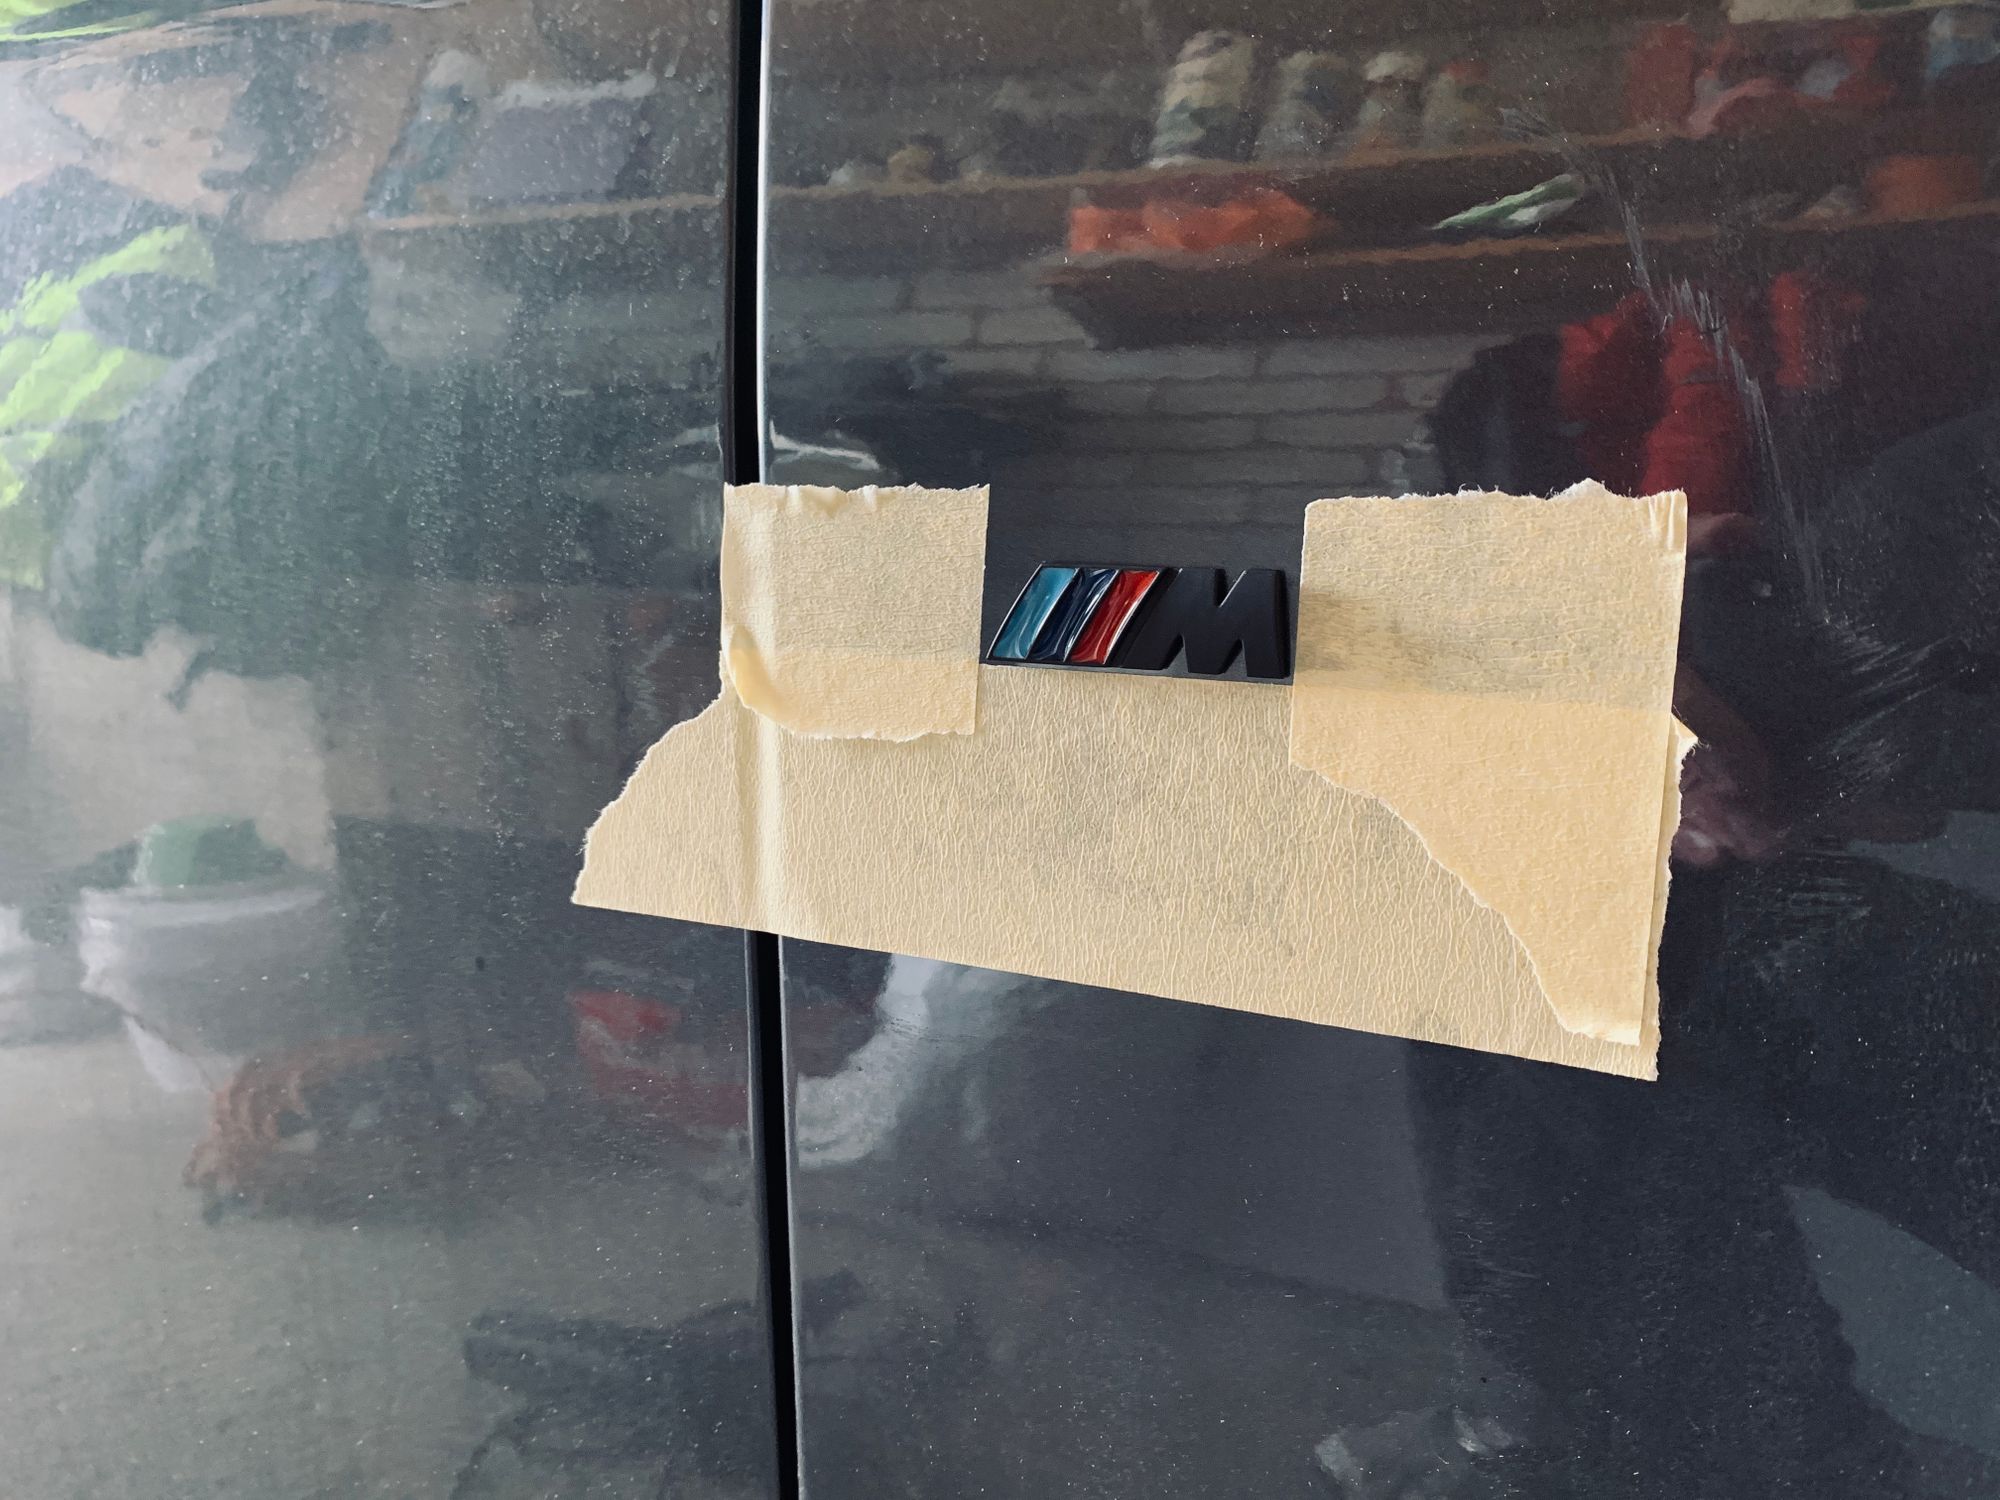
Another minor tweak on the aesthetics before we hit the good stuff and it's time to get rid of some more chrome and switch to black. This time I'm changing the badges on the wings so that they don't stand out quite so much.
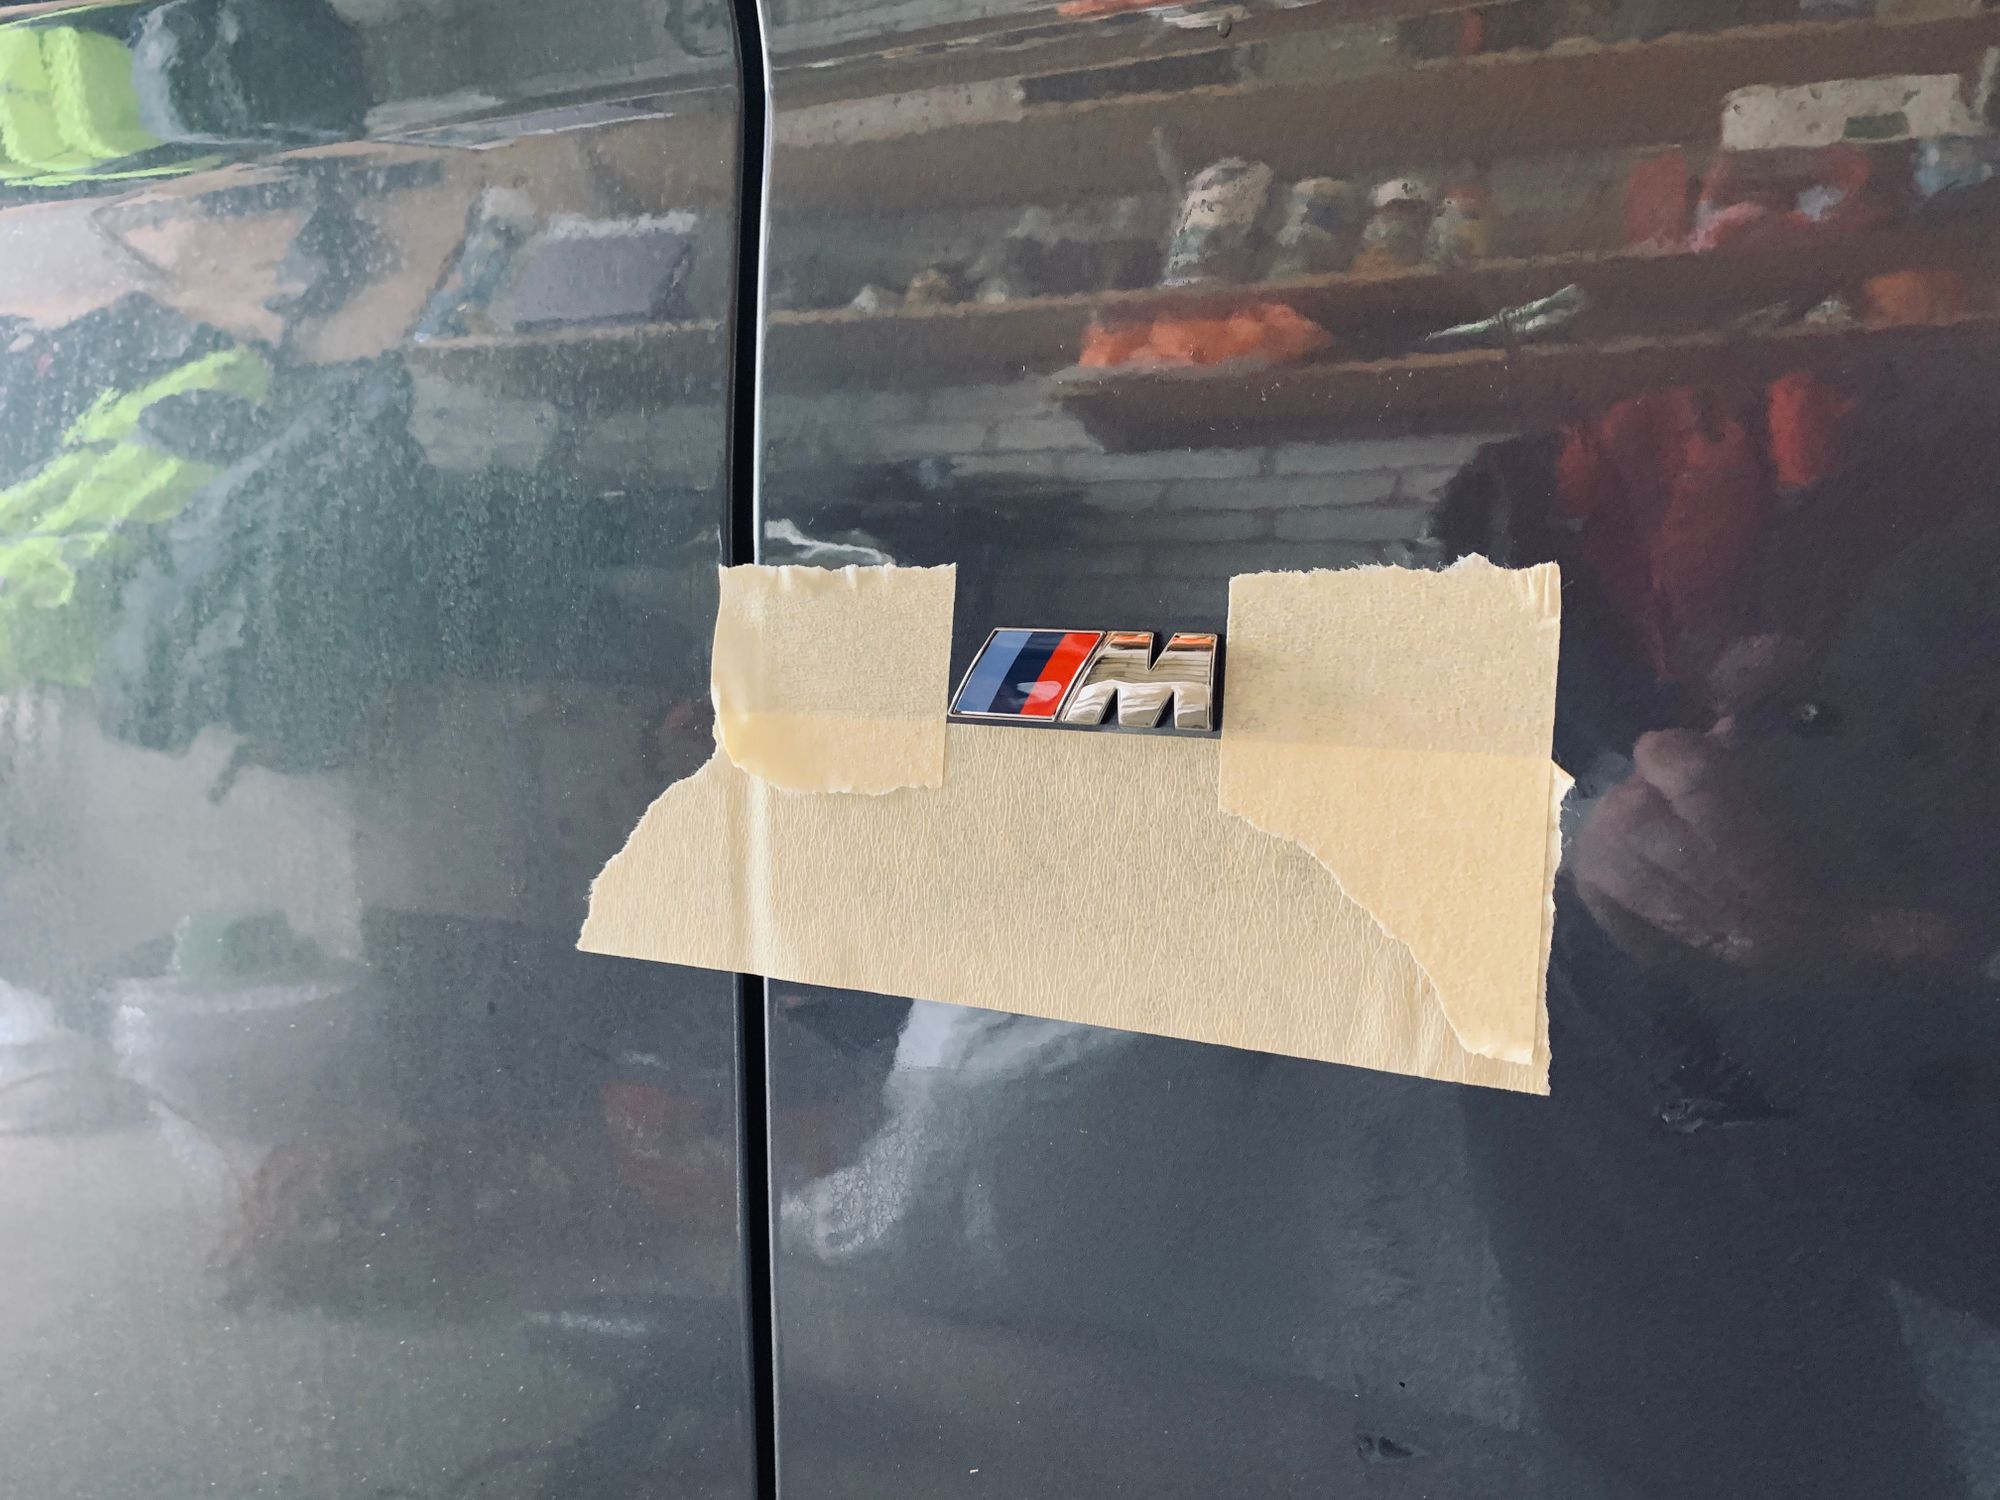
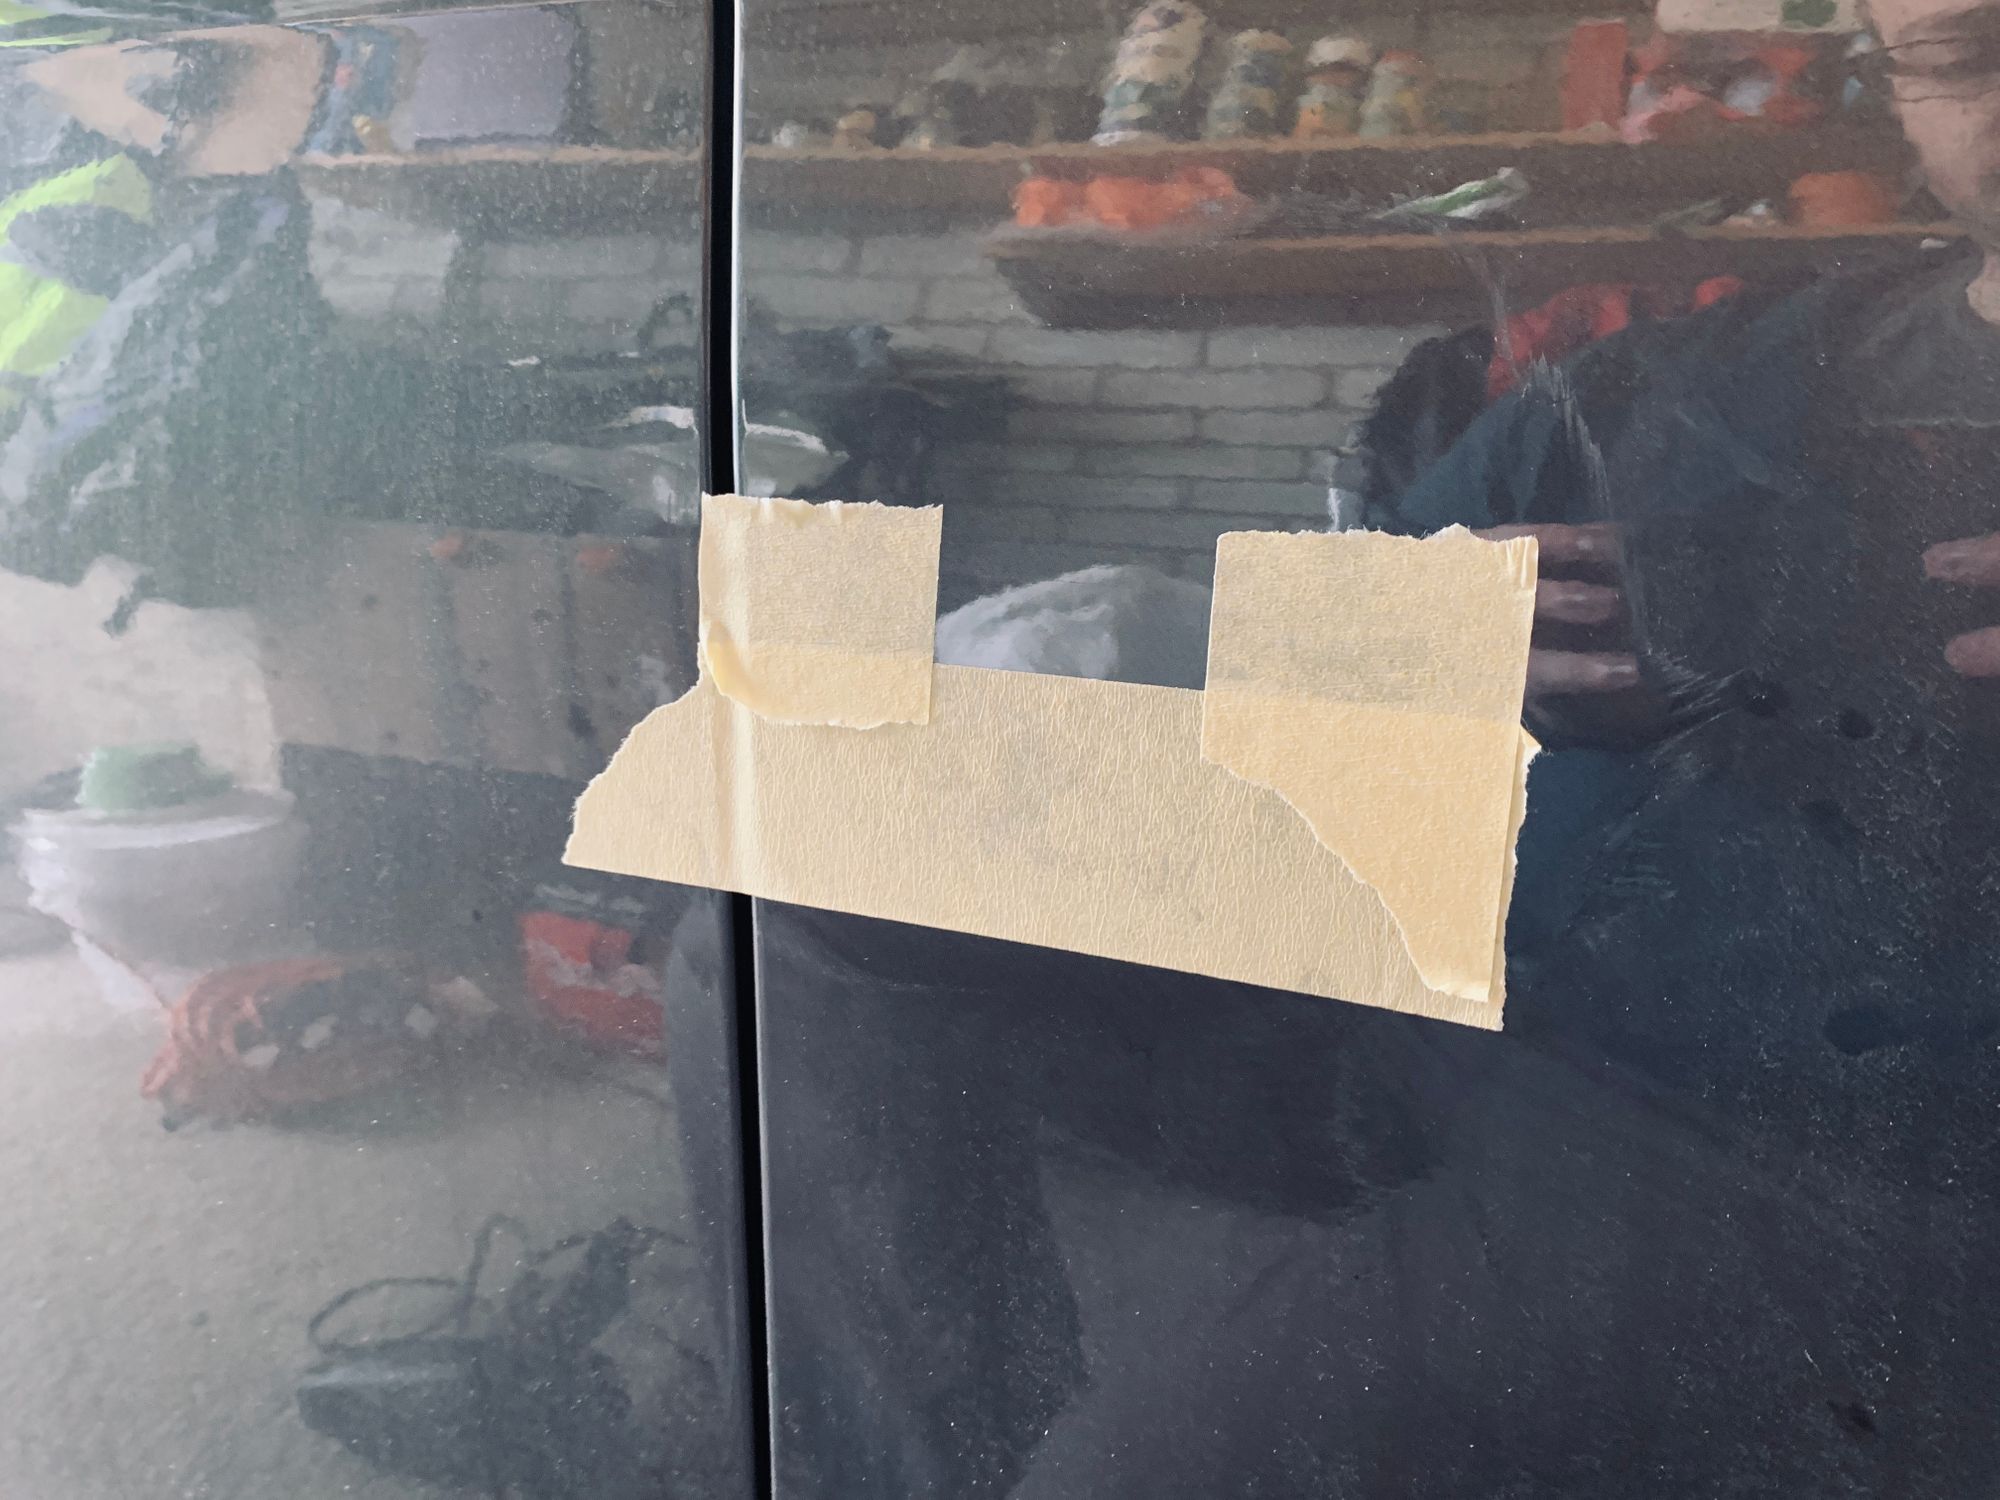
When you're removing badges to replace them and you want to make sure the new ones go back in exactly the same place, it's a good idea to make yourself a little template. Using the same masking tape I made an outline of the existing badge before I removed and this will allow you to put the new badge in exactly the same place.
Once the original badge is marked out you can remove it and there are a couple of ways to do this. The first thing to do is to make sure you always use heat. Using a hair dryer, or heat gun if you have one, gently warm up the badge and the area around it. To make sure you don't burn anything, always keep your hand on the car right next to the badge. If you're burning your fingers you're burning the car and you will quickly stop! Once the badge is warm the adhesive will be a little easier to coax off and in my case I could simply pry the badge off with my fingers at this point. Remember to be careful when prying the badge as when one side is coming up, the other is going down and into the paint. I usually rest a trim clip tool under the edge of the badge to stop it damaging the paint and this is really important.
If you can't pry up the badge with your finger, do not use a tool to pry it up! You're risking the same damage mentioned above which again is not a good idea. Instead, grab some dental floss or other similar, soft 'wire' and hook it behind the badge at one of the corners. Then pull the dental floss in a saw motion to cut through the adhesive layer behind the badge. The soft dental floss won't scratch up the paint and once you get it started you'll find the badge lifts up a lot easier.
Once you have the old badge off make sure you clean up the panel so the new badge has a perfectly clean surface to stick to. I like to heat the panel and the new badge up so that when I stick it down the new badge forms a really strong hold.
Once it's installed you can remove the masking tape and again clean up the area around it. I'd avoid hitting the area with a pressure washer for the rest of the day just to help it out whilst it's still bonding to the car. Also, if like me you're putting dark badges on a dark car, before you stick the badge down, take a black Sharpie marker and go around the edge of the adhesive pad on the back of the badge and colour it in black which will stop that white adhesive being so visible after fitting.
Where this is heading
Alright, that's enough of the cosmetic stuff, how about we start to get down to some real work huh?! Well, at this point, I should probably come clean on a little more of my plans for the car.
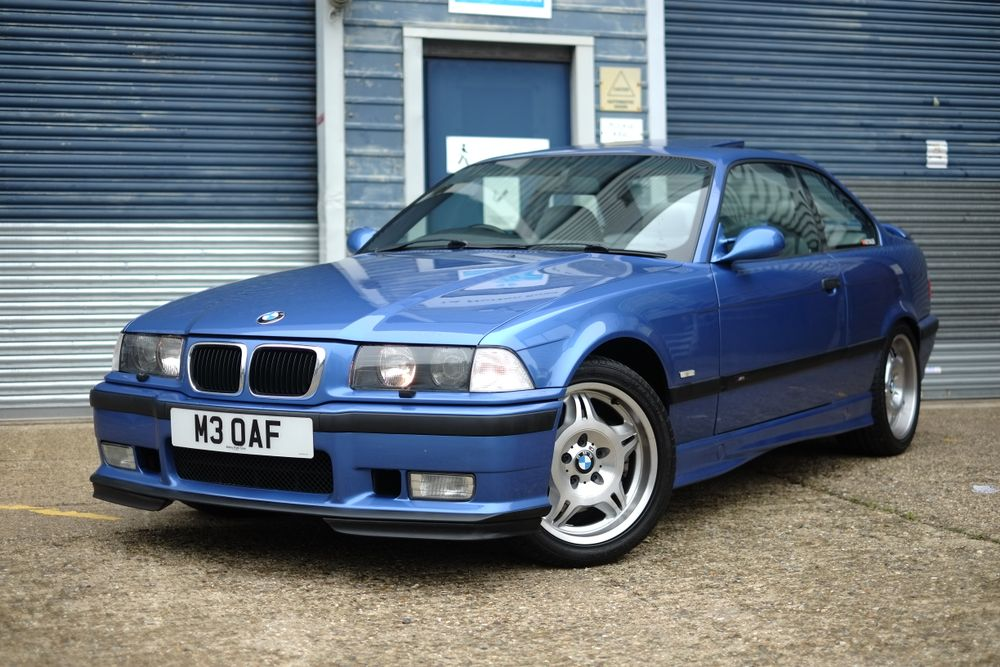
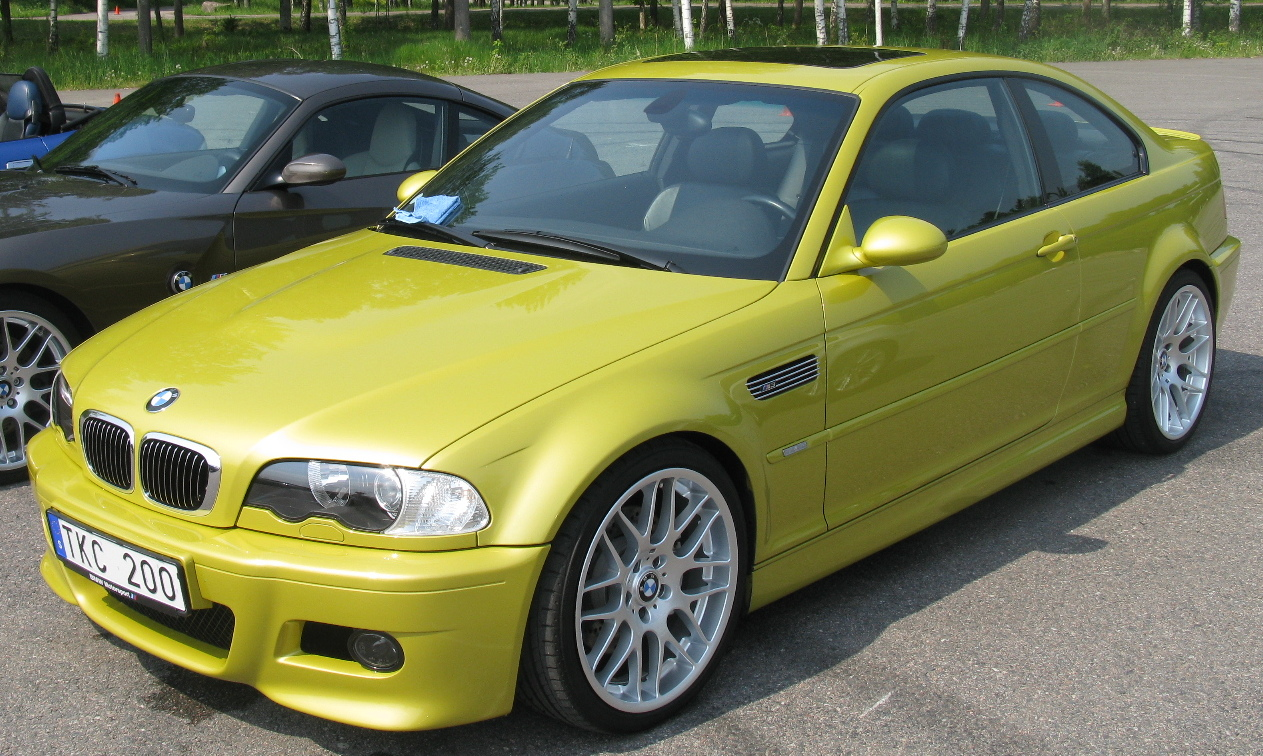
When I finally had the ability to buy my car and I'd saved enough money, I was faced with a choice. For so many years when I was younger the E36 M3 and then the E46 M3 had been my realistic dream cars as I moved up through the different BMWs that I owned. The difference between an E36 and an E46 is age, with the E36 chassis being produced from 1990 to 2000 and the E46 being the successor made from 1997 to 2006. Here's a picture of both the E36 M3 and E46 M3.
_(cropped).jpg)
I owned several E36 and E46 cars, but not the M3 variants. The BMW 3 Series comes with all different engine configurations and I owned the 318 E36 and in the E46 range I had a 320, 2 x 320d and a 325Ci. The same great platform, but none of them had the same oomph as the M3 variant. Fast forward a few more years to now though and within my budget I was possibly looking at one of the newer generation M3 cars. The E90 M3 was made from 2007 to 2013 and was definitely within my budget to purchase, and it certainly looks great, but...
_(cropped_II).jpg)
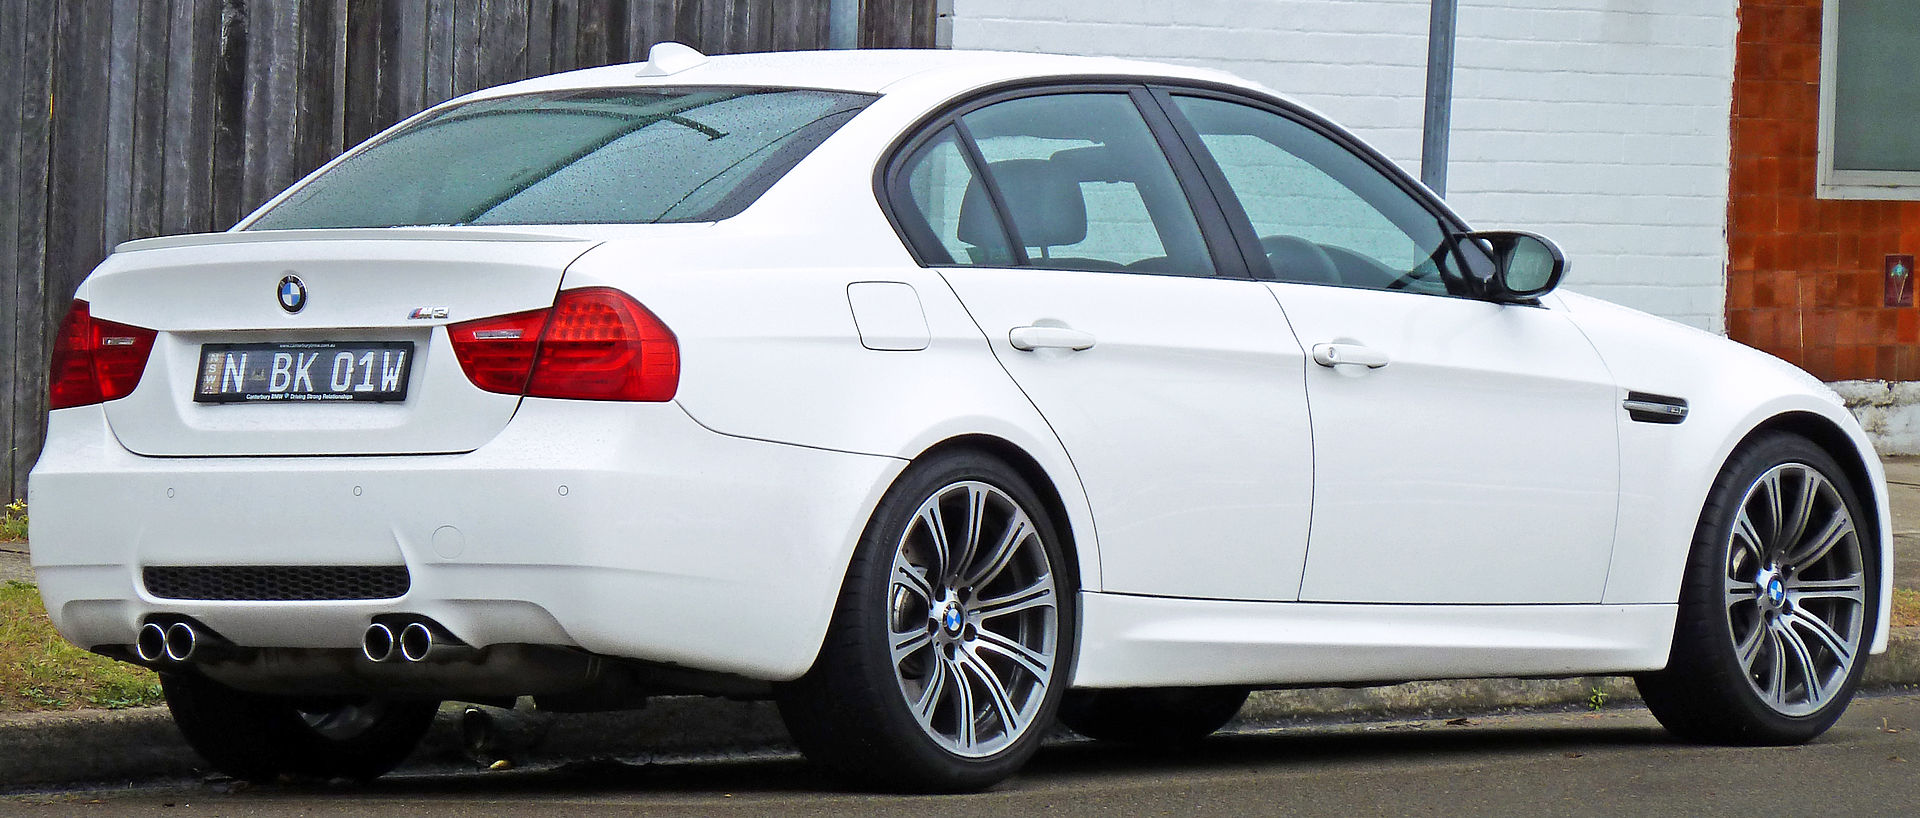
So was the newest generation F80 M3.

_sedan_(2018-08-31)_01.jpg)
The F80 changed opinions for many as it was the first M3 to run with forced-induction, with the twin-turbo I6 S55, but for me that wasn't a concern. The main concern was that it was maxing out my budget, like really pushing the boundary. That's when another contender entered the ring.
In BMW world we have the "full fat" M cars which are the absolute powerhouse variants of any BMW car. Then we have the "M Lite" cars which are sportier versions of the car, but don't quite make it to full M 'status'. That's when I came across the M140i. As an M Lite car the M140i was considerably cheaper than an M3 in every, single, regard. It had a lower purchase price, the parts were cheaper, the insurance was cheaper, servicing was cheaper. Everything was cheaper. A lot cheaper. That didn't mean sacrificing much though, and in some respects, actually the opposite. With my budget the M3 wasn't going to be new, I'd have to settle on something a little older. Maybe only a few years, but older nonetheless. With the 1 Series (the chassis the M140i is based on), I could get a brand new one and still see some significant savings. That meant the latest technologies and gadgets inside and outside. Then there's the power.
The M3 would be running, at best, an inline 6 cylider twin-turbo, and the M140i is running an inline 6 cylinder twin-scroll turbo. Whilst they are definitely different, they aren't worlds apart and the difference is that the M140i gives 335bhp as standard while the M3 gives 425bhp as standard. The thing is, buying the M140i would leave me a lot of spare change in my pocket and spare change means mods. And mods mean power.
This was how I arrived at my ultimate plan. The goal was to go down the road of the M140i and use that significant saving in £££ to fund the mods. I could get the M140i to far exceed the performance of the M3, do a lot of other mods to make the car my own and still have money left in my pocket. On top of that it'd also be cheaper to maintain and run on an ongoing basis because the tax, insurance and servicing were all a lot cheaper too. It seemed like a great idea all around and I've not for a second regretted it.
Chasing power
With the above explanation of my plan, it should hopefully be a little more clear on where some of the power mods to the car will be taking me. In Part 2 I talked about the new air intake and now in Part 3 we'll be looking at a new exhaust. In order to get more power out of an engine you need to get air in faster and get air out faster. Because I'm going to be chasing a lot of power (and an M3 on the track in the future) I needed more than just the M Performance Exhaust in the previous blog post, I needed a full exhaust system.
Powervalve Exhaust
The M Performance Exhaust fitted in Part 2 gave the car a great sound but the rest of the system was still quite restrictive as standard. I decided to go for a full turbo-back exhaust system which means that literally everything from the front of the car to the back of the car will be replaced.
You can see the customised system I chose with a Dynamic Drone Eliminator (DDE) in just here.
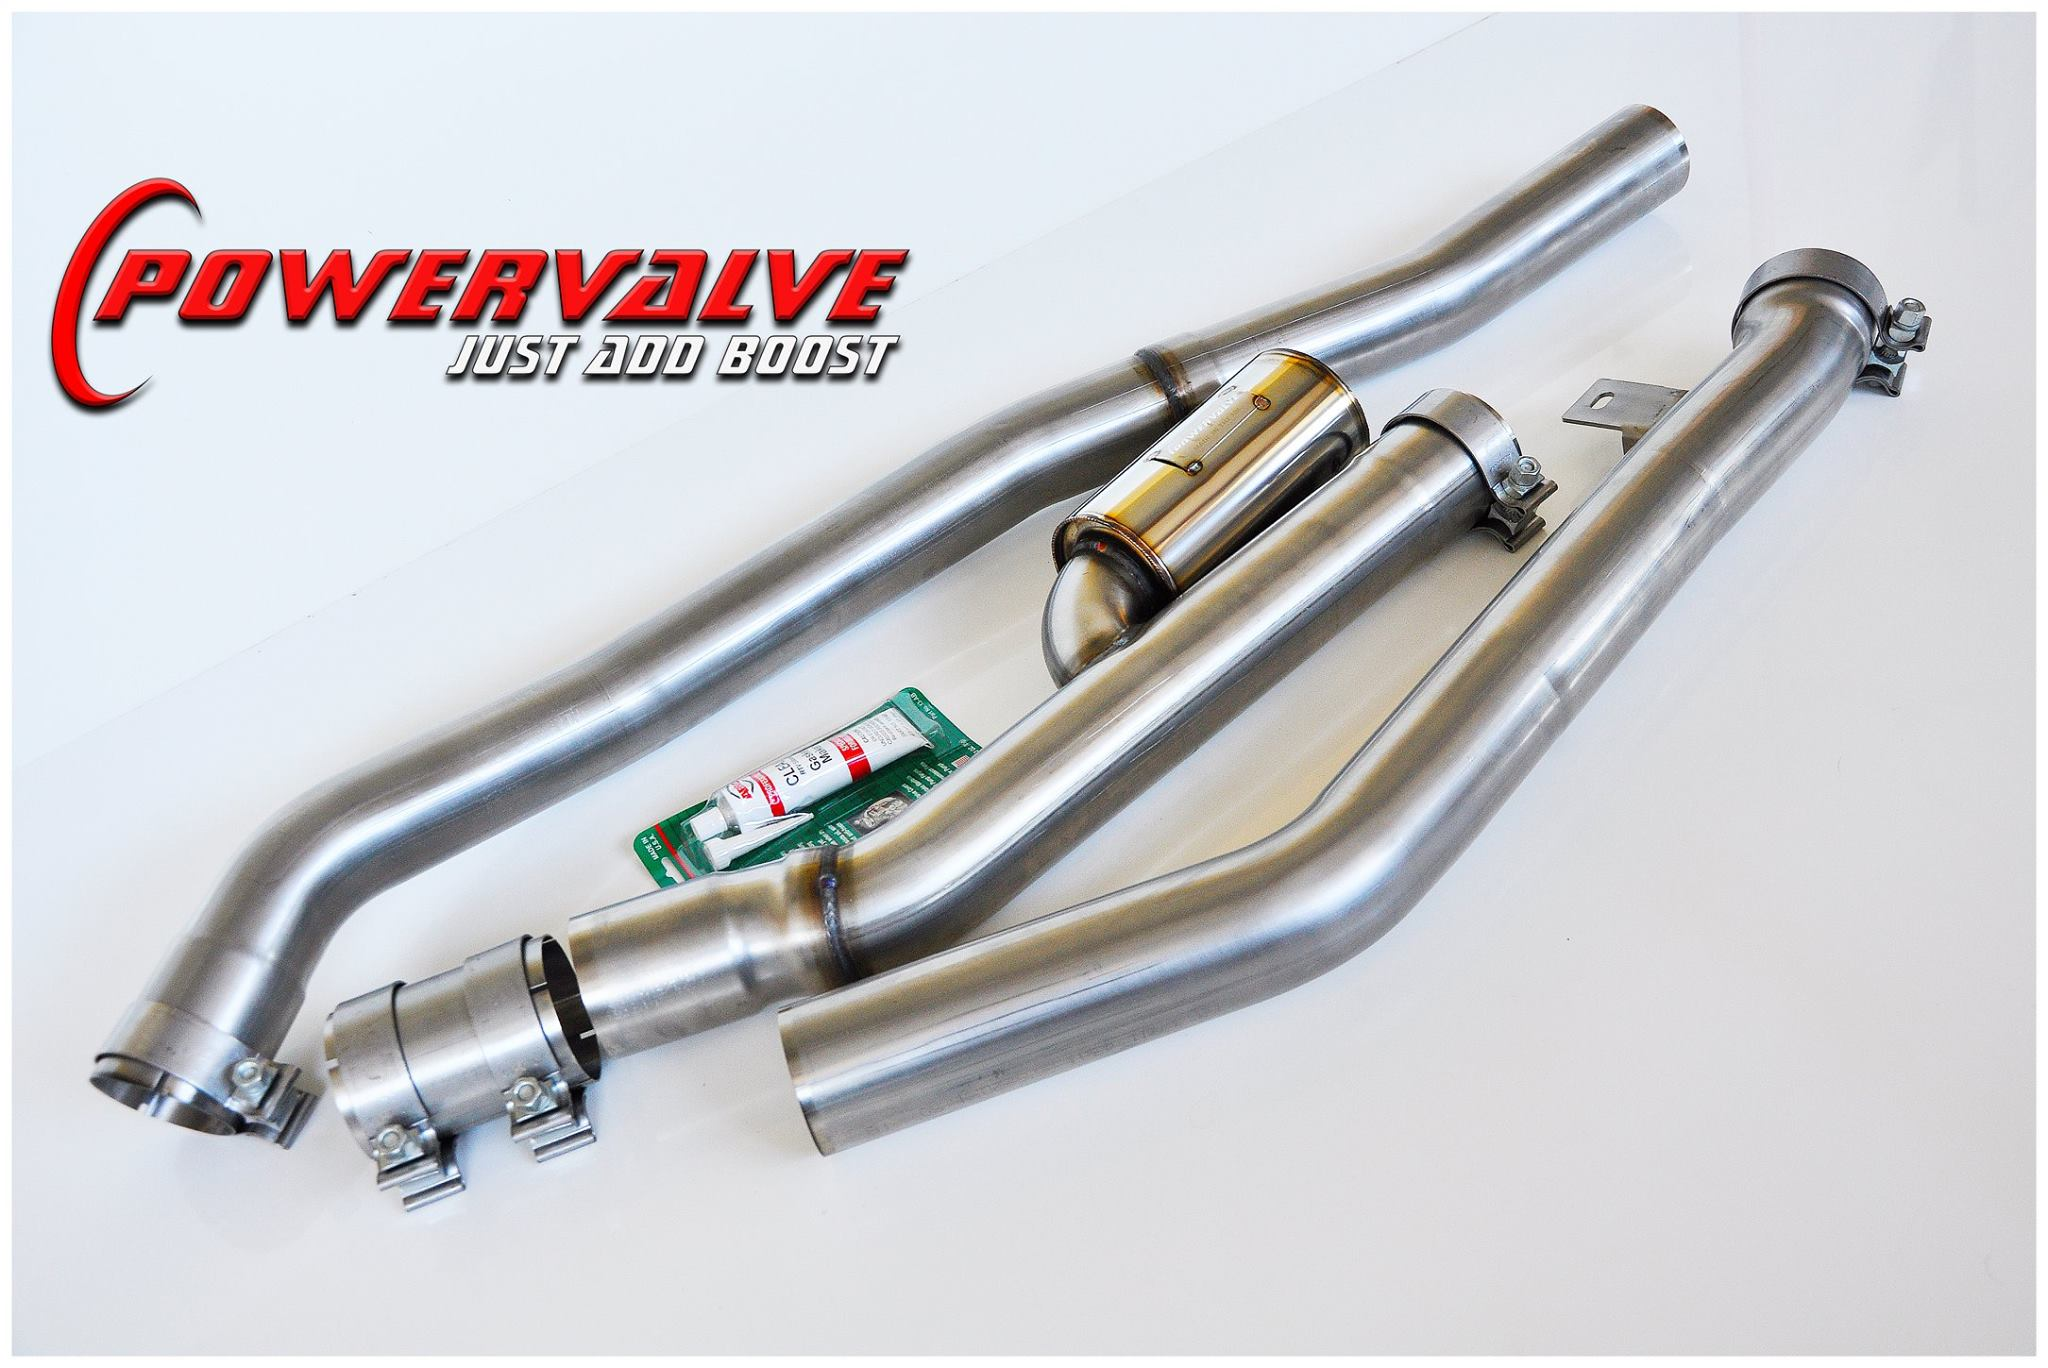
The top left pipe is the main centre pipe that runs the length of the car on the underside, the middle pipe has the DDE which is the small 'can' that comes off the side and the bottom right pipe goes up to meet the back of the cat. The DDE helps to keep the noise in the cabin down and I chose to get that fitted as I was really conscious that I didn't want it to be loud inside the cabin when driving. A larger exhaust like this can often leave cars too loud for my liking, but even when ploughing along at 100 mph with this new exhaust, passengers inside the car can still talk to each other with little more than a whisper. The DDE was a wise choice indeed because the Powervalve system also removes a resonator and muffler from the centre section of the OEM exhaust, resulting in a better exhaust note but also more volume. I want the exhaust to sound better, I want the rasp and burbles, but I do not want volume. I don't want it to be loud. Here's the muffler in the OEM system that gets removed and you will see the resonator in just a minute. The sole purpose of this device is to make things quieter.
Something else that's really important and just visible in those pictures is that the OEM exhaust system doesn't have round pipes, they're slightly flattened into a more oval shape and the new Powervalve system isn't. On top of that, the Powervalve system has less curves and bends, taking a more direct path to the rear of the car, and it has far better bends than the original system meaning smoother airflow inside the pipes. Just take a look at the bending work on the OEM pipes here...
You can see that awful kink in the pipe where it was bent to fit the car and it looks like a BMW engineer just grabbed the pipe and bent it with their knee. The Powervalve system has much smoother bends in the pipe and there isn't a kink in sight. This is really important because any restriction in the pipe like this will slow down the airflow and/or cause turbulence in the flow, and less airflow means less power. You can also see the resonator in the left of that image that the new system removes. The existing muffler and resonator were inline and thus restrictive to the flow of gasses but the new DDE is not inline and doesn't slow down the exhaust gasses whilst doing its job. All around, everything is just better on the Powervalve system.
The next critical change in the exhaust system is the 'cat', or catalytic converter. Another section of the exhaust, usually right behind the engine or turbo, a cat is designed to reduce the harmful emissions of a car and is required by law on any modern vehicle. To put it simply, they are a very fancy air filter full of precious metals that do some voodoo magic science reactions to turn the bad stuff coming out of the exhaust into less bad stuff before it goes into the atmosphere for us to breathe in. A lot of people don't like cats because they are very expensive to buy/replace (remember they are full of precious metals) and are very restrictive filters, harming the power potential of a vehicle by choking the exhaust flow. Take a look here inside my original BMW cat, this is the filter that the exhaust gas has to pass through.
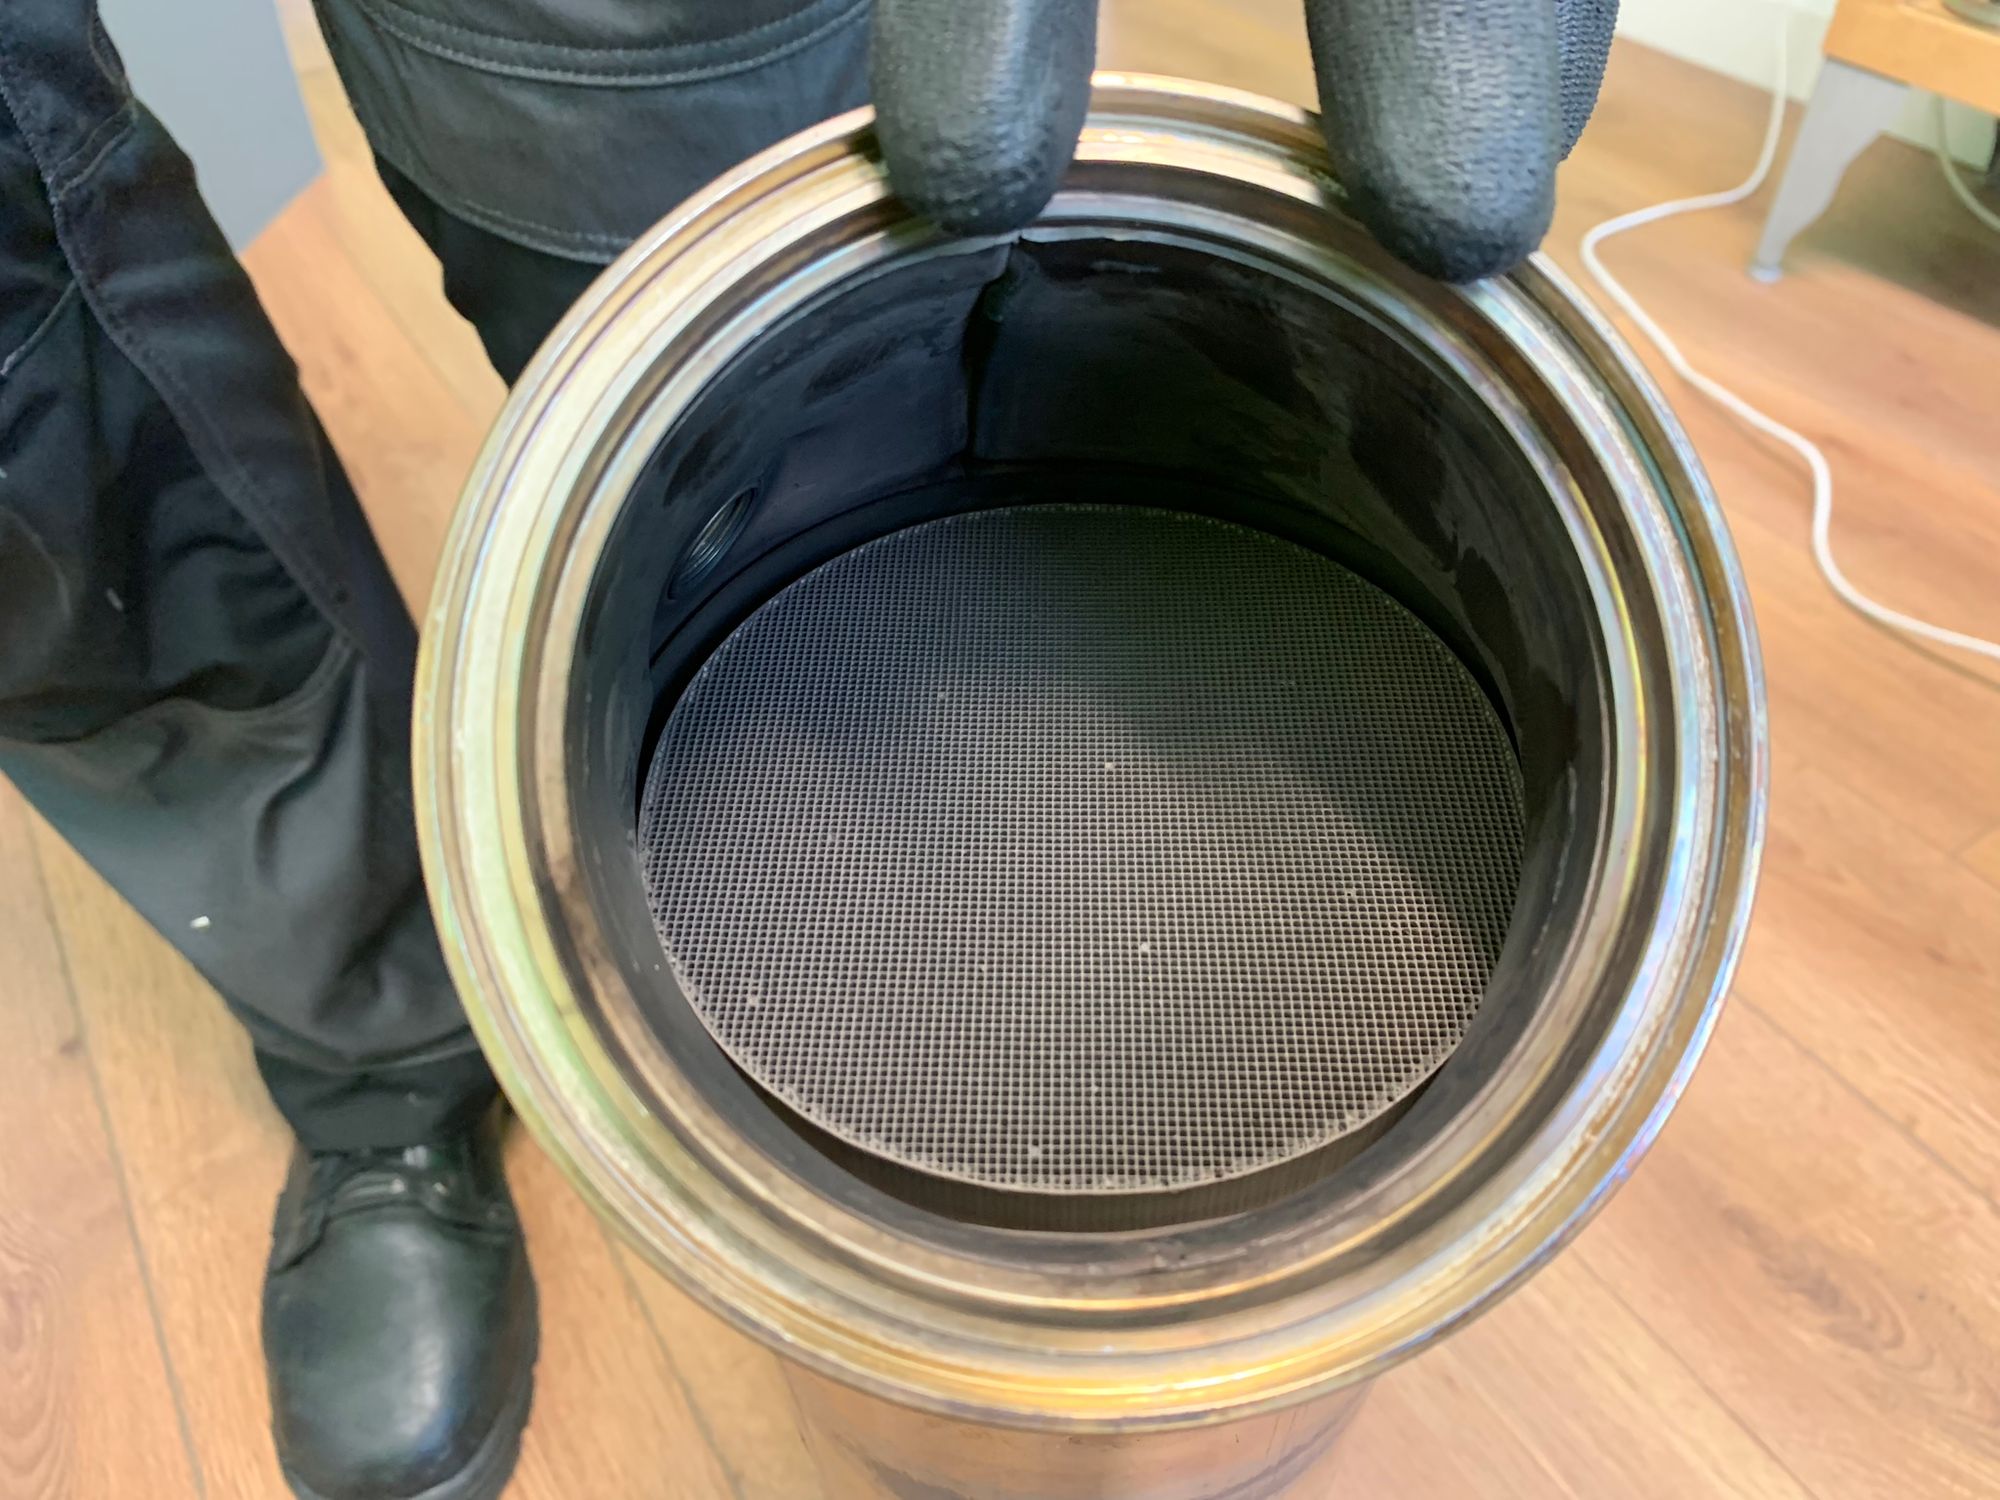
The OEM cat is a 400 CPSI cat (Cells Per Square Inch) meaning the holes are really small and the exhaust gas has to squeeze through them to be filtered and this does really harm the performance potential of the engine. The other thing I didn't like about the OEM cat was at the bottom of the filter material you can see a really sharp, protruding edge. Again, this is another restriction in the system and turbulence caused by hitting this edge will be slowing things down even more.
Now, there are 2 options to fix this problem and each comes with its own benefits and drawbacks. The cheaper option is to replace the cat with a de-cat pipe, essentially a piece of hollow pipe with no filter in it.
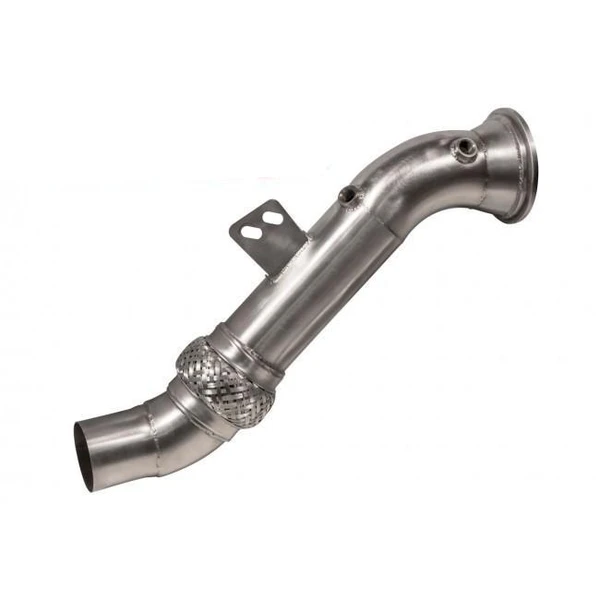
The precious metals inside cats are super expensive so a de-cat pipe is a considerably cheaper option but comes with the obvious environmental impact. Here in the UK it's illegal to run a car with a de-cat pipe if the car came from the factory with a cat fitted. Sometimes people will open up their OEM cat, rip out the internals and close it back up so it looks like they're still running a cat when they actually aren't. This doesn't help in all cases though as VOSA (Vehicle and Operator Services Agency) here in the UK can randomly stop you and test your emissions, amongst other things, to see if your car is road legal, and that's a hefty fine if you get caught flouting the rules. I wanted to do this properly and that meant taking option 2 which is more expensive but it's the right way to do things. There is such a thing as a sports cat which is a catalytic converter designed to do its job with the most minimal impact on performance possible. This does make it the more expensive option, by some quite significant margin actually, but it is the right option. Here's the sports cat.
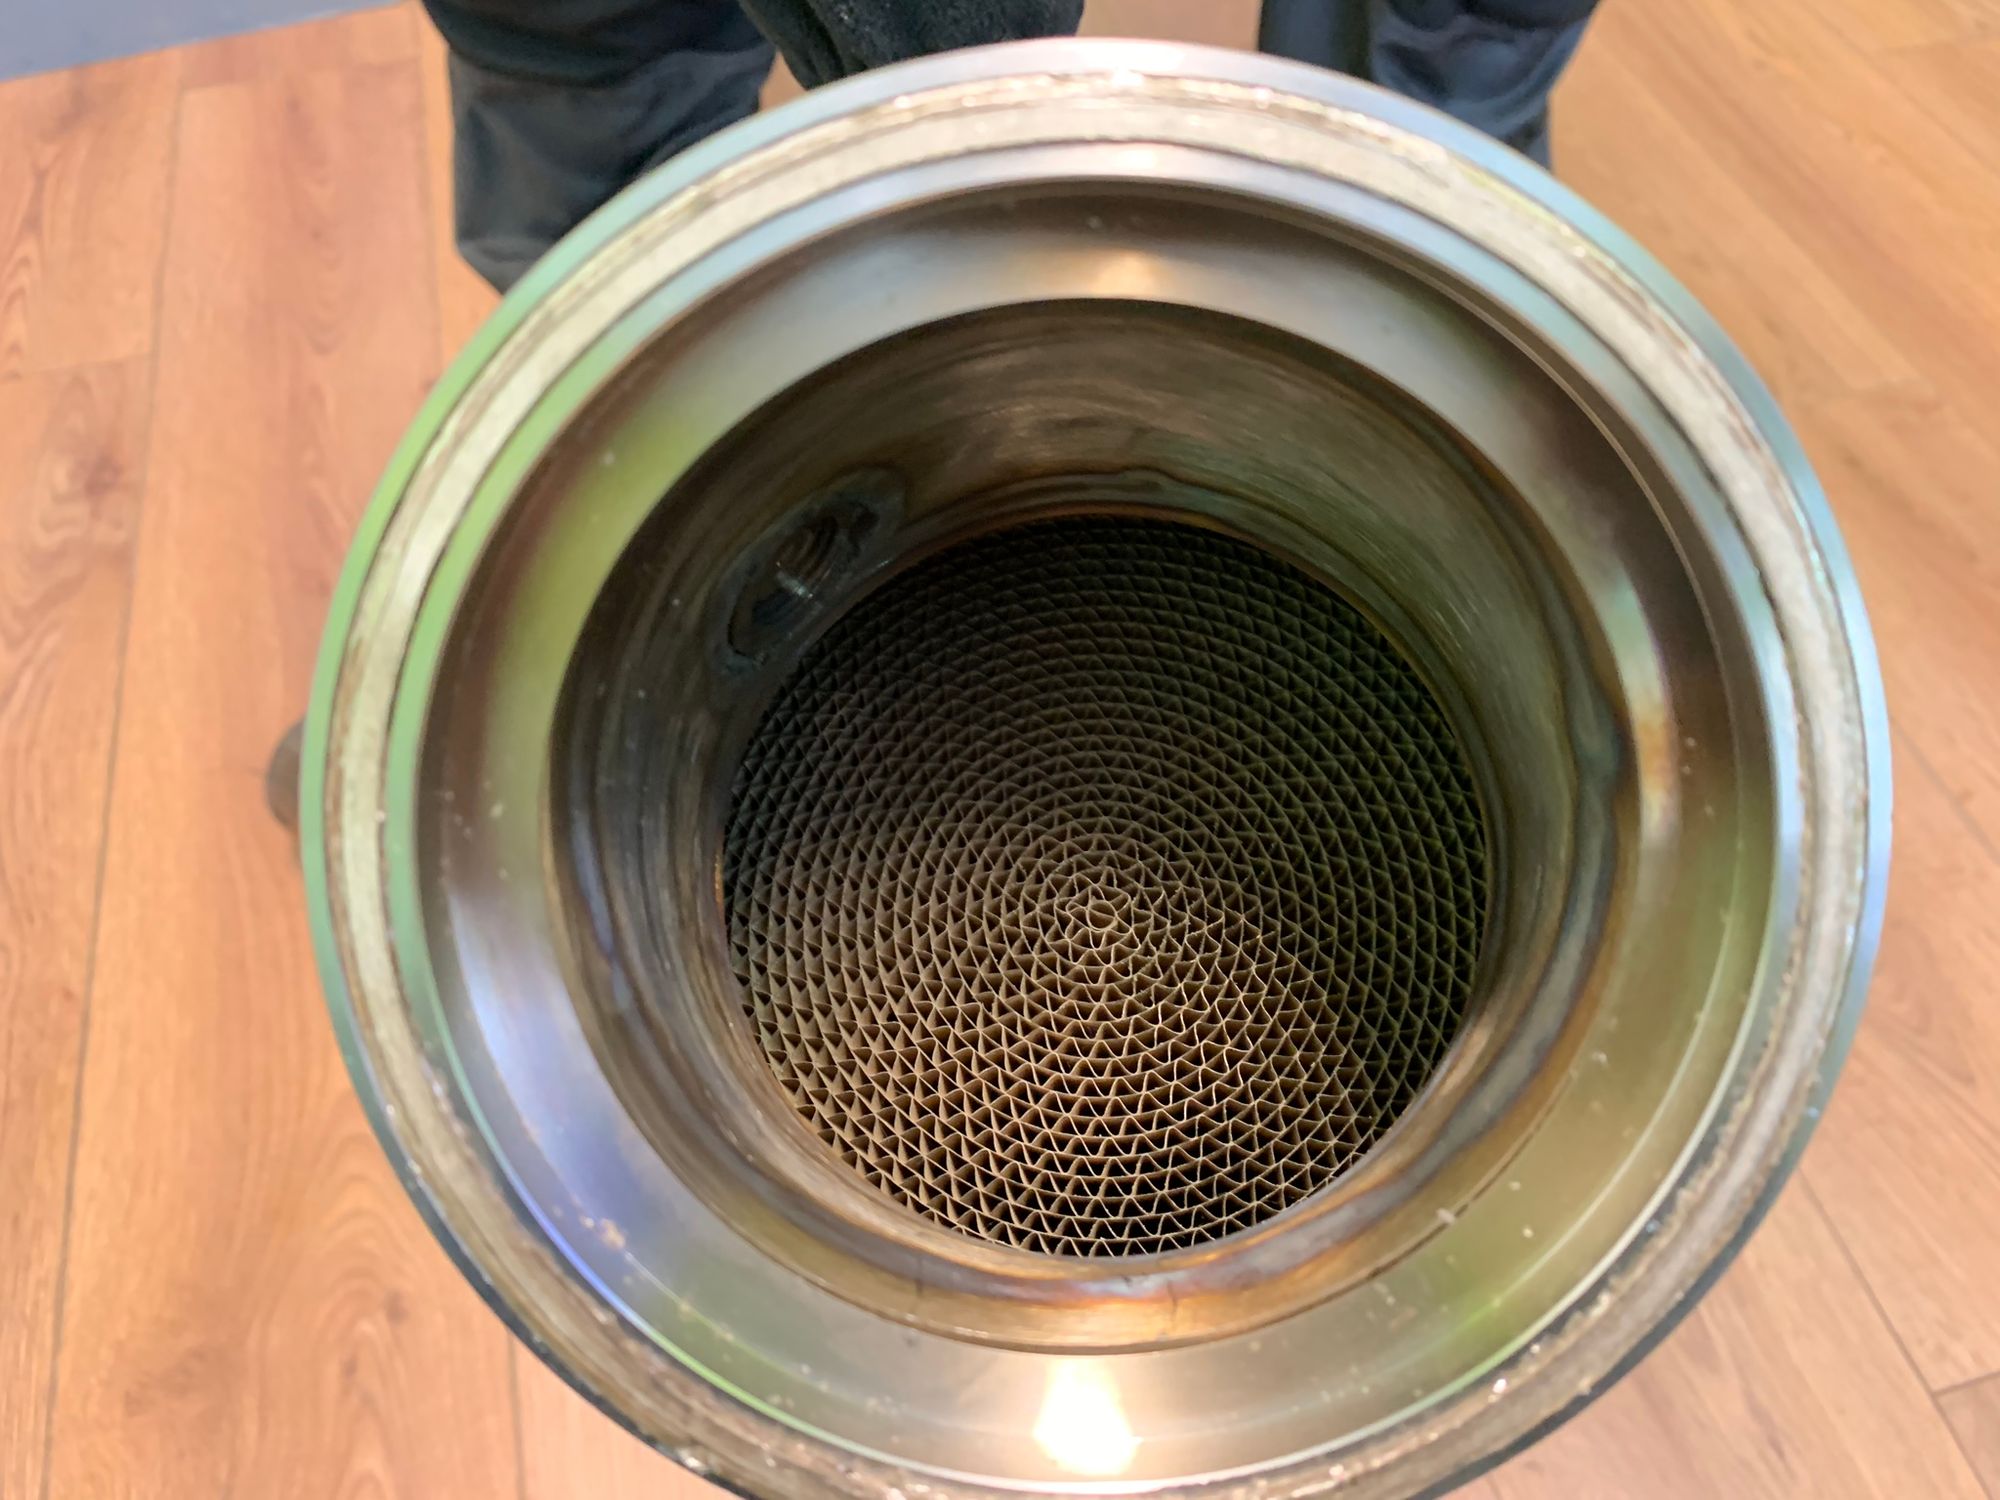
Looking into the sports cat there are 2 really obvious things to notice. First, this is a 100 CPSI cat so those holes are now massive and have a much smaller impact on the flow rate of gas. Second, is that the entry to cat is so much smoother and we've lost that hard edge that was causing problems before. If we look at the OEM cat and the sports cat side by side, we can see yet another advantage.
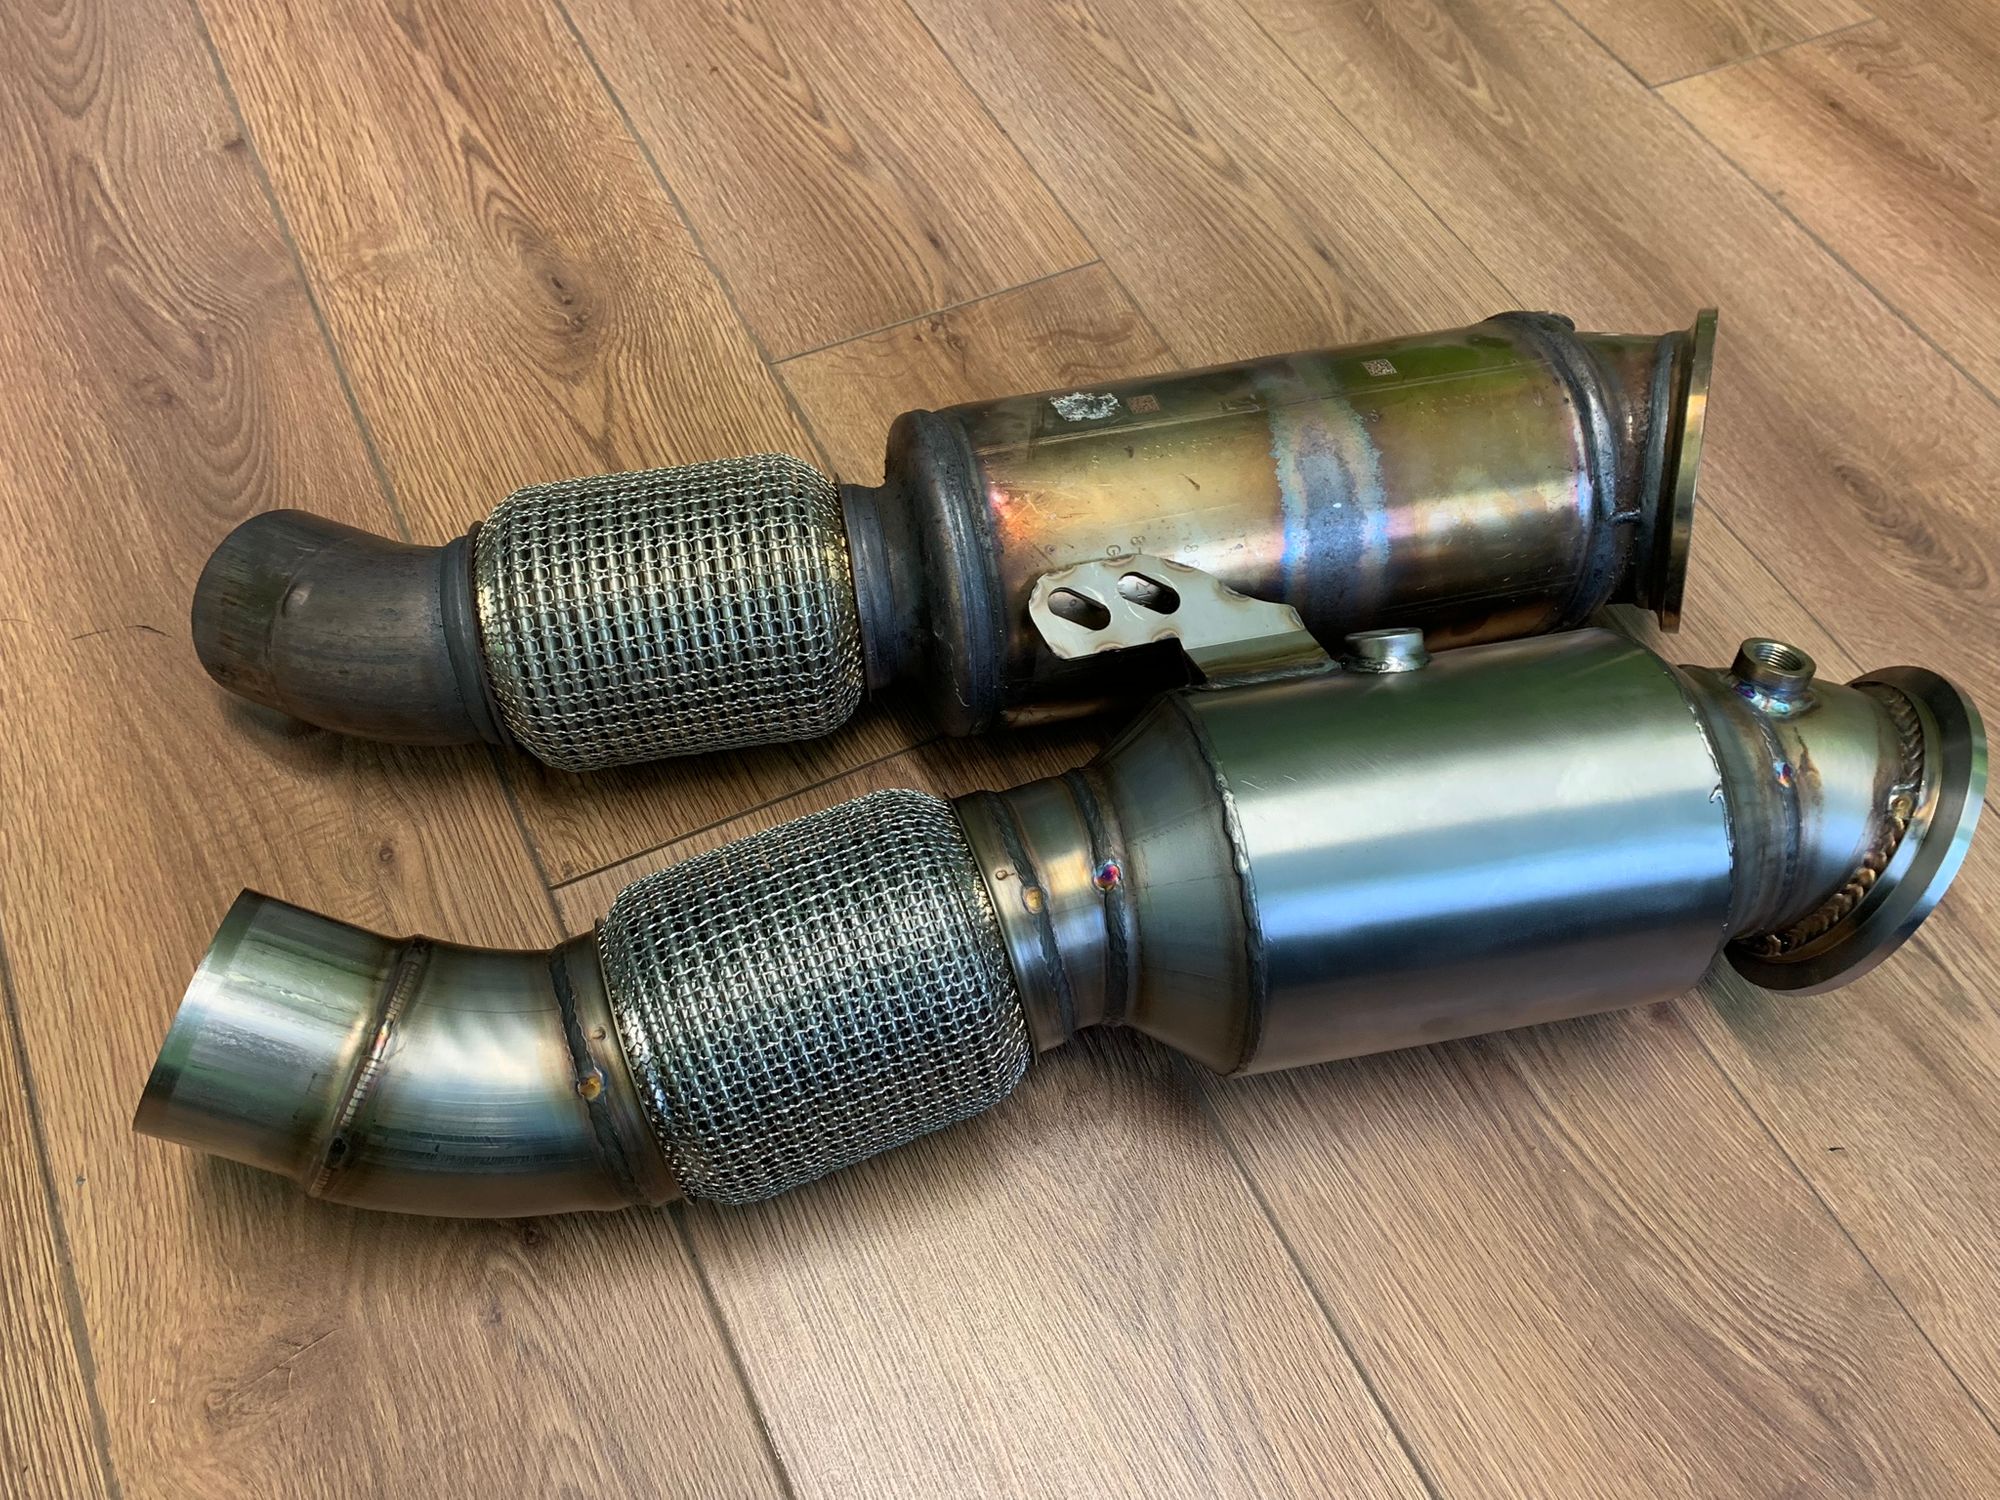
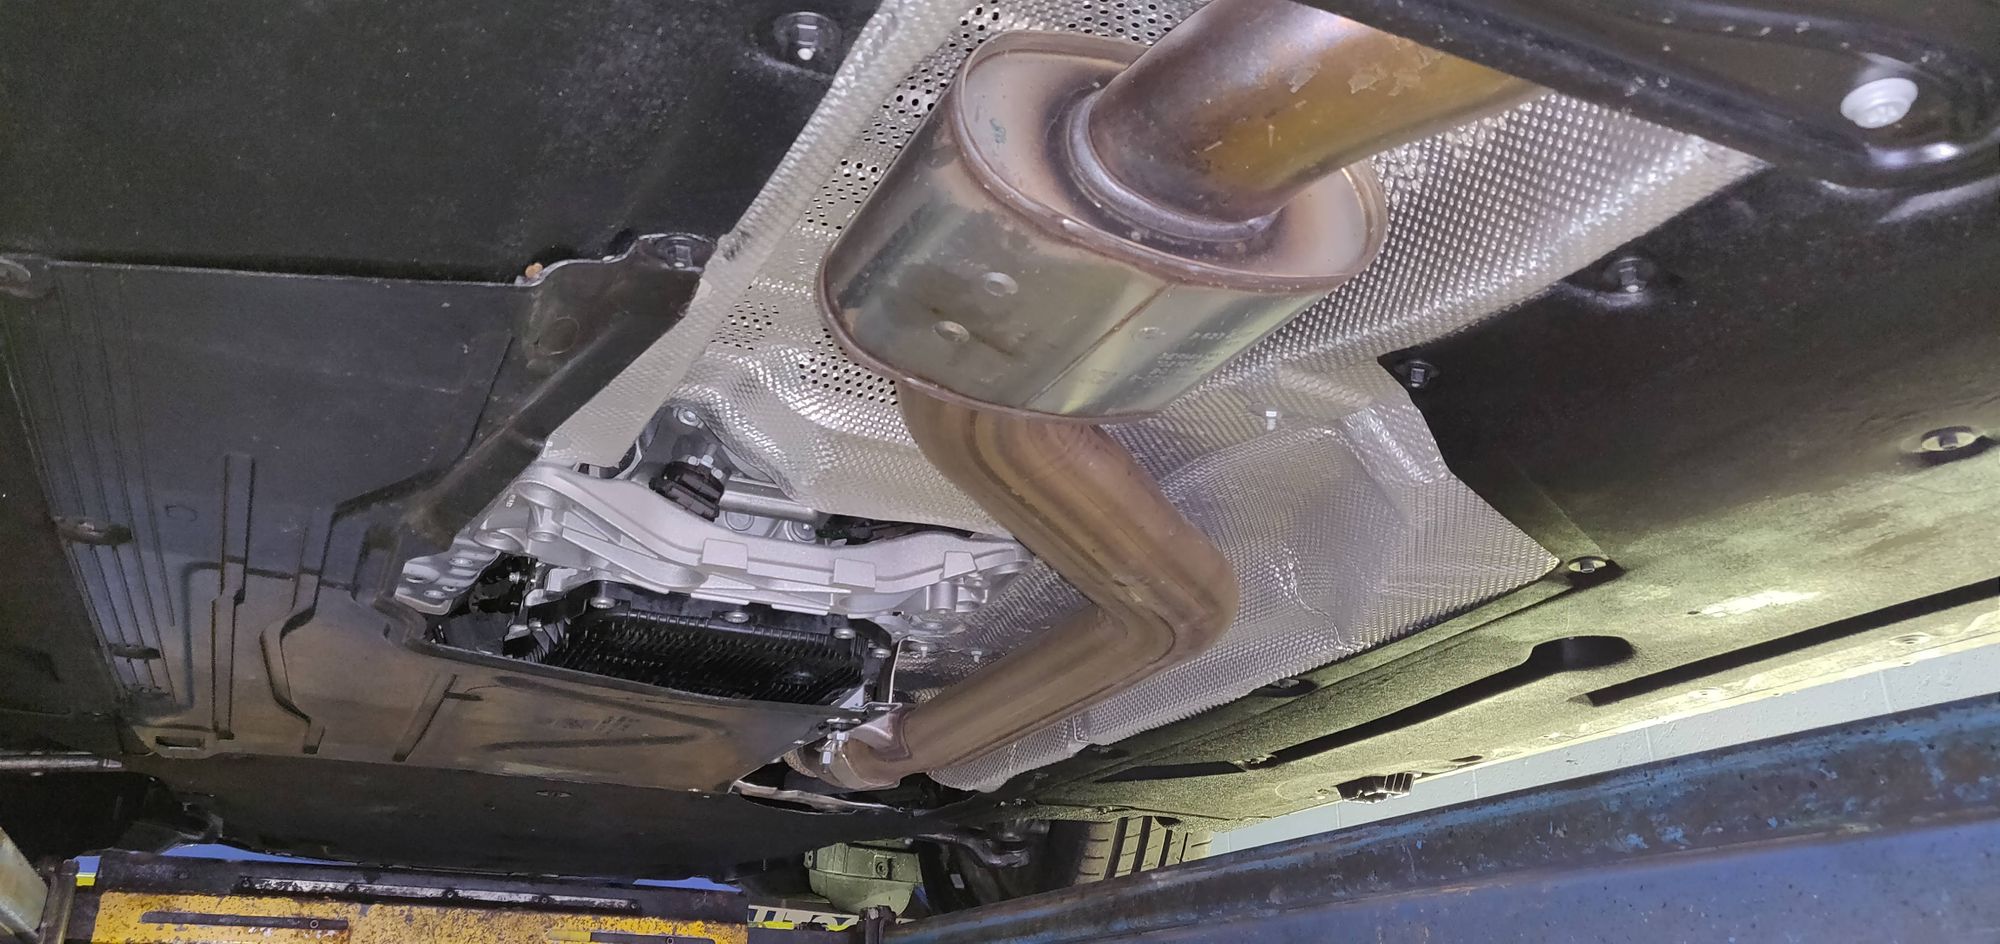
The OEM cat is on top and you can see between the main 'can' on the right which contains the filter material and the 'flexi joint' on the left, there is a serious restriction in the diameter of the pipe. Compare that to the sports cat on the bottom and you can see the sports cat maintains the full diameter of the pipe all the way through without any restriction. This thing is designed to get gas through as fast as possible and allow us to unlock a lot more power from the engine without screwing over the planet as we drive around. The final bonus here will eventually be sound. We've removed a muffler and resonator from the exhaust so far but the cat changes the sound of the exhaust in big ways. Cars that run with a de-cat or sports cat will sound a lot more raspy and naturally a little louder too. I wasn't chasing the volume, hence the DDE, but I did want that rasp in the exhaust that you don't get to hear very often. Now, with all of that finally covered off, here's the full system installed on the car!
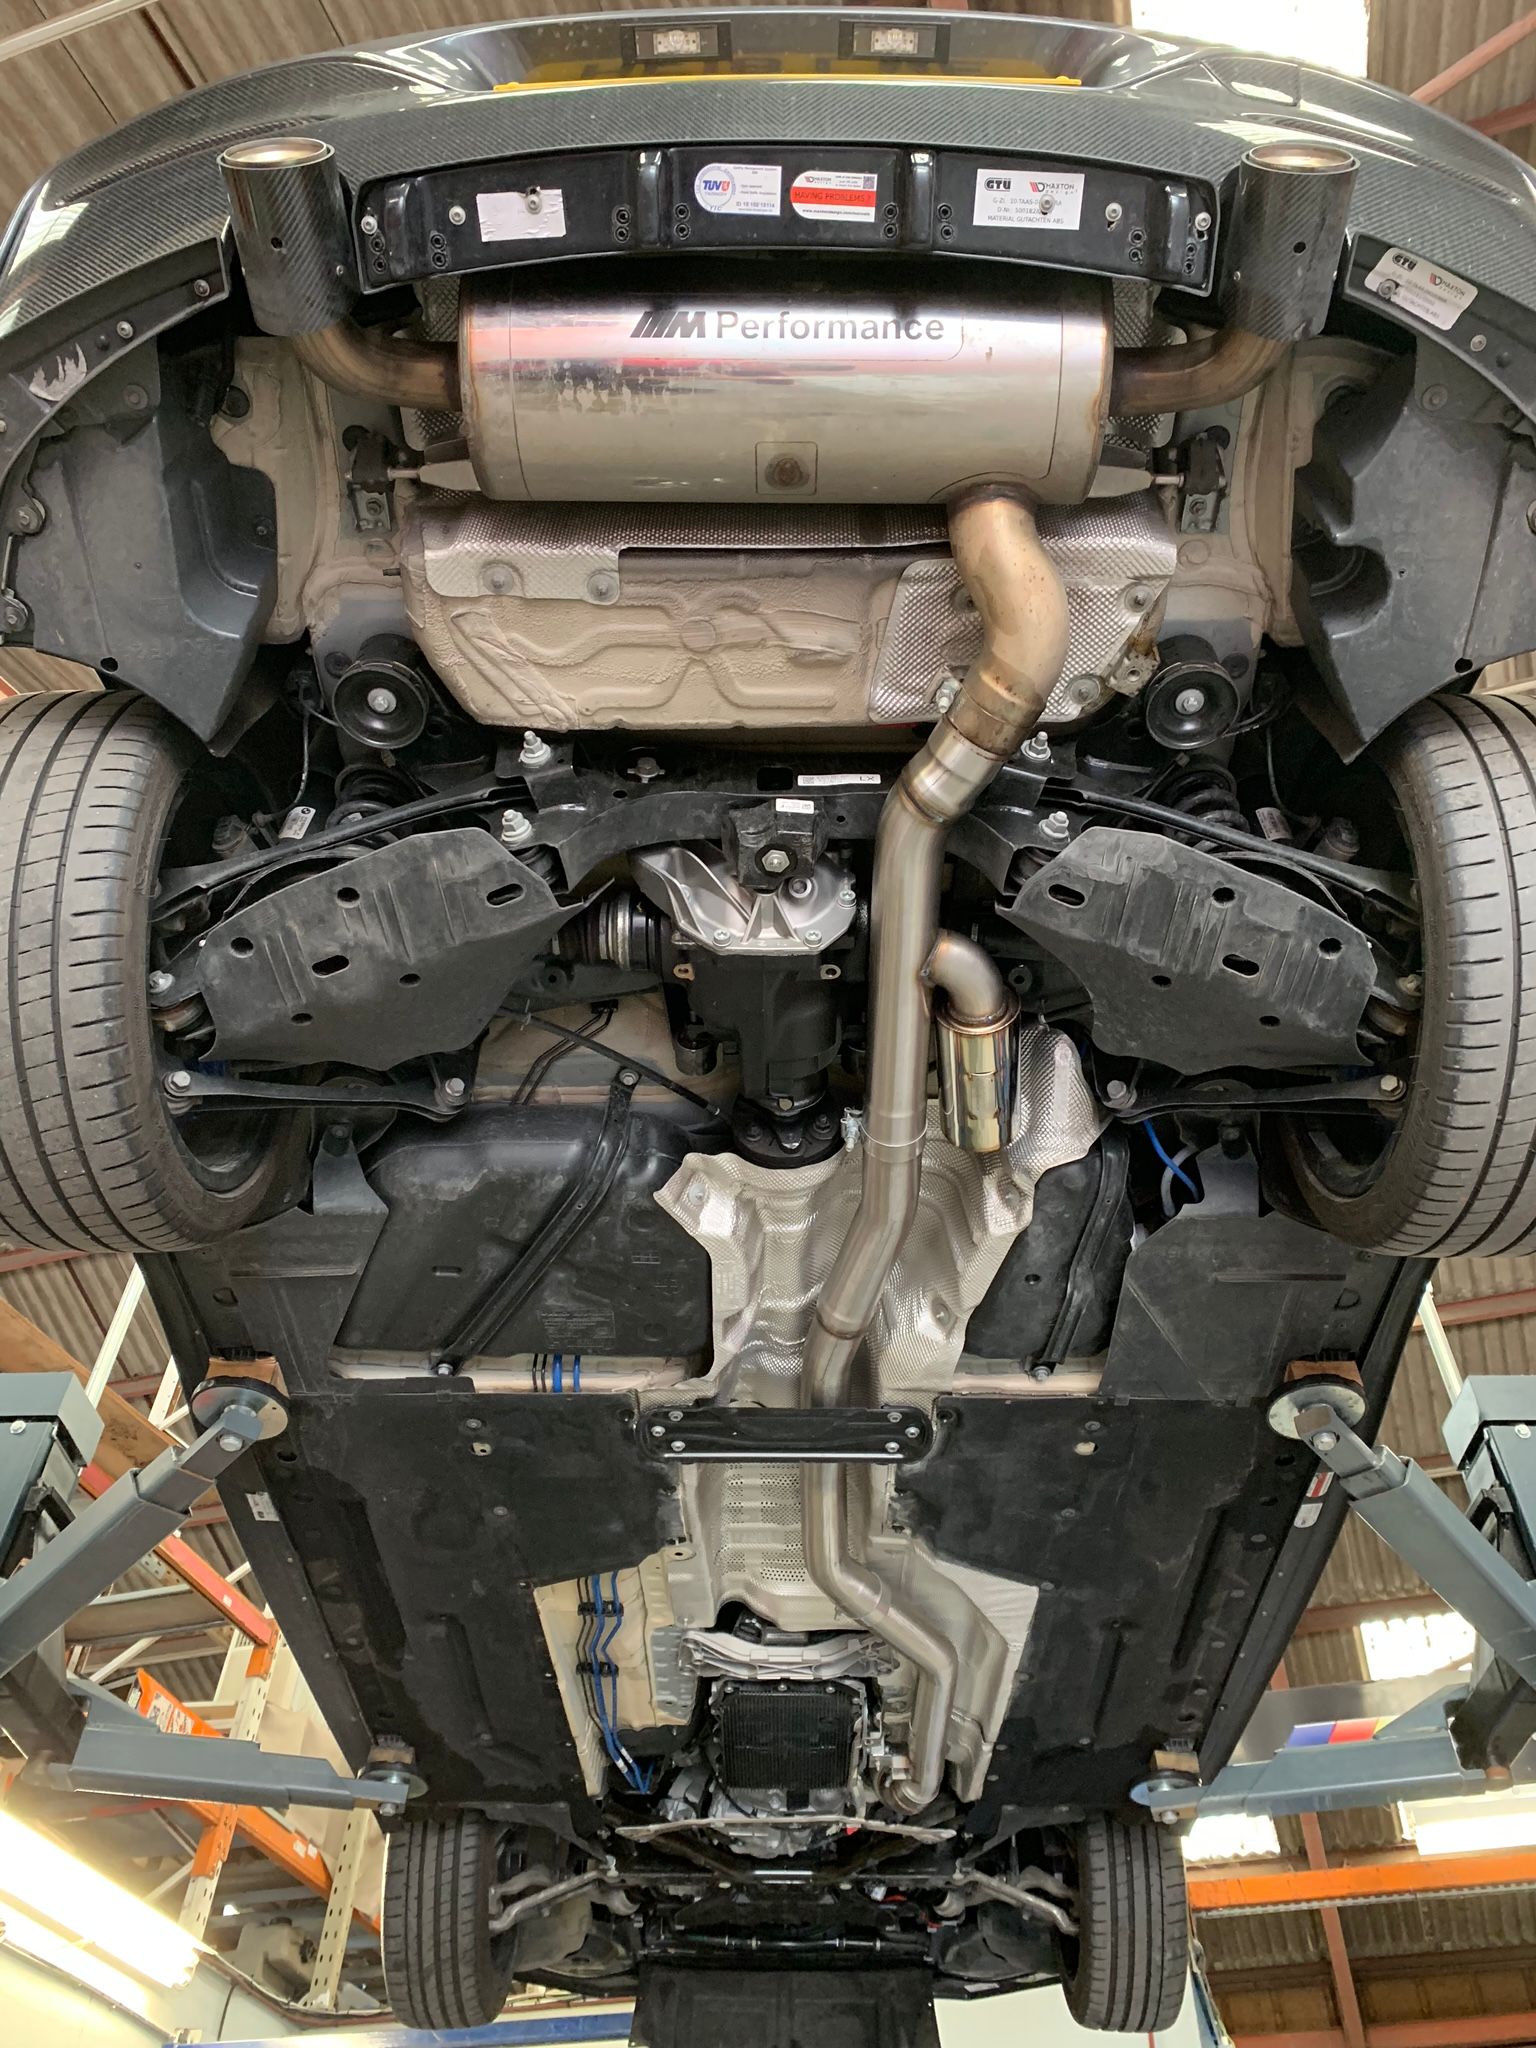
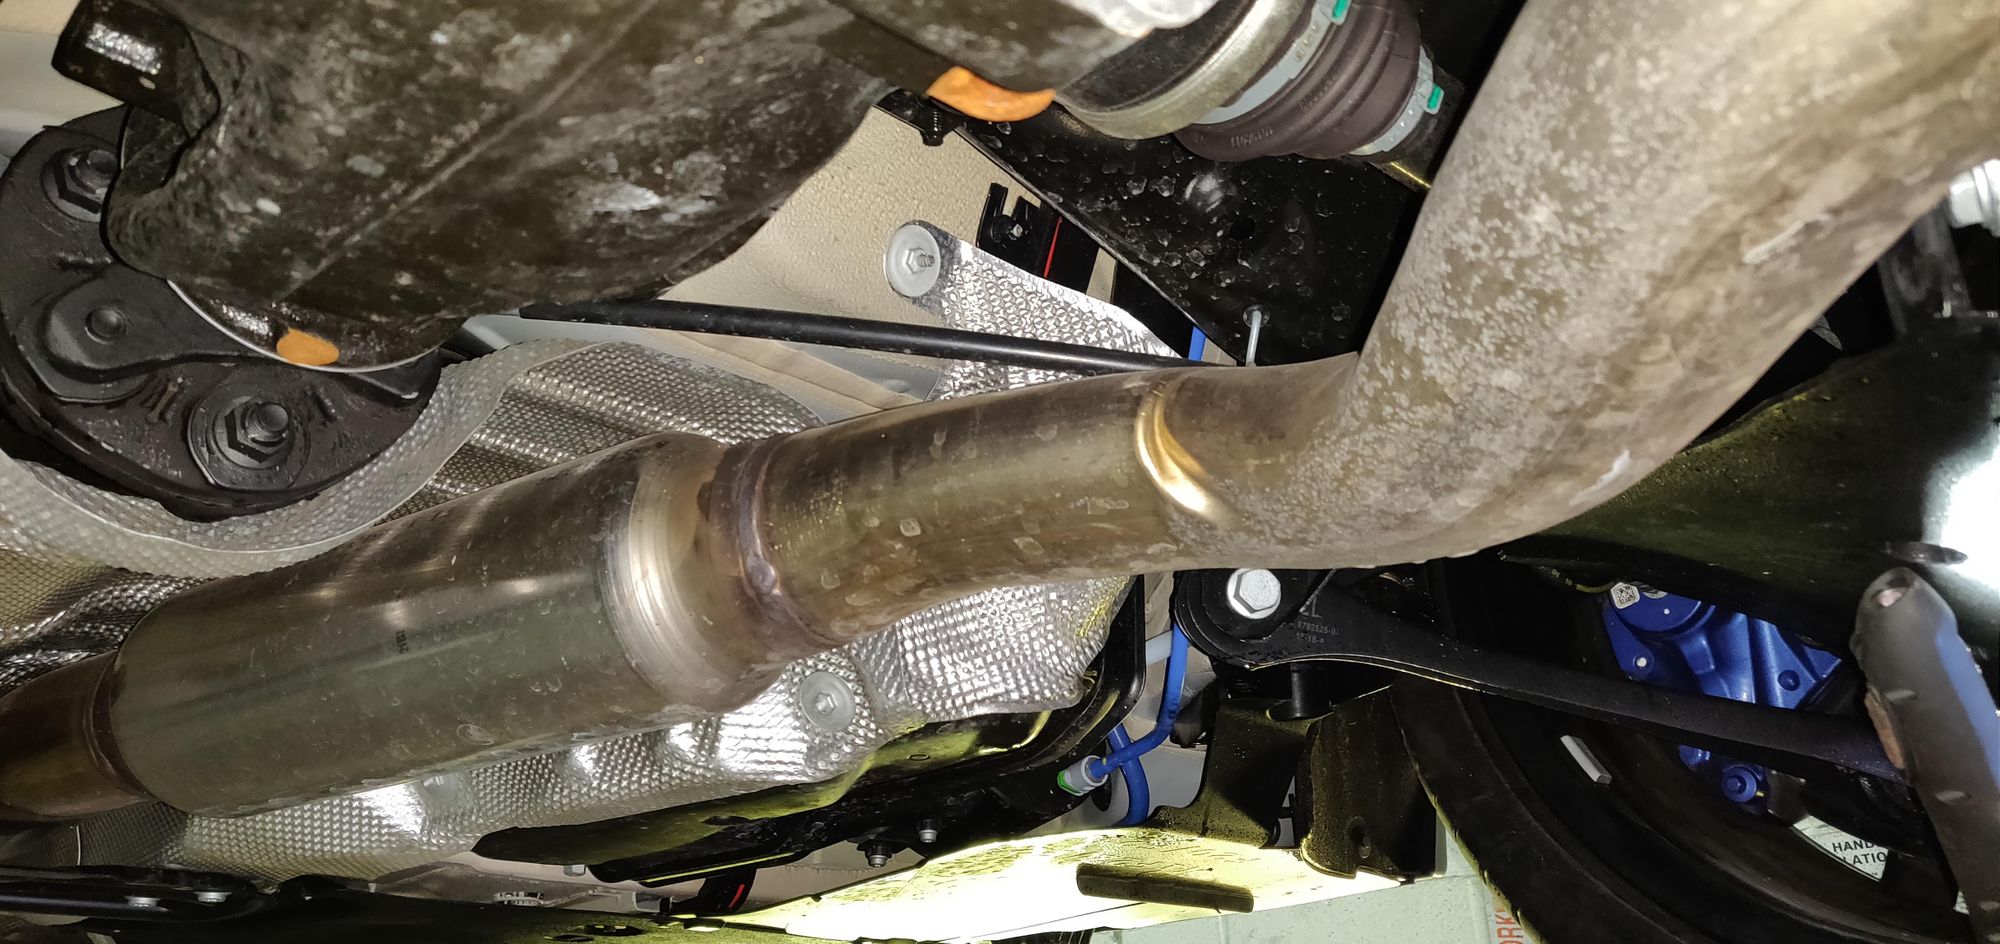
Starting at the bottom of the image, which is the front of the car, you can just see where the sports cat comes out from the back of the turbo. From there it's into the Powervalve system all the way until you can see the DDE branch off and then into the rear muffler. There are less turns, kinks and bends in the system and it's as straight as it can be from front to back, exactly what you want.
More to come!
With a few more cosmetic mods done in Part 3 it was finally time to get the last of the performance mods done too. With the full turbo-back exhaust system now installed and the new air intake already done in Part 2, the car is ready to start chasing bigger power numbers in the future. These mods will improve the performance of the car already as they're removing restrictions that the car can take advantage of, but the car needs to be tuned to see any big advantages.
Parts
Here's the list of parts used in Part 3 and where you can get them:
Powervalve Turbo-Back Exhaust with DDE
View all of the other blog posts here: The BMW M140i Project Series