
It's been a while since I published something about my car and it's another big post! I've talked about alcohol based fuels before, like my methanol injection post or my ethanol fuel blending post, but this time I'm going a little further. My car is going Flex-Fuel!
The Series
The last couple of posts have seen some cosmetic mods and info on how to read logs, and not much in the way of big changes to the car, but this post is going to make up for that! With what is actually a relatively small hardware change to the car, along with a little bit of software magic, things are going to get a whole lot more interesting.
Flex-Fuel
Depending on where you live in the World, you will either be very familiar with the idea of Flex-Fuel, or you'll be sat there wondering what it means. A Flex-Fuel Vehicle, often referred to as FFV, is a vehicle capable of taking a huge variation in the ethanol content of its fuel, without any modification or consideration being required. If you drive an FFV you can fill up with anything from E0 (Ethanol 0%) all the way up to E85 (Ethanol 85%) and not give it a single second of thought, the ECU will take care of everything for you and you don't have to blend your own fuel like this!
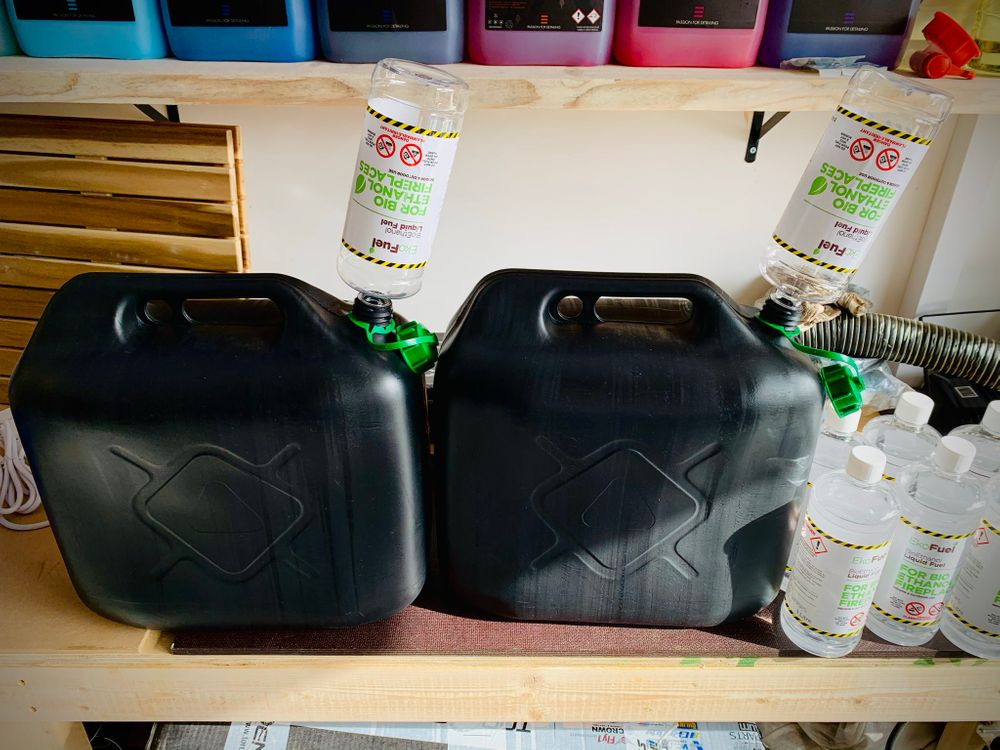
In 'Part 12 - Ethanol fuel blending!' I talked about how I tuned my car to run on E30 fuel, a very specific blend of 70% petrol (gasoline) and 30% ethanol (hence E30). My car, when tuned for E30, needs exactly E30 in the tank. Okay, E28 or E32 aren't going to cause much of a problem, but you certainly can't put E10 or E50 in! You can't put anything except E30 in the tank or bad things could happen. This is fine, and I can mix E30 and keep it at E30, but it takes away a lot of flexibility and introduces a burden for me to keep on top of the ethanol blend. Wouldn't it be great if you could just put whatever you like in your tank and the car would automatically take care of the rest?..
Ethanol Content Analyser
An ECA is a simple piece of kit that you can install in your low-pressure fuel line and it will do as the name suggests, it will measure the ethanol content of your fuel. Strictly speaking, an ECA is actually measuring the lack of petrol (gasoline), but if you have 70% petrol then it's safe to assume to other 30% is ethanol unless you've been filling the tank with something else like water or beer! You've been able to buy an ECA for a long time and you can pull up the reading on a smartphone app, but that's no use beyond checking that you got your blend right and if you're targeting something like E30, the ECA app on your phone can confirm you hit your target blend. I was confident enough in my blend though and I never felt the need to buy one because I wanted one that was integrated into the ECU and could be used in a much more dynamic way. Finally, after much waiting, ProTuningFreaks have released their Flex-Fuel kit for the B58 Gen-1, which includes an ECA that can feed data straight to the DME (Digital Motor Electronics, or ECU)!
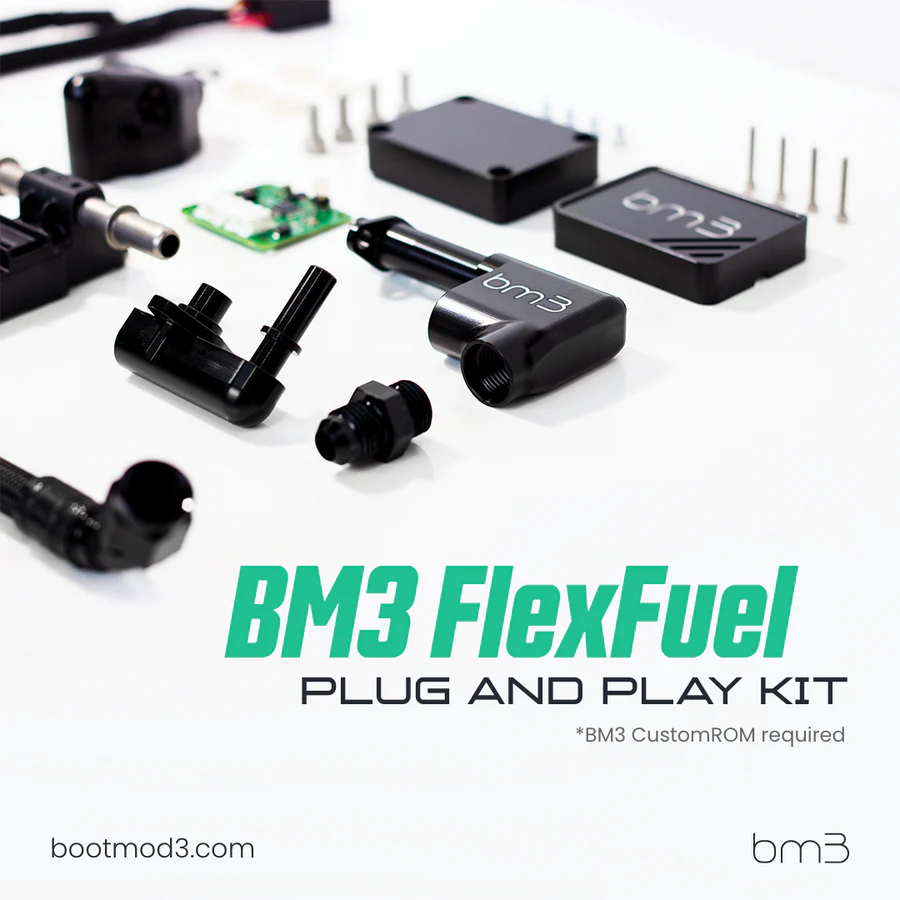
What comes in the kit
I bought the PTF Flex-Fuel kit, but for any kit that you buy, the components are going to be similar because the same functionality is required. PTF have this great diagram of the various components, of which there aren't too many.
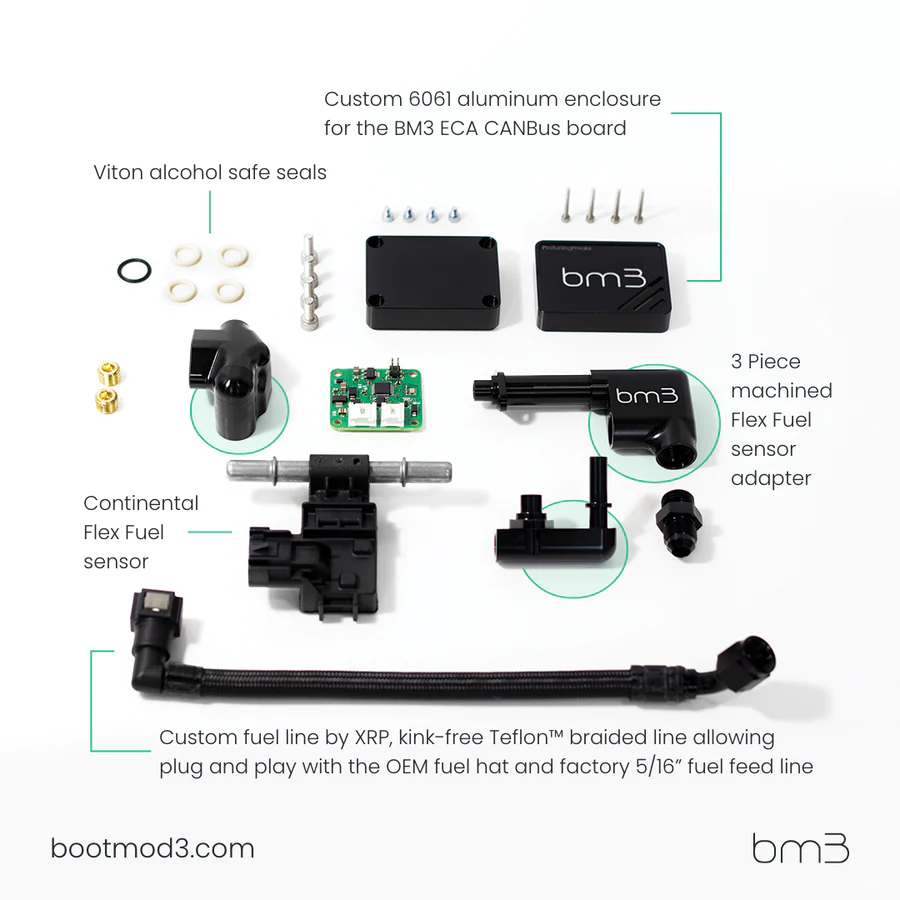
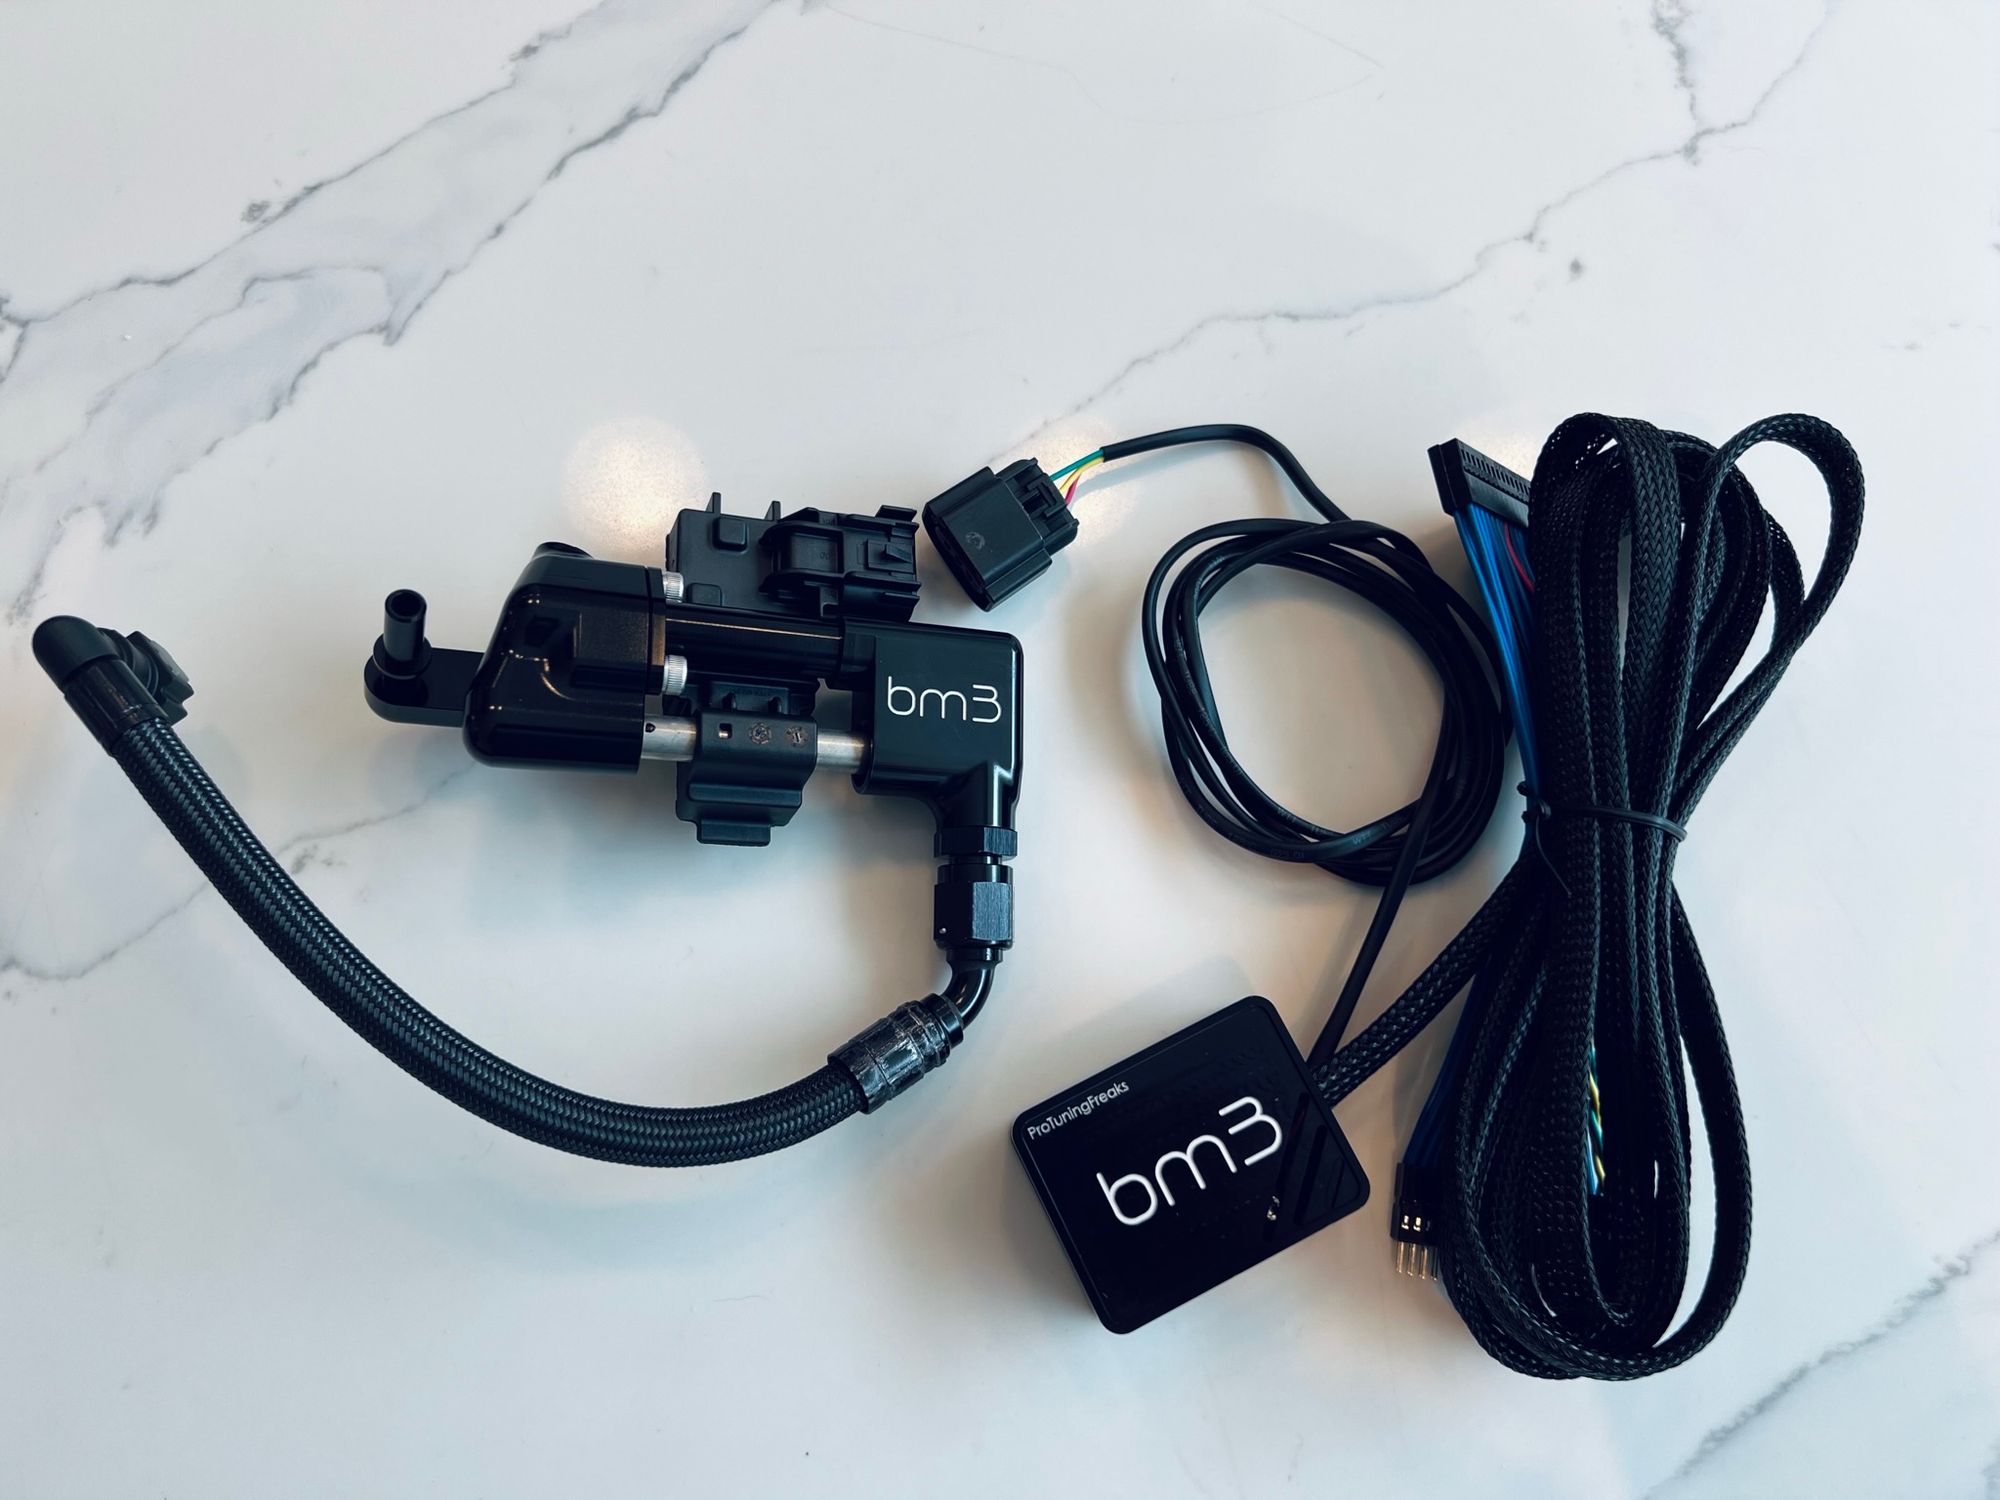
The ECA needs to sit in your fuel line to be able to sample your fuel, so there's generally the ECA (or Flex-Fuel Sensor) with a fuel line connector on each side, allowing it to sit in the middle.
Any kit that you buy will place the sensor between your Low-Pressure Fuel Pump (LPFP) and the High-Pressure Fuel Pump (HPFP) so it's always in the low pressure line. If we go back to my data logging blog post, we can see that the fuel pressure sensor in my low-pressure fuel lines was reading ~72 PSI at high load, which is a decent amount of pressure, but not too much to deal with. If we look at the pressure sensor in the high-pressure fuel line, between the HPFP and the injectors in the fuel rail, I'm seeing ~2,882 PSI at high load! That is an insane amount of pressure and if you're going to build a sensor to sample the fuel and handle the pressure, you're going to put it in the low-pressure line and not the high-pressure line for (hopefully now) obvious reasons!
Because the low-pressure line runs from the LPFP in the fuel tank at the rear of the car, all the way to the HPFP at front of the car, there are theoretically a lot of places an ECA could be installed. There are, however, only 2 places it makes sense to install it and that's at either end of the low-pressure fuel line because nobody is going to be able to reliably splice into a fuel line and install new connectors! That means any kit you get will either install on top of the fuel tank under the rear seat of the car, or, just before the HPFP in the engine bay. The kit I bought installs under the rear seat on top of the fuel tank.
Hardware Installation
Installing the ECA is really quick and simple so I'll cover that first. You need to lift up the rear bench and remove the seat bolster on the right hand side. Both of these items are just clipped into place and a gentle tug will remove them. After that, lift the carpet under the rear bench to reveal the fuel tank access hatch. With 5 x 10mm nuts, the access hatch lifts off and you can see the top of your fuel tank with the LPFP electrical connector that I've disconnected (orange arrow) and the fuel line (blue arrow) that runs under the car to the HPFP in the engine bay.
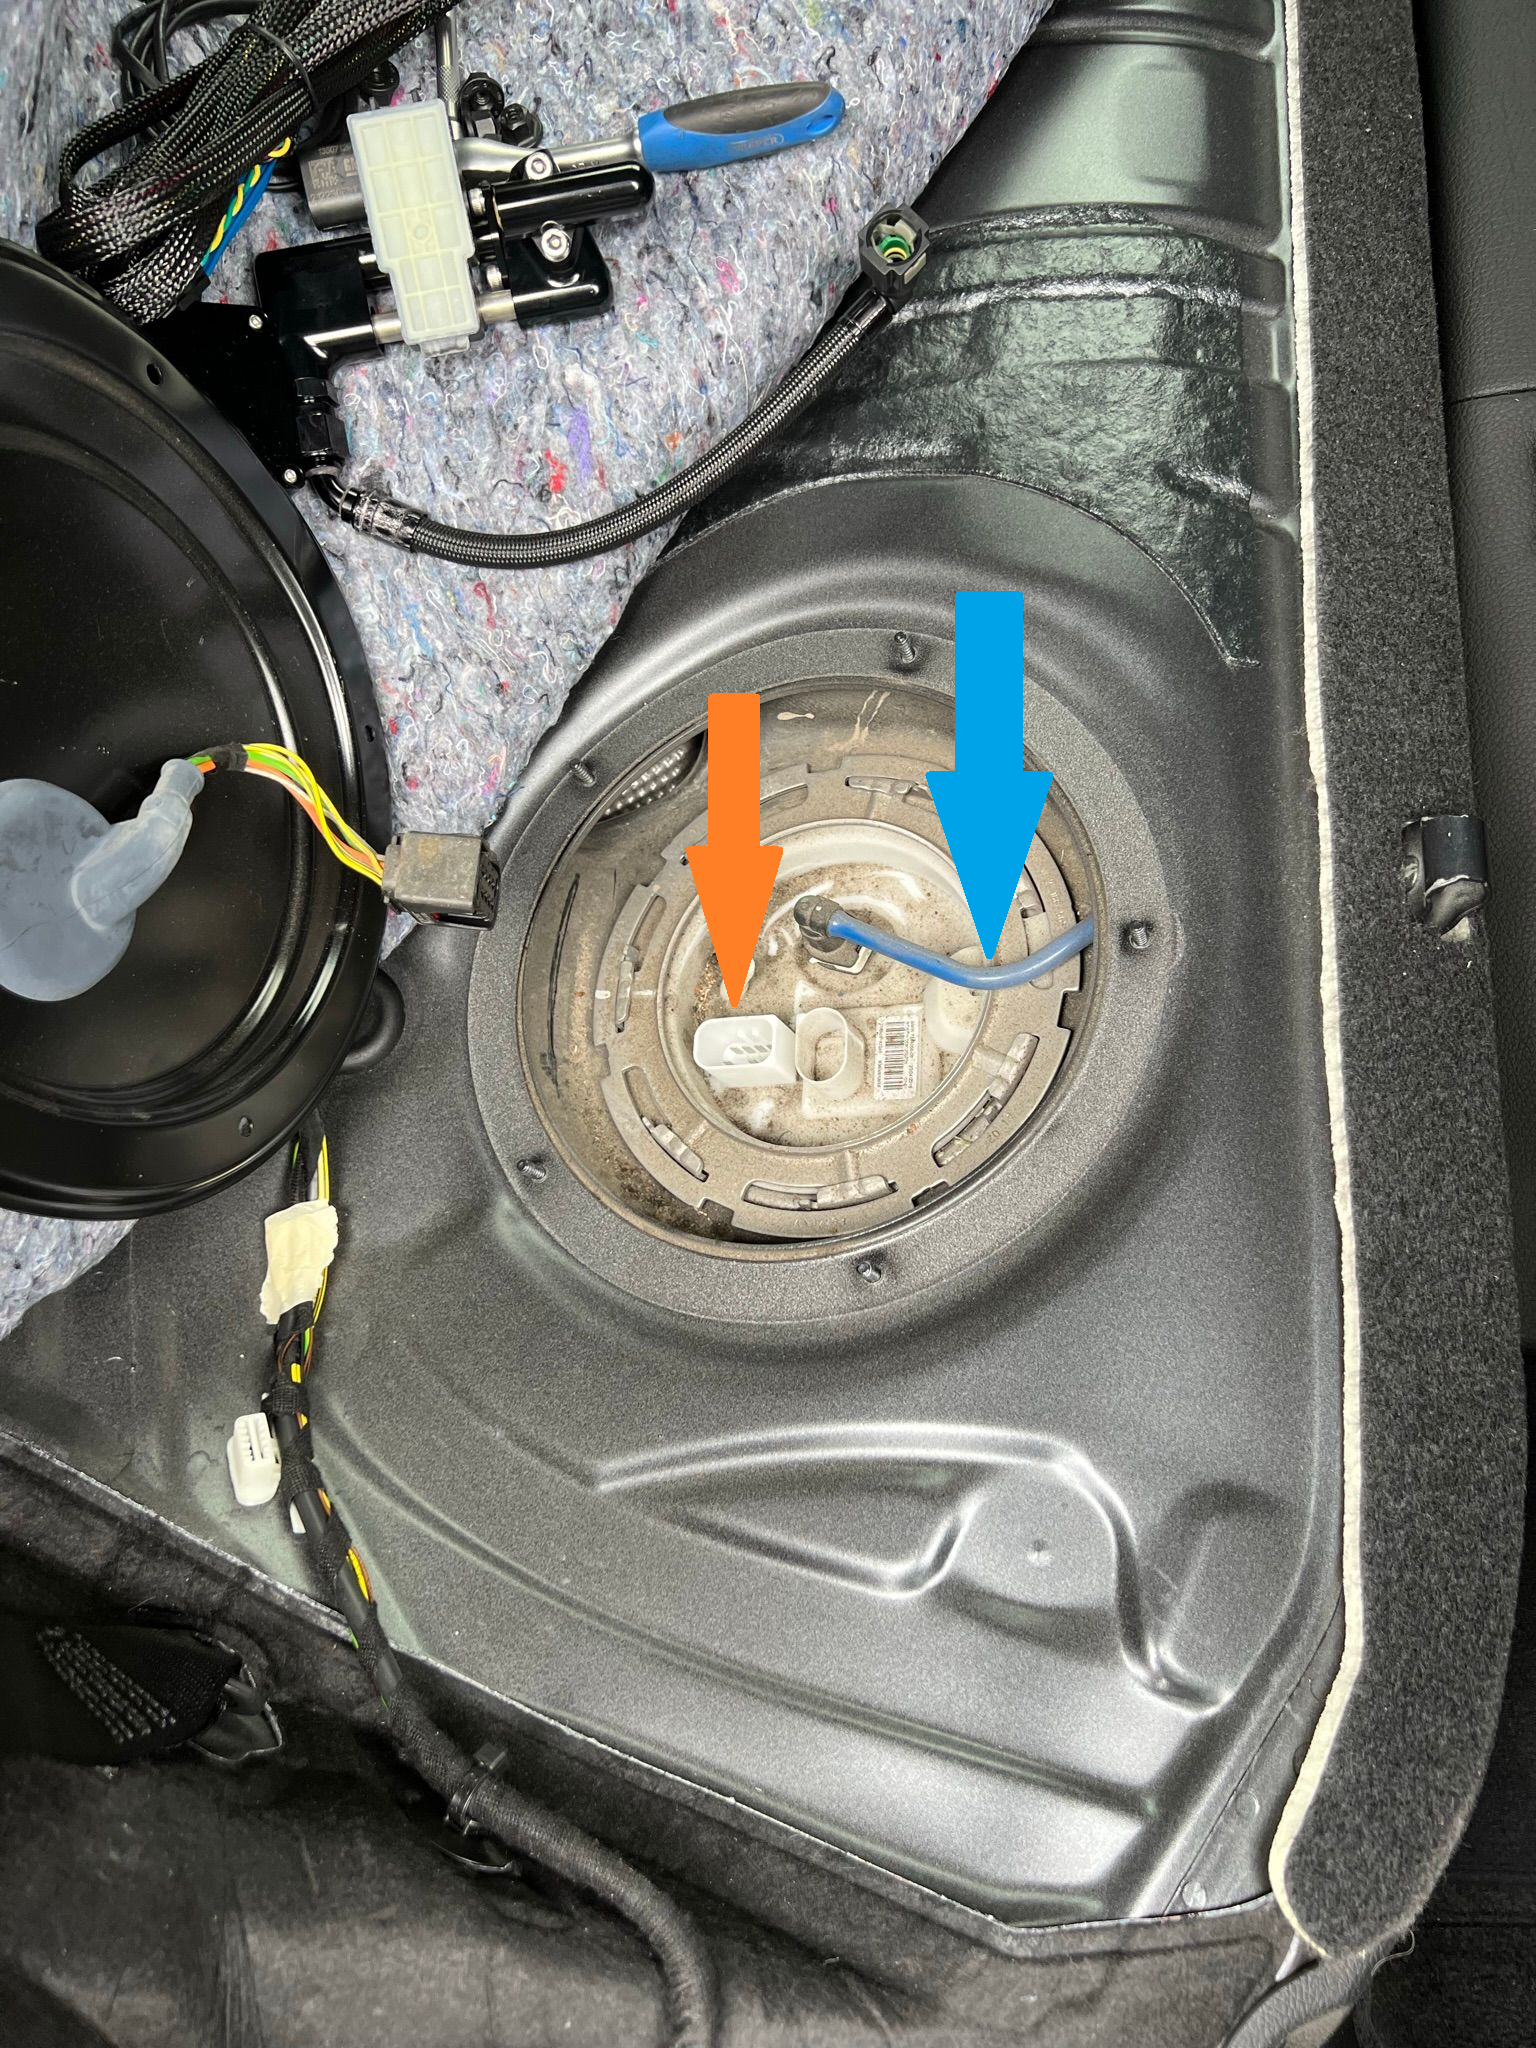
I disconnected the electrical connector in the above photo to give me more space, but you might not even need to do that. The blue fuel line will be disconnected from the LPFP and connected to the ECA. The ECA will then connect back to the LPFP. This means that fuel will flow from the LPFP into the ECA and then through the blue fuel line as normal, allowing the ECA to read the ethanol content of the fuel on the way through.
You're going from this:
LPFP --> Blue Fuel Line --> HPFPTo this:
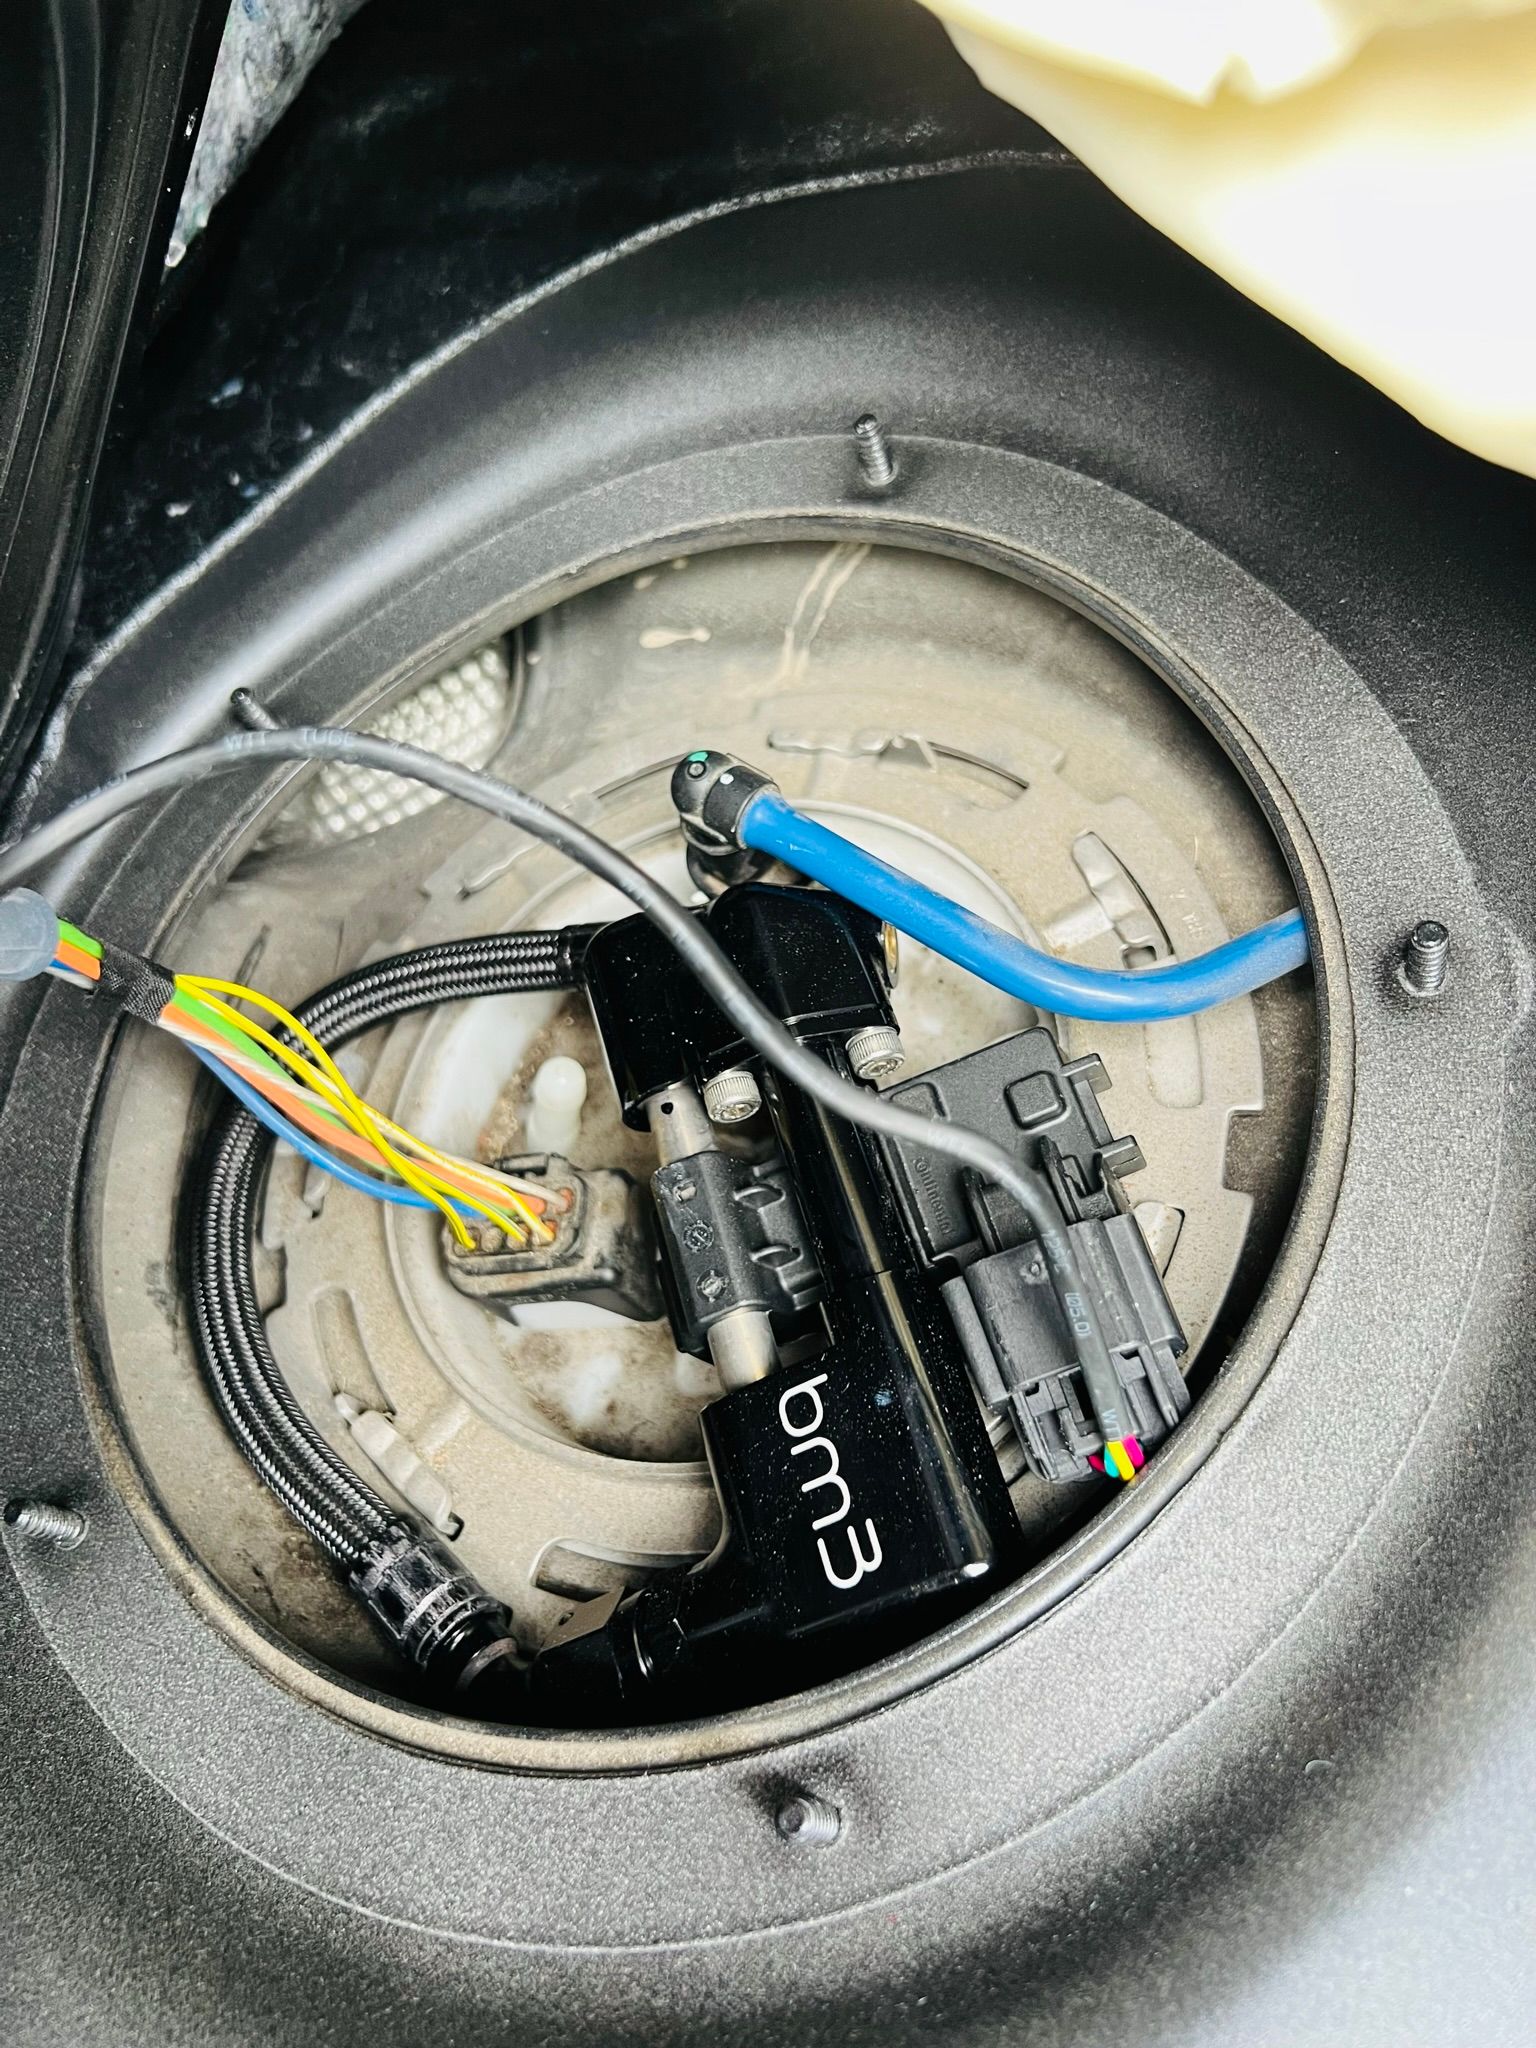
LPFP --> ECA --> Blue Fuel Line --> HPFPHave a cloth/rag ready for when you disconnect the fuel line as some will leak out and then clip the fuel line onto the ECA. You just squeeze the tabs on the fuel line to release it and then push it until it clicks on the ECA. Next, just push the fuel line from the ECA back onto the LPFP until it clicks. Here's what it will look like after the ECA is installed.
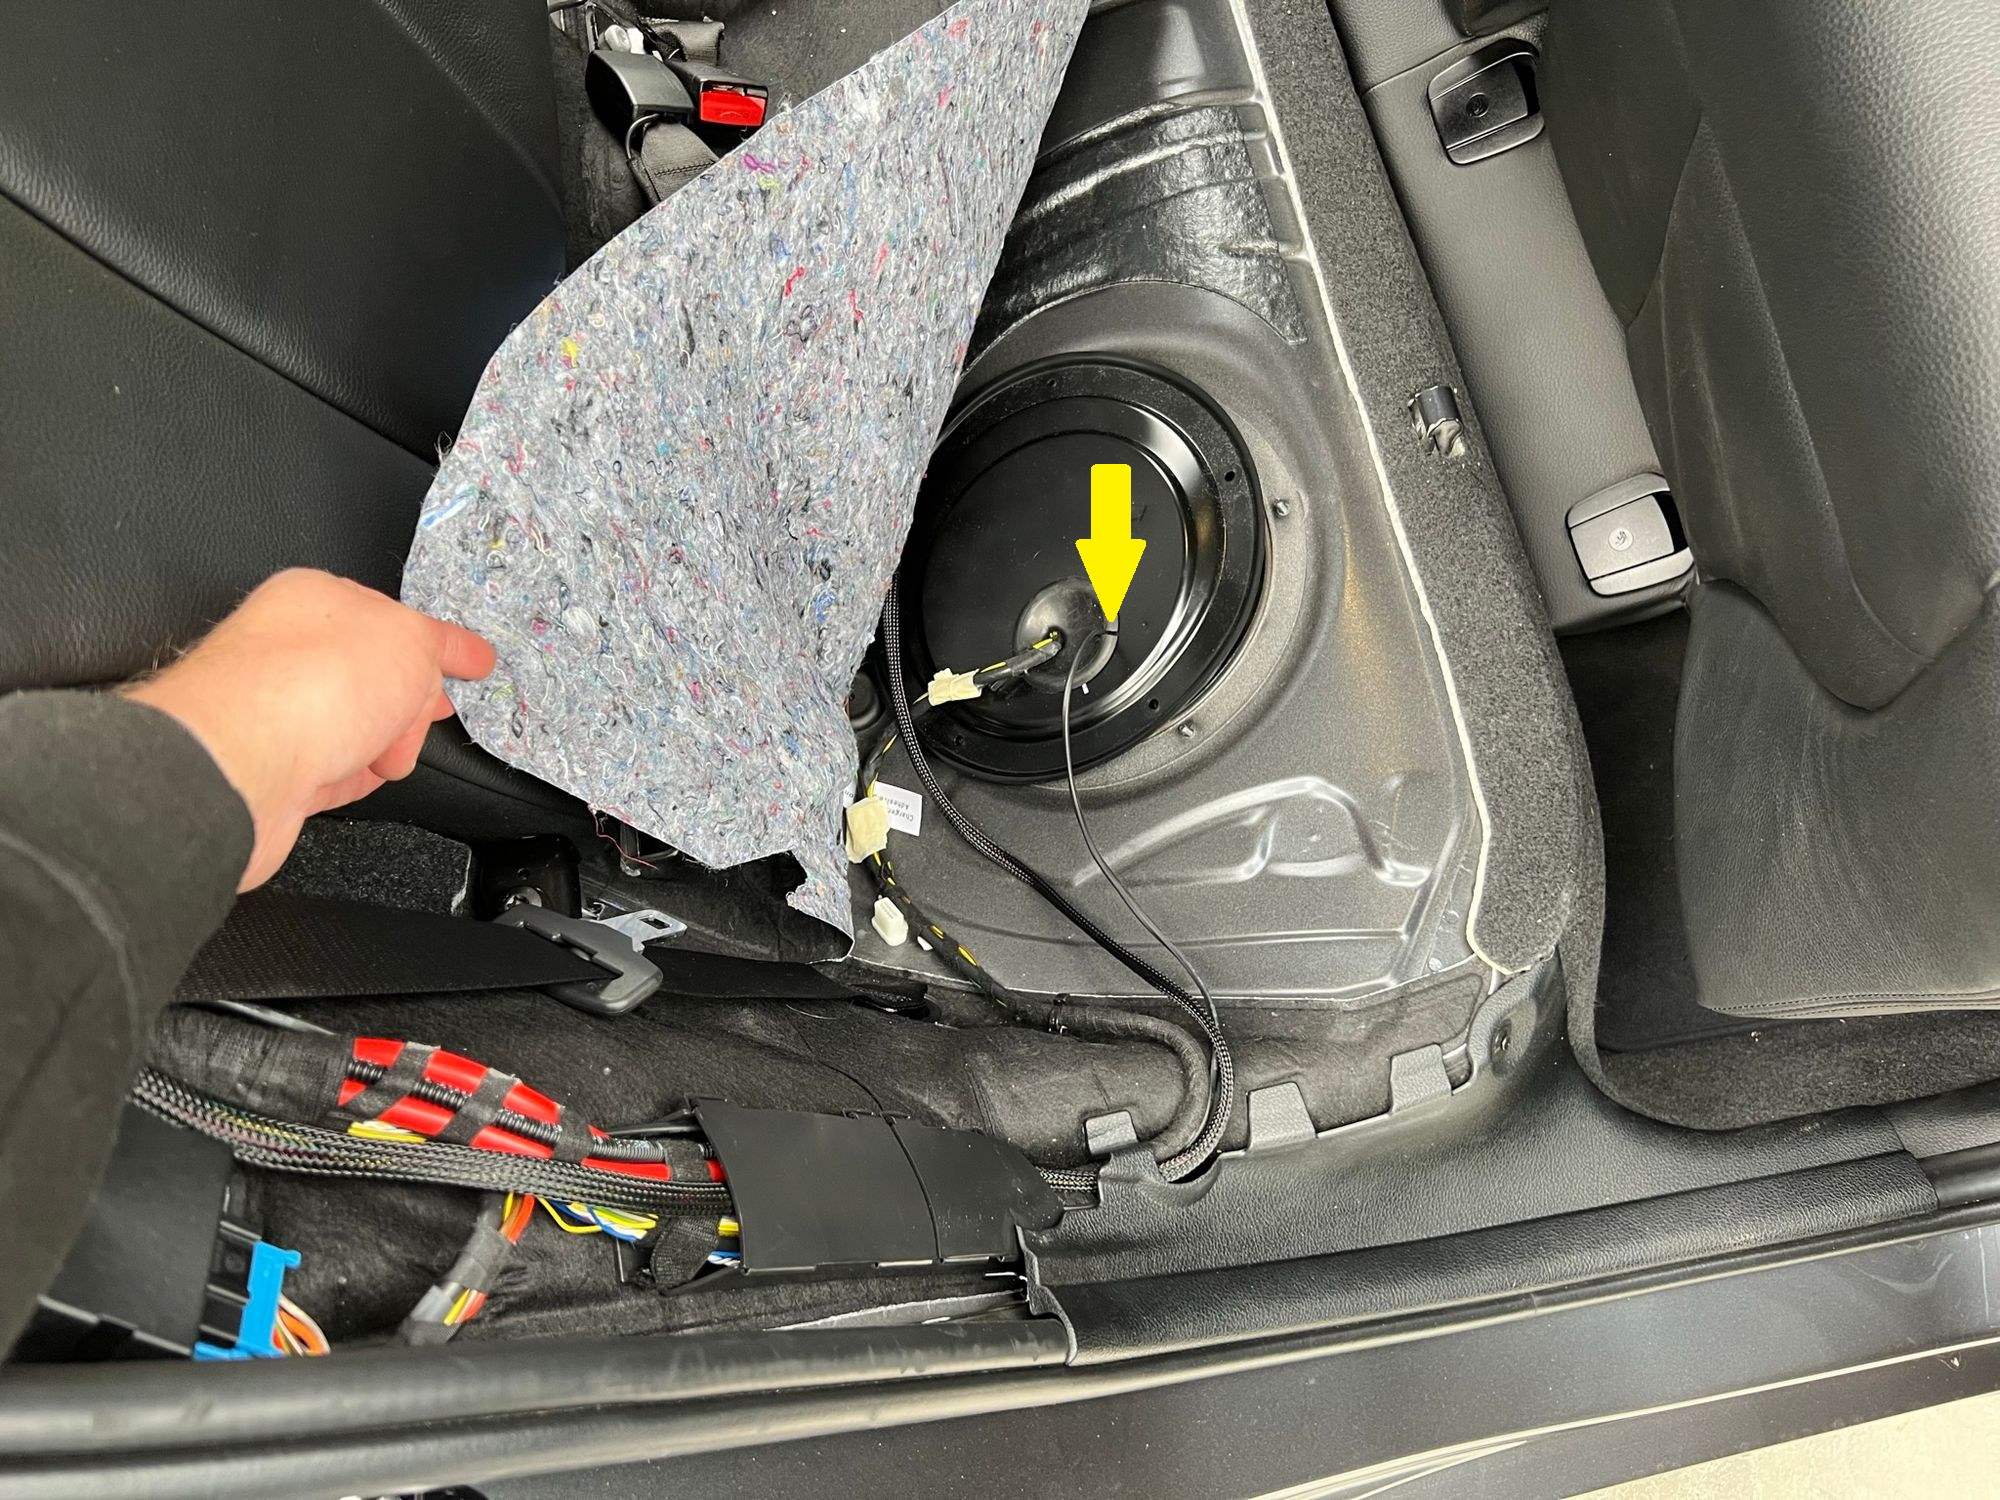
You need to make a small cut in the rubber grommet so your new electrical connector from the ECA can pass through alongside the existing electrical connector and then re-install the cover on the access hatch. You can see mine mostly assembled here with the small cut (yellow arrow) that I made to pass the new electrical wire through. The hatch just needs the 5 x 10mm nuts installing and this part is done.
The small electronic control unit that comes with the kit needs a place to live and I tucked mine up behind where the seat bolster is. There's plenty of cable to reach here, it's completely out of the way and there's even a perfect little space for it.
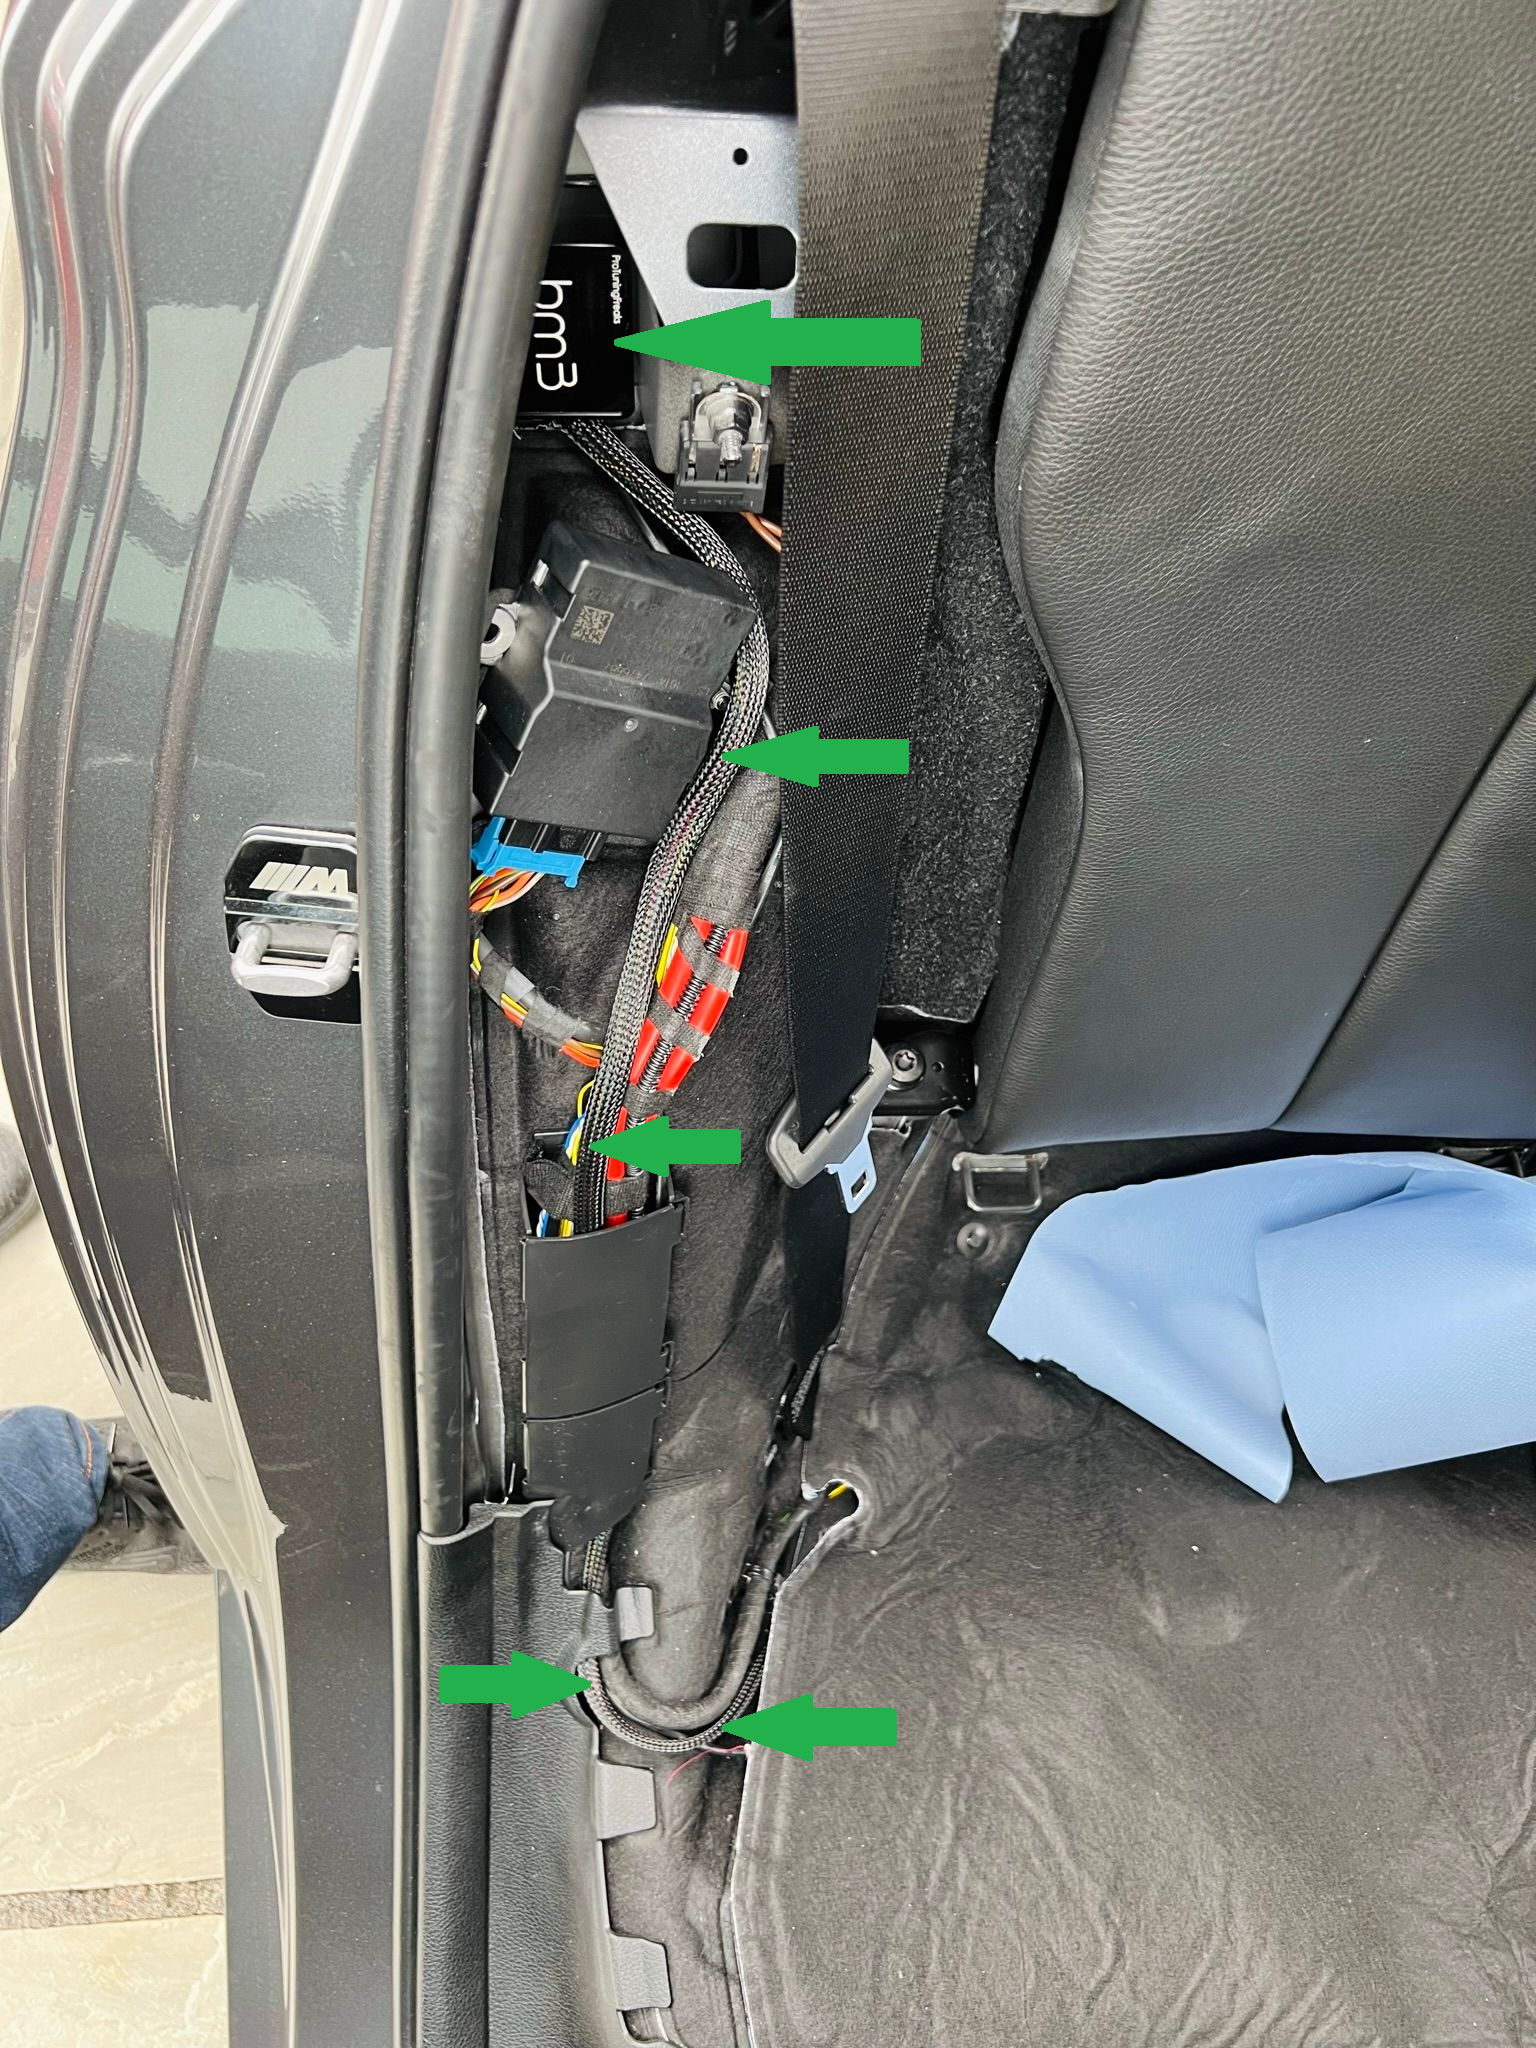
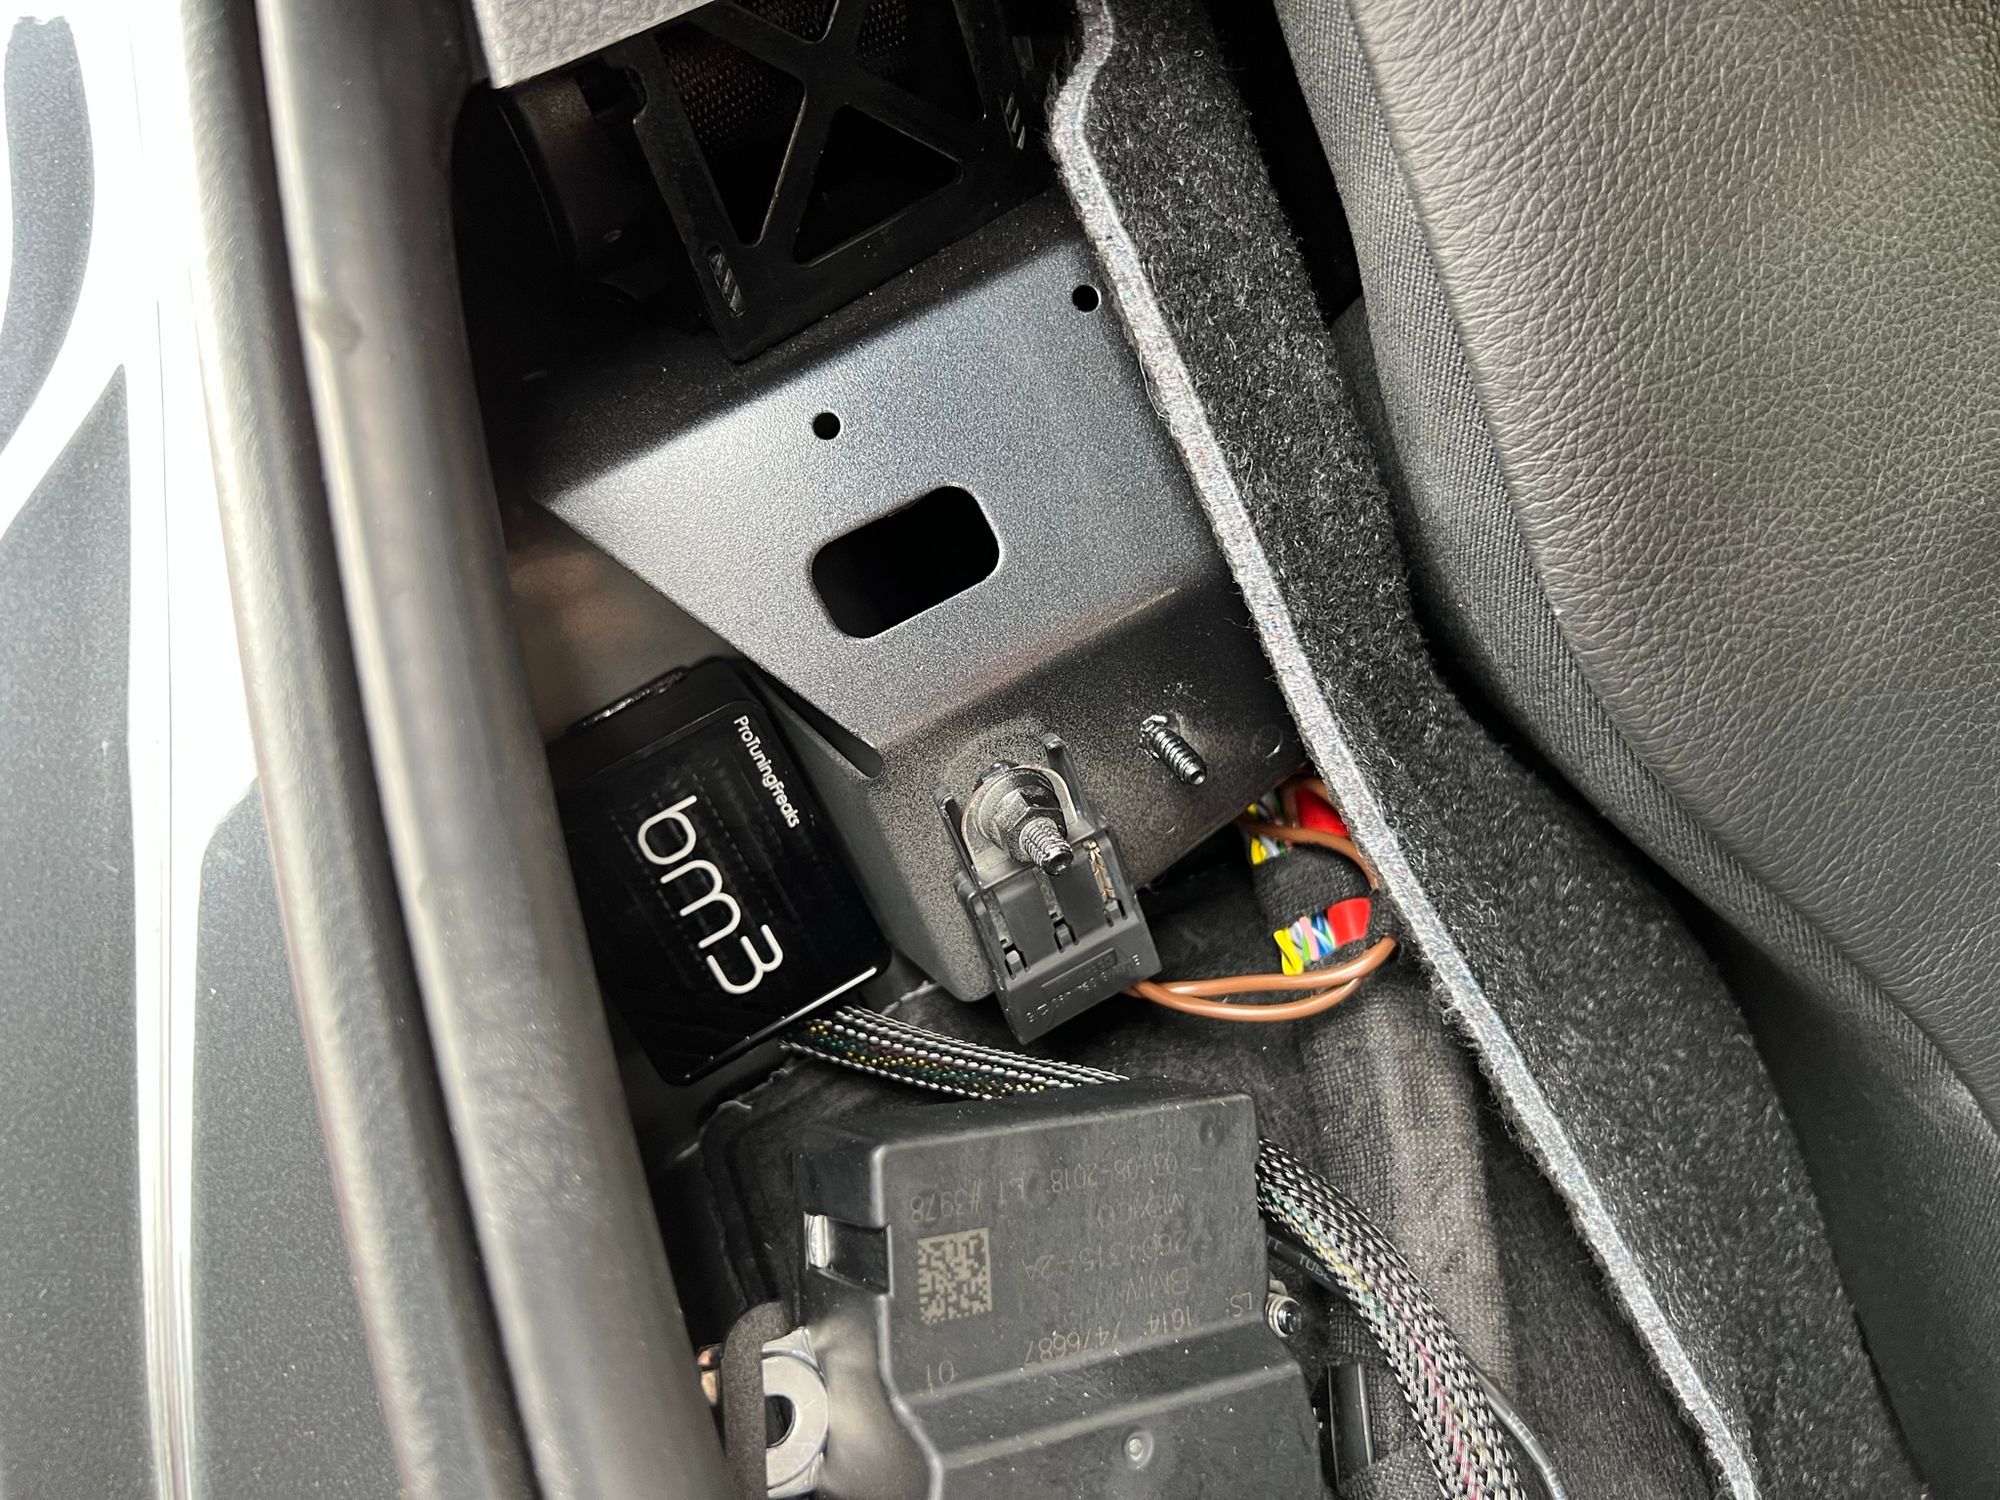
The wiring tucks into the existing trunking and goes down under the seat completely out of sight and that's the first half of the installation complete! The next half is running a single cable, but it does need to be run to the Front Electronics Module (FEM) located in the front passenger footwell of the car. Now, because I live in the UK and my car is Right-Hand Drive and not Left-Hand Drive, the 'passenger' footwell isn't on the right side, it's on the left, which is further away from where we are in the right-rear corner of the car. This meant that I needed to extend the cables for my kit as it's designed for an LHD car. I gave this feedback to PTF and they're going to update the wiring harness for future RHD orders using the new measurements that I gave them, nice! Here's the installation video showing where I ran my wires and you can refer to the PTF installation manual for specifics on which connector you're connecting to when you get there.
Here’s a video I made for the manufacturer with some details so they can make an LHD harness but I trimmed out the interesting bits! pic.twitter.com/zBeRJgmwCg
— Scott Helme (@Scott_Helme) June 30, 2022
Here's a photo of the connector and it's simply a case of unplugging the connector, swapping over the pins, and plugging it back in. It's a little fiddly, but it's really easy and a direct swap of parts. All of the time for this part of the job is spent removing and installing trim panels to hide the wire, actually connecting the wire takes about 30 seconds!
This is the OEM connector the ECA controller piggybacks into (big arrow), it’s known as the FEM (Front Electronics Module). Just a case of popping some pins out, splitting off them and connecting it back together.
— Scott Helme (@Scott_Helme) June 30, 2022
Small arrow is a different tap for another project. pic.twitter.com/HtMuKCxFcF
This is how the ECA will now feed the data about ethanol content in the fuel to the DME, via the CANBUS, and the DME can then respond dynamically to the reading, once you have the software in place to allow it to do so. For such an awesome modification and the potential it unlocks, it's surprisingly simple in concept and installation.
Software Installation
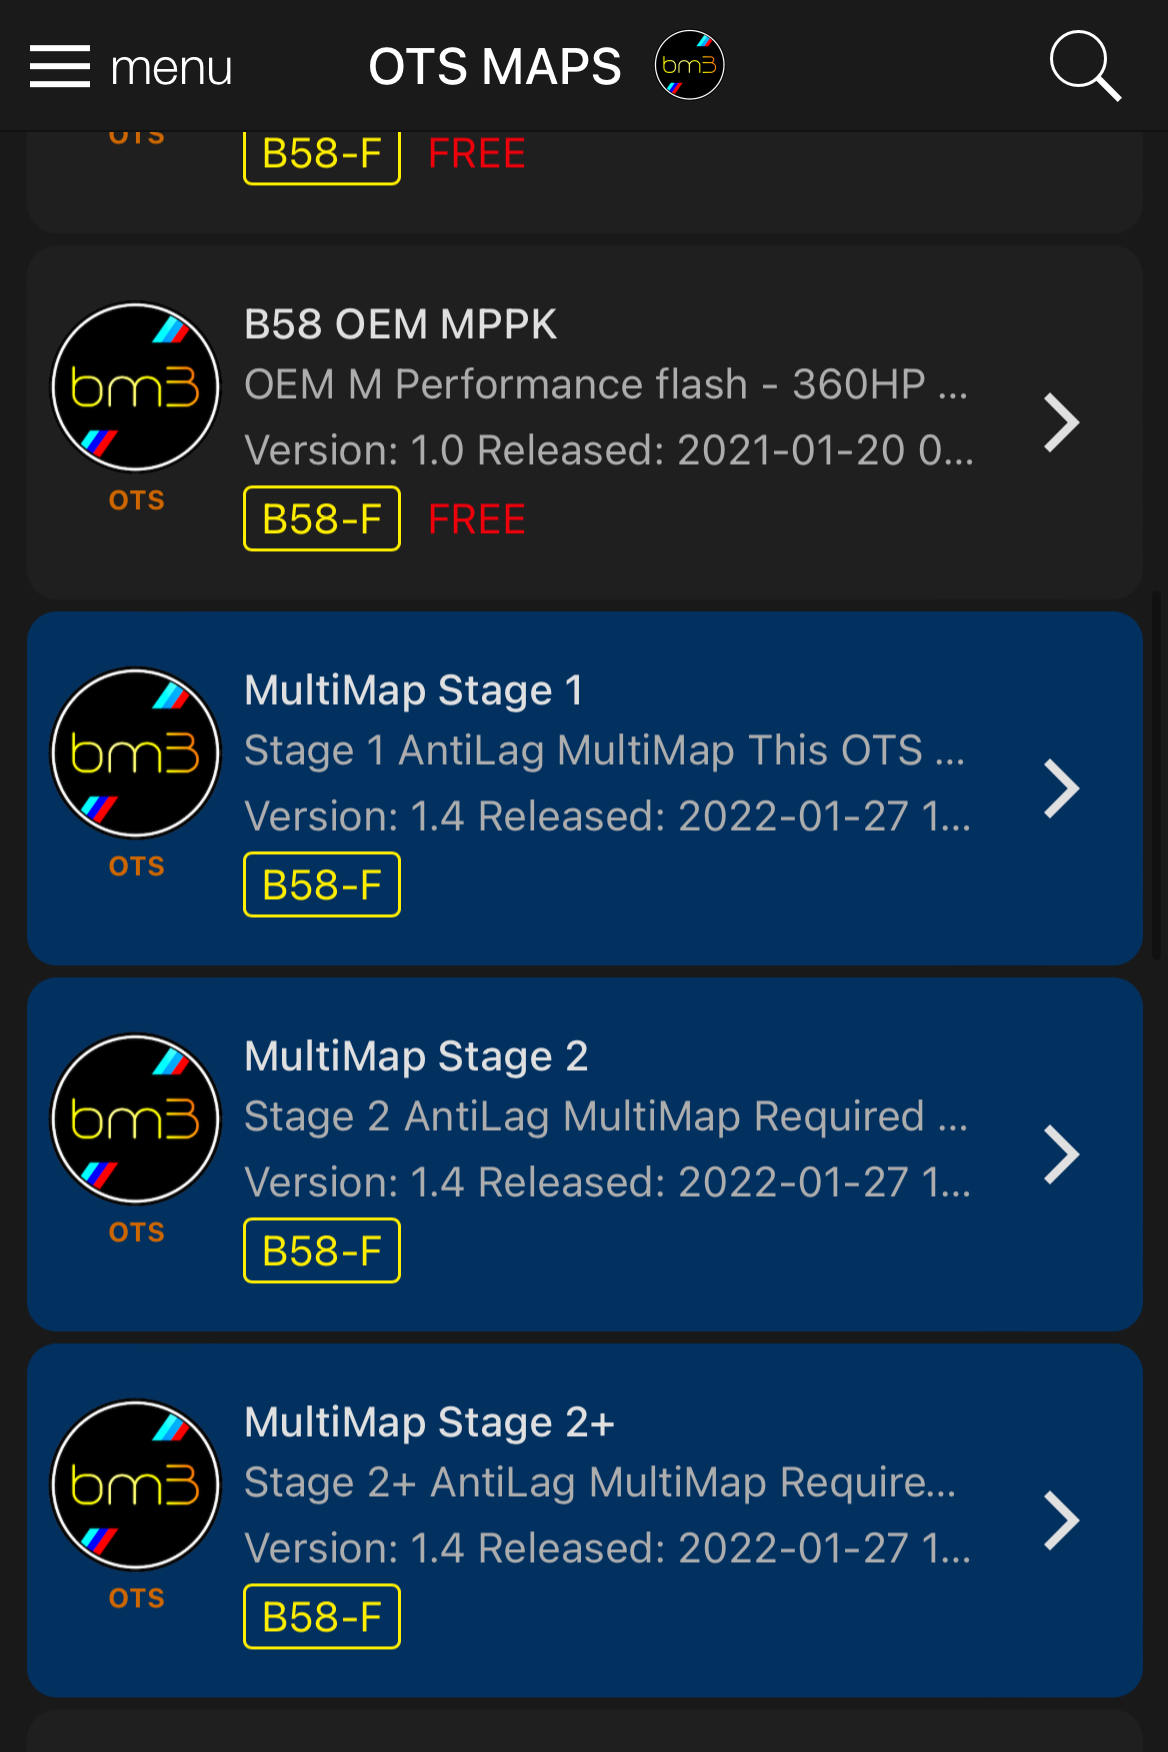
Just like any other time you'd flash a map onto your car with the BM3 app, this time is no different. Head to the OTS Maps section and you can see the new 'MultiMap' maps highlighted in blue.
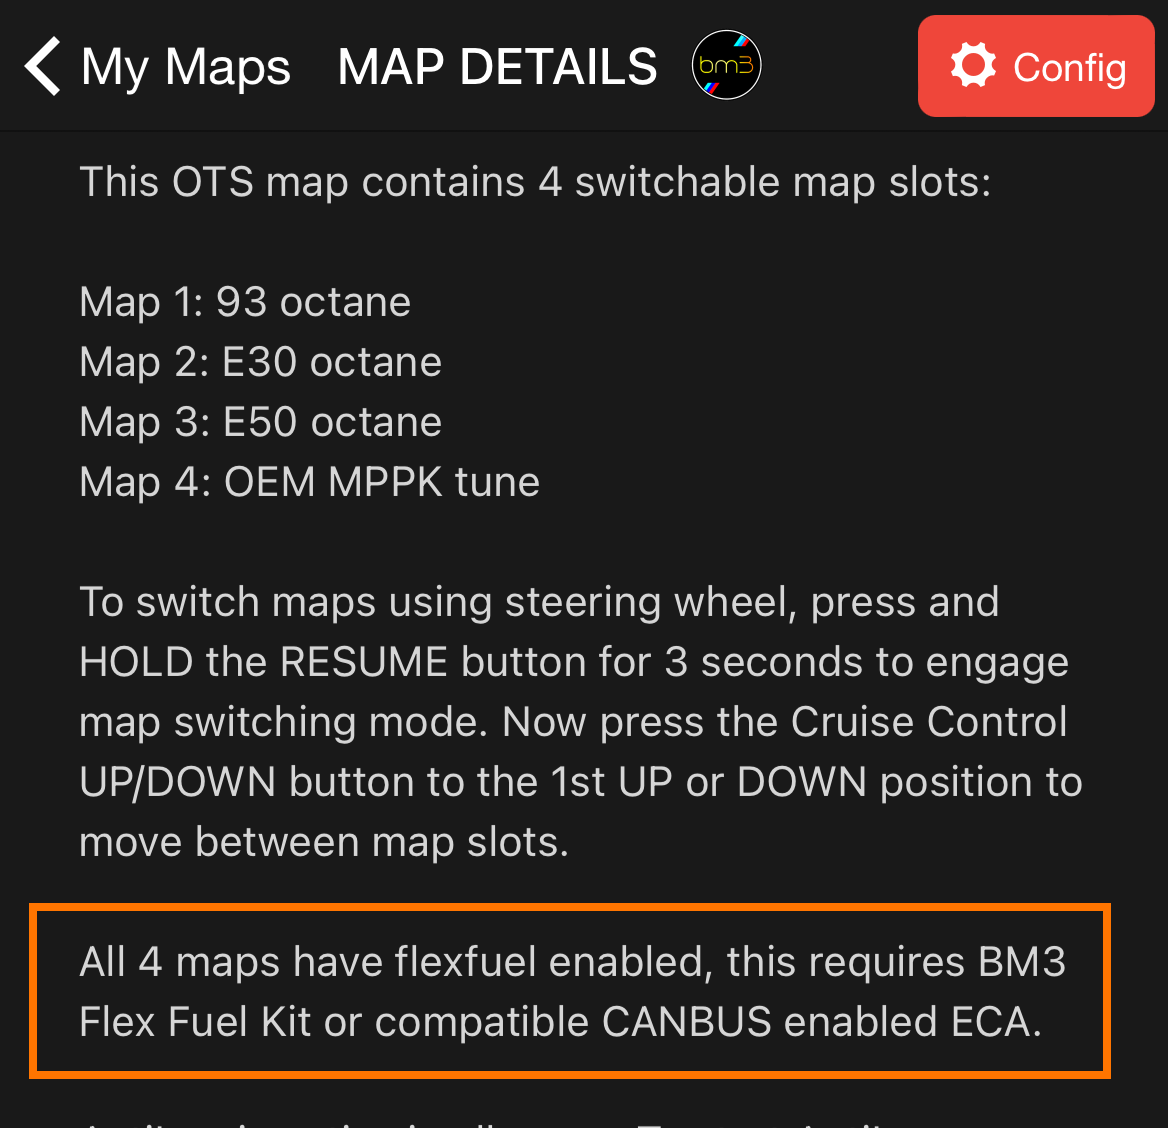
Pick the appropriate map for your car, I'm on Stage 2+, and add it to your maps. The important thing you're looking for is in the map description where it states that Flex-Fuel is enabled on this map and you now have the necessary hardware installed!
Flash the map as normal and that's literally it, you're ready to go! If you want to see what the ethanol reading is for your current fuel, you can do it with just the cruise control button and the rev counter. This is seriously awesome and I can't even explain how bloody awesome this is! PTF have hooked into the cruise control button so you can get a reading from the ECA right here on the dash!
Here’s another vid showing the integration into the OEM controls, I can’t stress how awesome that is! pic.twitter.com/YSnTOyACkI
— Scott Helme (@Scott_Helme) June 30, 2022
Want to know if it's really working? Just throw some more ethanol in the tank!!!
There’s only one way to test it, moar ethanol!!! 🌽🌽🌽 pic.twitter.com/JDrOZR0xd6
— Scott Helme (@Scott_Helme) June 30, 2022
Give it a couple of minutes to mix in and get through the LPFP into the ECA and then you can check again and literally watch the ethanol content reading go up!!
The proof! It only takes a minute or two for the ethanol content to start rising 😎 pic.twitter.com/PHVAqrgLVx
— Scott Helme (@Scott_Helme) June 30, 2022
The thing I've absolutely been looking forward to the most is that I now don't need to be careful or precise with my blends and I can fill up with E5, E10, E85 or E-whatever-I-want and not have to re-flash the car either! Here's a demo I did after topping up a little on ethanol and then filling the rest up with standard fuel to pull the E content back down.
Did a quick before and after adding some fuel today and you can see the difference in ethanol content. This is a seriously cool bit of kit! pic.twitter.com/Gpi1eUlLwx
— Scott Helme (@Scott_Helme) June 30, 2022
And after! There’s a maximum of 5% ethanol in 99RON fuel so topping up with that really lowers the E rating. pic.twitter.com/D95mvG1PMQ
— Scott Helme (@Scott_Helme) June 30, 2022
The Benefits
The main benefit for me is sheer convenience and flexibility. No measuring of fuel or ethanol, no re-flashing the car, no worrying about if your blend is accurate. I can now do what I did before and just pump fuel into the tank and drive the car knowing that the DME will take care of everything else for me.
I'm a little annoyed that we still don't have any availability of E85 here in the UK, but if you have it available where you are then a Flex-Fuel conversion should be top of your list of things to do. On my next road trip into Europe I will certainly be filling up exclusively on the E85 corn juice!! 🌽🌽🌽
The Drawbacks
There are many people out there that are really critical of ethanol blended fuel and the UK press have certainly pumped out their fair share of articles about how bad E5 and E10 are for your car, which is pretty funny when you consider the blends I'm running! If you want my view on the benefits of ethanol blended fuel (and I have no concern over any drawbacks) you can read Part 12 of my series which goes into them all in great detail. Of course, if your car is only rated for E10 you should only run it on a maximum of E10, and something like E30 or E85 is going to cause problems, but as long as you stay within the capabilities of your car, you're good to go, and my car now has much greater capabilities. If you want more flexibility like me, Flex-Fuel is the way to go and I'm now good to go on anything up to E100!!! 😎
Parts
Here's the list of parts used in Part 16 and where you can get them:
View all of the other blog posts here: The BMW M140i Project Series