
It's pretty easy to get a basic CSP setup and issued on your site, but tightening up the policy can be tricky. To benefit from protection against XSS attacks you need to potentially disable inline script which could mean some pretty significant changes for your site. In this blog I'm going to walk through how I locked down the CSP on report-uri.
The original policy
The original Content Security Policy (CSP) on https://report-uri.io looked like this:
Content-Security-Policy: default-src https: data: 'unsafe-inline' 'unsafe-eval'
This is a really basic CSP and all it actually does is prevent any assets being loaded using HTTP. The default-src directive specifies that we are only allowed to use https:, we can load from the data: URI and we allow unsafe-inline and unsafe-eval for things like scripts and styles. This isn't so good as the unsafe-inline puts us at risk of XSS attacks and an attacker could load malicious assets from any domain as long as it used the https: scheme. We need to lock this policy down and here's how you can do it using https://report-uri.io.
Building a CSP
I've built a nice little tool to help you go through the process of building your CSP and you can find it here https://report-uri.io/home/generate. I'm going to be walking through the process of building my CSP from start to finish and using this tool along the way.
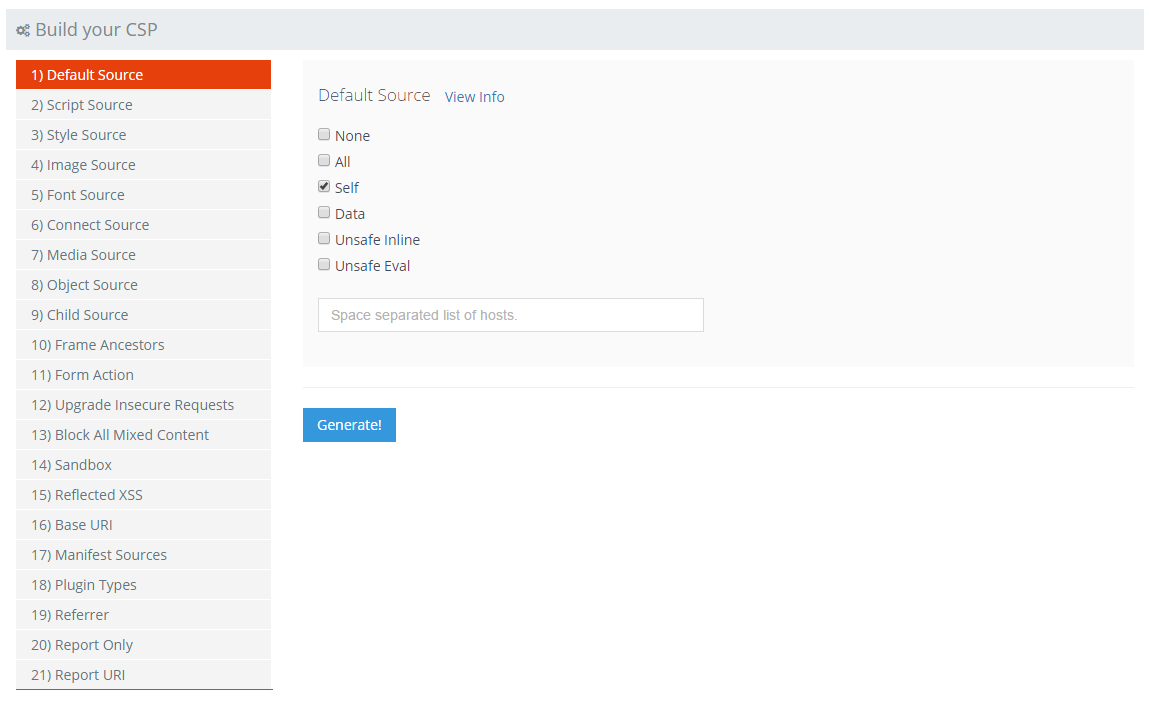
Default Source
For my policy I chose to set the Default Source to self. This means that unless something is specifically whitelisted by the policy, it can only be loaded from my domain. This allows you more fine grained control over your policy as you can prevent certain assets from being loaded from particular domains. For example, if I set https://cdn.example.com as a default source, the browser could load images, scripts or any other asset from the domain and you may not want this to be the case.
Some guides advocate the use of 'none' as the default source to completely block anything from being loaded other than what is whitelisted in the CSP. I'm not sure I agree with this approach and think it could actually be quite dangerous. I limit the default-src to 'self' but I can also see a perfectly legitimate case to set it to *. First of all, other specified policy directives do not inherit from default-src, they replace it. This means that you can allow everything, or just self, and then override it with specific policy directives. So if you have the following policy:
default-src *; script-src https://scotthelme.co.uk;
The policy could load any assets from anywhere, except scripts, which can only be loaded from https://scotthelme.co.uk. This is a great fall back for if things go wrong and you've made the choice between totally breaking if you use 'none', as other assets wouldn't load, and continuing to work as you've used * as the default. It's the old argument of fail open or fail closed, the choice is yours. There is another situation that you need to consider though. What if a browser doesn't support a particular directive, or what if support for another directive is added and you miss it? If you've used 'none' as your default and an older browser receives the policy, it may not support some of the newer directives and fall back to blocking. This could result in a really broken website. The same also applies to a similar situation where someone running the latest version of Chrome could support a brand new policy directive that you don't yet specify, so it falls back to the default. This could result in another broken website. Allowing 'self' should cover you for a lot these kind of situations, after all, if you're not happy loading any asset from your own domain, you probably have bigger concerns! If you depend heavily upon 3rd party assets then the * default may be best for you. If you specify every other supported directive and override it, then it won't leave you open, but, you need to move quickly in specifying any new directives in your policy once they are supported to override the default.
Script Source
For the script source is should be quite easy to quickly identify a lot of the hosts your site loads scripts from, this will prevent you getting a lot of reports when you initially setup the policy. Have a scan through your source and try to identify the low hanging fruit that you can whitelist.
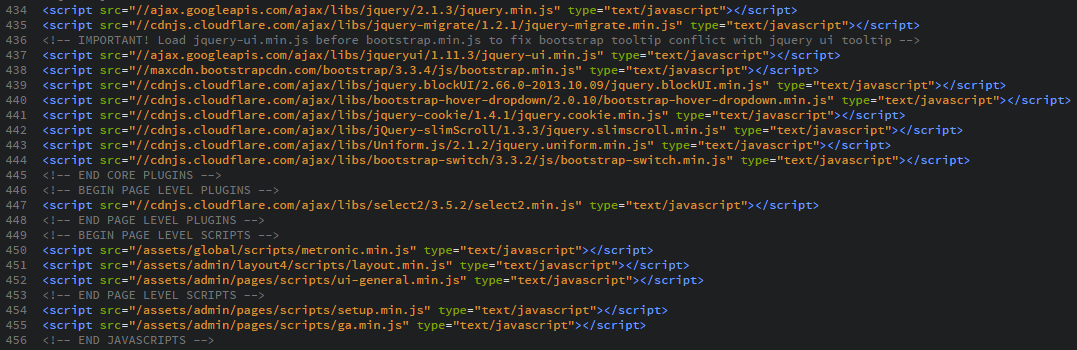
This list represented most of the scripts that my site loads and was a good starting point for building up the Script Source directive. You need to include the Self option to be able to load scripts from your own domain and then add a space separated list of hosts for the remaining 3rd party locations.
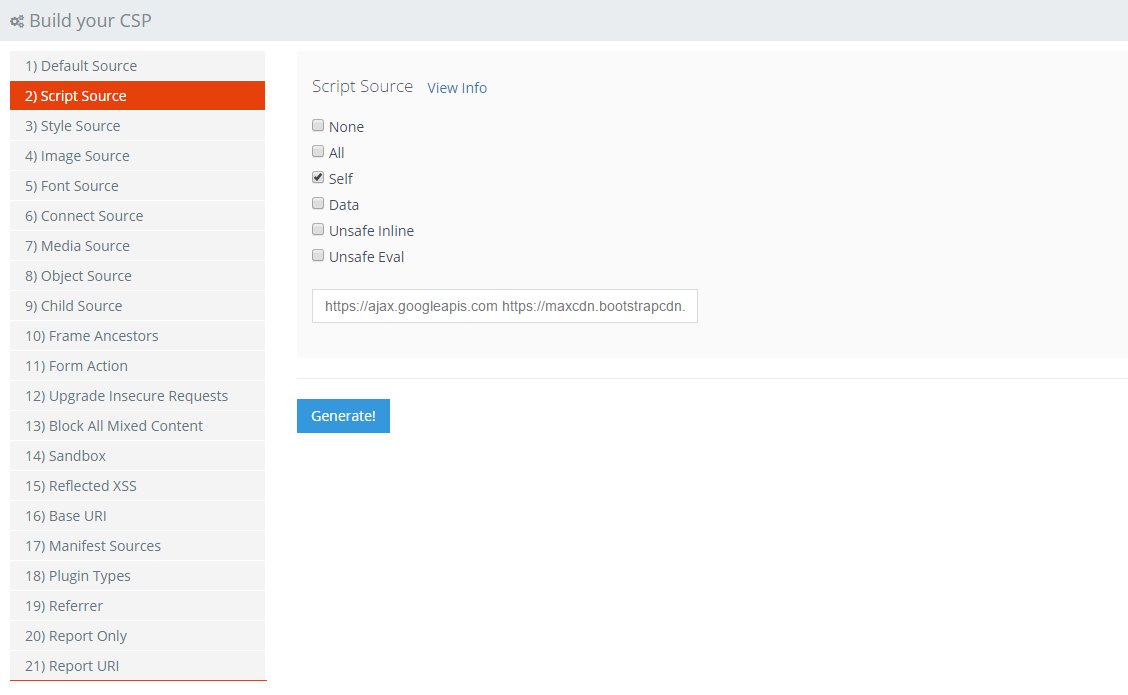
I've specified the HTTPS scheme for all external sites as I want to ensure that a secure connection is used to load the assets. There may yet be more hosts that need to be added to this list, which we can come back to do later, but for now, we should have most of them covered.
Style Source
Similar to the Script Source you should be able to quickly identify a good portion of the styles that you load and where you load them from. My header file contained most of the styles that I load and allowed me to build a fairly solid Style Source list.
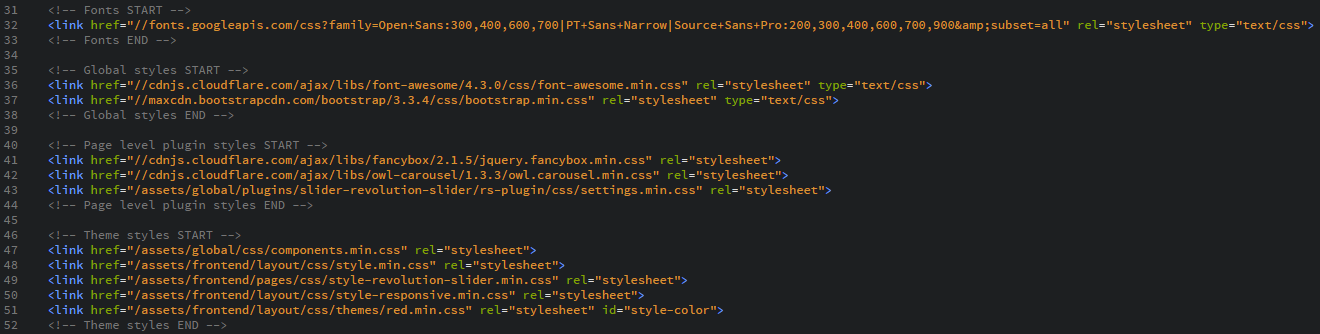
Again, make sure you check the Self option if you load styles from your own domain and then insert all of the 3rd party domains into the hosts list so you can load styles from them.

You will notice here that I've also checked the Unsafe Inline option. This is something that I'd already picked up on whilst developing the site and is linked to how certain elements in the GUI are enabled and disabled like buttons. Rather than change the class of an element, some of the JS libraries I'm using apply inline styles to elements instead. Without the Unsafe Inline option these features would break and generate a lot of reports. For now, I need to have this option enabled.
Image Source
Images can be a little more tricky to track down as they are likely a lot more scattered throughout your source. Fortunately for me I know that the only real places I load images from are the Google Analytics tracking pixel, your Gravatar if you have one and a couple of other locations. Again, be sure to check the Self option if you want to load images from your own domain.

Font Source
Font source should be another easy one to track down. Gather up the required list of hosts and don't forget to include yourself again if you need to!

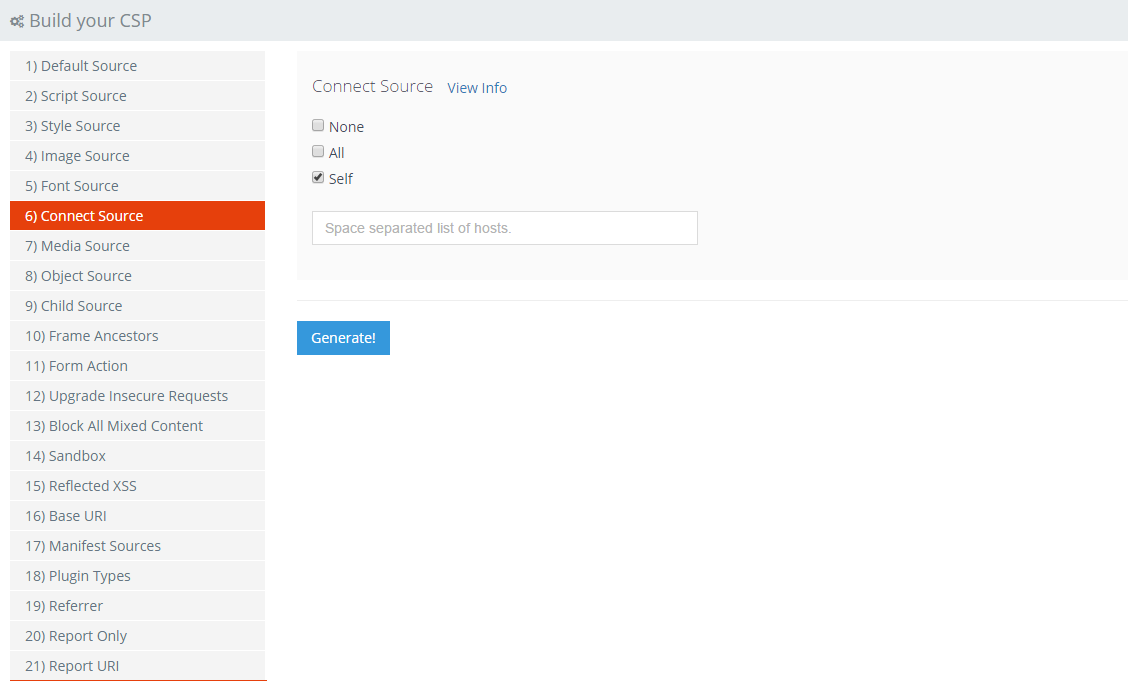
Connect Source
The Connect Source applies to fetch, XMLHttpRequest, WebSocket and EventSource connections. As I only AJAX data from my own domain, the only required option here is Self.
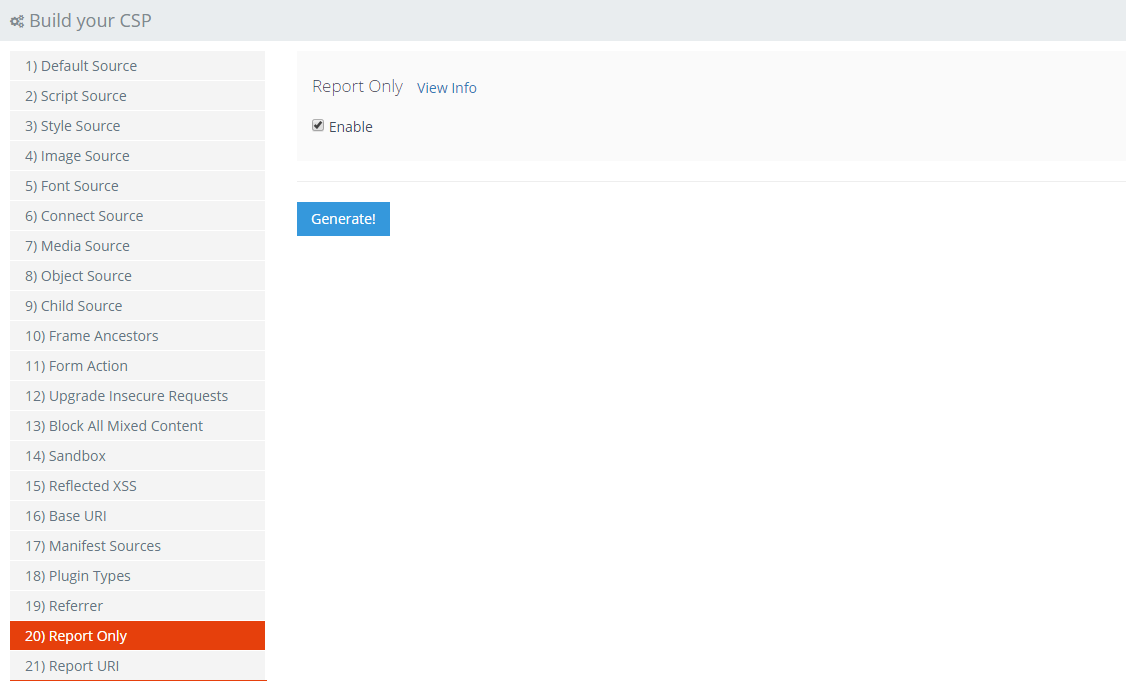
Report Only
When setting up a policy for testing one of the most important things that you enable is the Report Only mode. This means the browser will receive the policy and inform you of any violations but not actually enforce it on the page. That way, if the policy is too restrictive or you've mis-configured it, it won't disrupt your website during testing.
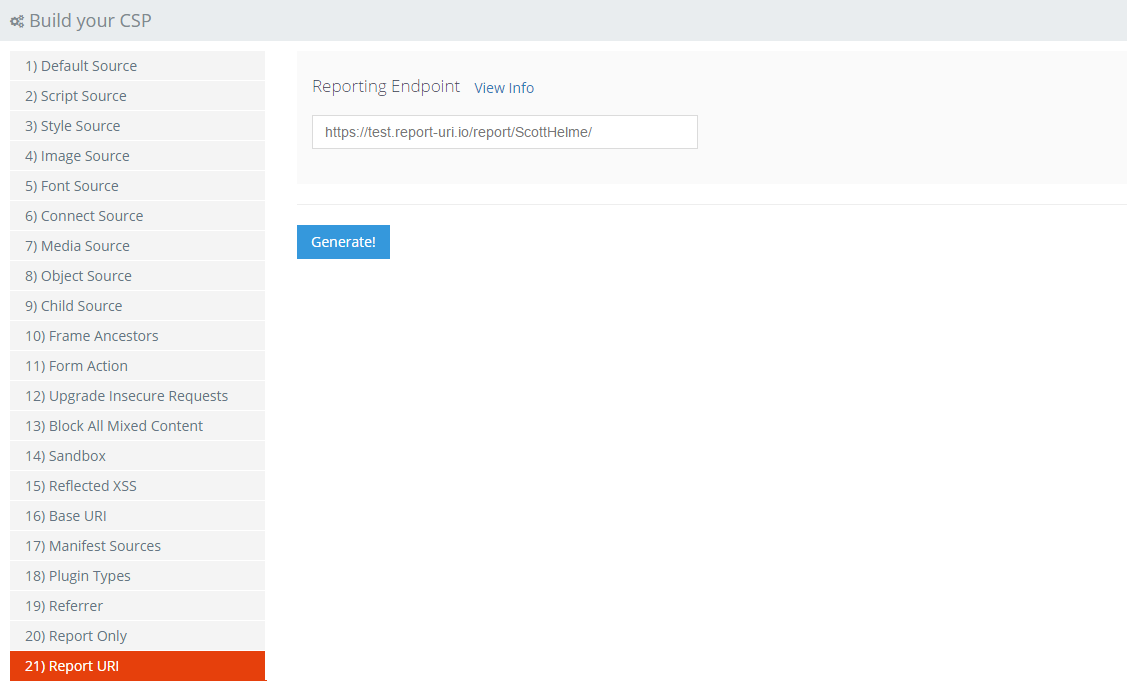
Report URI
The Report URI is the location that the browser should send reports of violations when they happen. You can setup an account on https://report-uri.io and get your own report collection address. Then, as violations happen you can see what's happening in your account and what's going wrong.
Generate!
Once you've got the basics in place you can hit the generate button and see what your policy looks like so far.
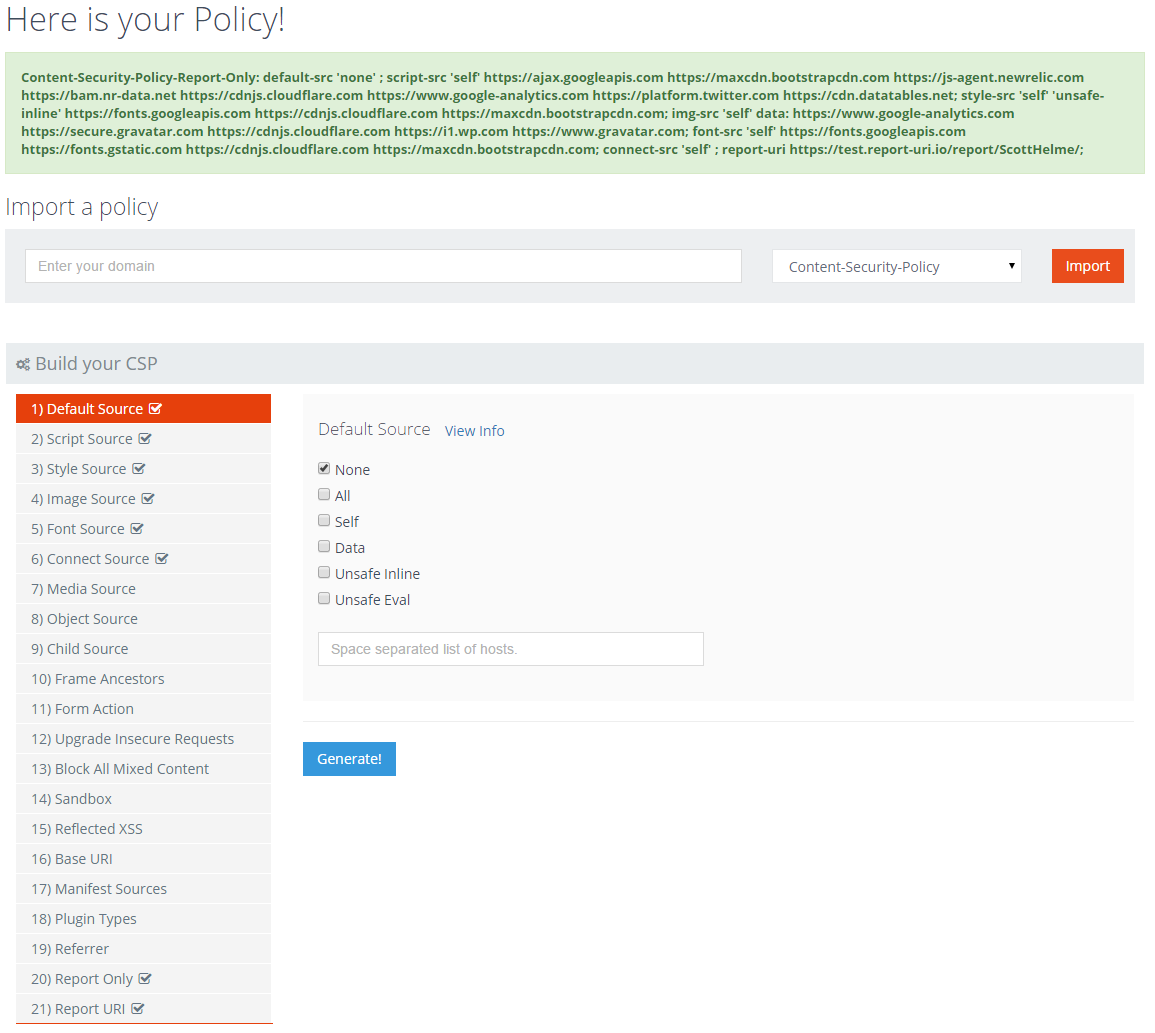
You can see the header is Content-Security-Policy-Report-Only and following that is all of the policy that's just been created! As you can see, using the policy builder is far easier than editing one huge line of messy text. Not only that, but there is a small marker placed by the side of each policy directive that you have enabled so you can see at a glance what's been implemented. If you want to add or remove any items, you can simply navigate back to them, make the required changes and hit generate again to update the policy.
Implement the policy
Now you have the header that needs to be issued on your site, all that's left to do is setup the header and issue it to your visitors. My blog on Hardening your HTTP response headers has information on how to issue the CSP header for NginX, Apache and IIS so should make for a good starting point if you're unsure. Once the policy is in place and being issued, you need to go and navigate your site to see if any errors are generated. Keep an eye on the Real-Time section on your https://report-uri.io dashboard or open the console in Firefox or Chrome to see if any violations are being reported. If you do have errors being reported, it will specify the policy directive being violated and the offending asset causing the violation. If the violation is actually an action that should be allowed, then you can modify your policy to allow it and update it by hitting Generate again. If you want a quick way to check if the header is being issued you can analyse your HTTP headers using my tool at https://securityheaders.io/, which will also give you information on various other HTTP headers, and there's also the CSP Analyser at https://report-uri.io/home/analyse.