
I've always loved tinkering with things and I recently found myself wanting to build something. I used to love playing with electronics, didn't want to build something that was too big of a project and something that would be kind of useful. I somehow arrived at a Twitter follower count display, so here we go!
It's nice to have a hobby
Over recent months I've found myself so busy working it's been a little crazy. I did a weekly update with Troy a couple of weeks back when we were in London and we kind of touched on that a little in that video. I'm doing a lot of travel for training and conferences, both of which is pretty tough going in terms of the actual travel itself and speaking/teaching. There's also Report URI taking up a lot of my time, bits of work on Security Headers, my blog and then of course the family too! I wanted to sit down and do something with my hands that didn't require too much thinking and a little project with a Raspberry Pi seemed like a perfect fit. I ordered the parts, I grabbed some beers and I sat down to tinker.
The components
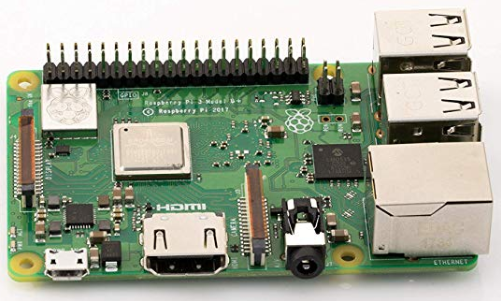
The first thing on my list was a Raspberry Pi and I went for the current generation device. You can probably get away with a much cheaper variant for a project like this but I'd also like to be able to repurpose the device so the Raspberry Pi 3 Model B+ was the device of choice.
Now we have a Pi to control everything, it needs something to control. For the display I was happy with something simple so I opted for a 7-segment display. There's a really cool kit on RasPiO for £10.

I'm fortunate to have enough Twitter followers that I needed two of these kits so once they were delivered it was ready to try and build a simple test rig and get to grips with the basics.
Building a working display
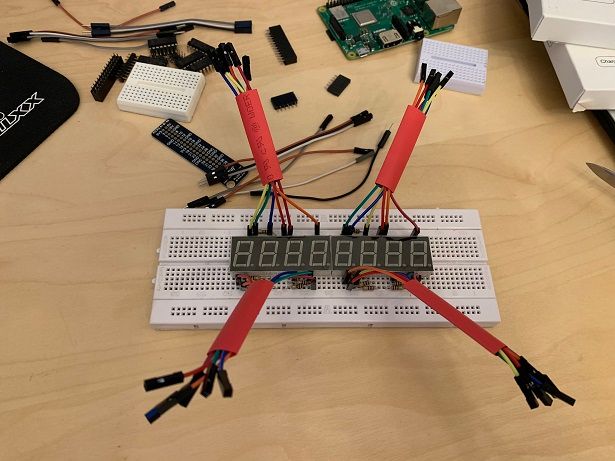
There's a great blog post on RasPi.tv on How to drive a 7 segment display directly on Raspberry Pi in Python which I based my initial work off and it allowed me to quickly build a working prototype.

I wired the display up on the breadboard and got it displaying some basic numbers that I could control with a Python script on the Pi. With that I was comfortable trying to tackle the more complex task of driving both 7-segment displays at the same time. This required an upgrade to the breadboard to fit both displays but was just a case of transplating all of the parts over.
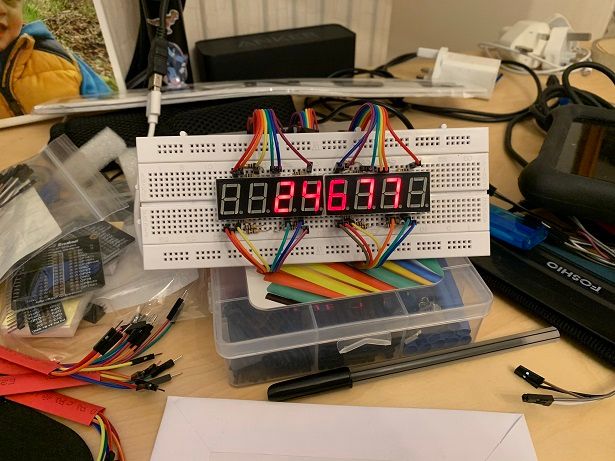
The original cables that came with the displays weren't long enough to loop around the back of the new breadboard so I ordered some longer ones and tried firing up both of the displays in tandem to output a static number that represented my follower count.
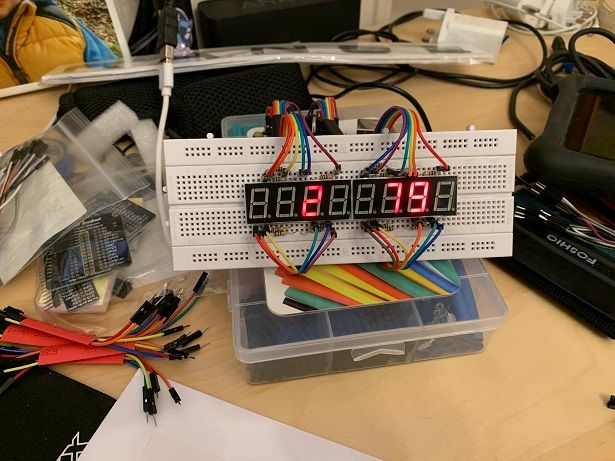
Yeah, not quite right. It turned out it was a simple fix and I had some of the segments wired up to the wrong GPIO pins on the Pi so after a quick shuffle, all was well!
Here's the final code for display.py which I'm using to drive the displays. It reads a number from the file followers.txt and displays it on the displays. For now the file just has a static number in it, but later it will be dynamic.
import RPi.GPIO as GPIO
import time
GPIO.setmode(GPIO.BCM)

# GPIO ports for the 7 segments on each display
asegments = (14,25,27,3,2,15,22,4)
bsegments = (7,21,19,5,11,8,26,13)

for segment in asegments:
    GPIO.setup(segment, GPIO.OUT)
    GPIO.output(segment, 0)
for segment in bsegments:
    GPIO.setup(segment, GPIO.OUT)
    GPIO.output(segment, 0)

# GPIO ports for the 8 digits
digits = (18,23,24,17,12,16,20,6)

for digit in digits:
    GPIO.setup(digit, GPIO.OUT)
    GPIO.output(digit, 1)

num = {' ':(0,0,0,0,0,0,0),
    '0':(1,1,1,1,1,1,0),
    '1':(0,1,1,0,0,0,0),
    '2':(1,1,0,1,1,0,1),
    '3':(1,1,1,1,0,0,1),
    '4':(0,1,1,0,0,1,1),
    '5':(1,0,1,1,0,1,1),
    '6':(1,0,1,1,1,1,1),
    '7':(1,1,1,0,0,0,0),
    '8':(1,1,1,1,1,1,1),
    '9':(1,1,1,1,0,1,1)}

try:
    while True:
                f = open("followers.txt", "r")
                followers = f.read().rstrip("\n")
                iteration = 7 - len(followers)
                for number in followers:
                        for loop in range(0,7):
                                if iteration <= 3:
                                        GPIO.output(asegments[loop], num[number][loop])
                                elif iteration >= 4:
                                        GPIO.output(bsegments[loop], num[number][loop])
                        GPIO.output(digits[iteration], 0)
                        time.sleep(0.001)
                        GPIO.output(digits[iteration], 1)
                        iteration += 1
finally:
    GPIO.cleanup()
Fetching your Twitter follower count
There's a great Pyhton library for interacting with the Twitter API called Tweepy and it's super simple to get started with a quick look through their documentation. I just need my follower count and with a few lines of Python, I can have something that fetches that called getFollowers.py.
import tweepy, time

auth = tweepy.OAuthHandler("Consumer API Key", "Consumer API Secret")
auth.set_access_token("Access Token", "Access Token Secret")

api = tweepy.API(auth)

while True:
        followers = api.get_user("Scott_Helme").followers_count

        if followers > 1:
                text_file = open("followers.txt", "w")
                text_file.write(str(followers))
                text_file.close()

        print str(followers)
        time.sleep(5.1)
This script sets up Tweepy with my API keys from the Twitter Developers page, get's my user and the follower count and then writes it to the file followers.txt. There's also a sleep in there because this is running in a loop and we don't want to hammer the Twitter API and break their rate limit. The limit for GET requests like this is 180 requests per 15 minute window so 180/900 = 0.2 requests per second, or 1 request every 5 seconds. I set the sleep to 5.1 just to free up some additional requests in each rate limit window and make sure we're not brushing right up against the limit.
Start everything on boot
I want to be able to take this device with me on my travels and perhaps do lightning talks about it, have it on the podium at conferences and generally just be something fun that isn't hard to demo. For that, I need it to fire right up and start working without me having to do stuff. Running the scripts will be done with cron so all we need to do is add an entry to fire them off when the Pi boots. To edit your crontab simply run crontab -e and add the following entry (updating paths where required).
@reboot sleep 5; screen -S display -d -m python /home/pi/display.py; screen -S followers -d -m python /home/pi/getFollowers.pyThis entry will run when the Pi boots, wait 10 seconds, start the display and then start the follower script both in screen sessions. Once the Pi is up you can see the sessions have started with screen -ls.
pi@raspberrypi:~ $ screen -ls
There are screens on:
        807.followers   (20/02/19 22:46:05)     (Detached)
        805.display     (20/02/19 22:46:05)     (Detached)
2 Sockets in /run/screen/S-pi.
If you don't have screen installed on your Pi you can get it with sudo apt-get install screen and you're good to go.
Other things
The Pi doesn't have encryption on the microSD card which contains everything, including the Twitter API keys in the code above. When I created my keys I made sure they were read-only keys to limit their power but if the microSD is ever stolen or accessed, you will need to revoke those keys.
I have my Pi configured to automatically connect to one of my guest WiFi networks at home. When I'm travelling with the Pi I will spin up a WiFi hotspot on my phone with the same SSID/password for it to connect to. If you want to configure WiFi on the Pi use sudo raspi-config and go to Network Options.
You should change the default password for the pi user, especially if it will be on a network with other devices. Use the passwd command to do that when logged in.