
Just last week I wrote about how I improved the security and privacy of all devices on my home network using a Raspberry Pi, Pi-Hole and the new 1.1.1.1 resolver from Cloudflare with DoH. Following deployment, the dashboards and metrics on the Pi-Hole really shone a light on some of the things that devices on my network were up to.
The Pi-Hole
If you want to read more about the setup I built last week you can see details in my blog Securing DNS across all of my devices with Pi-Hole + DNS-over-HTTPS + 1.1.1.1. The Pi-Hole is an awesome bit of kit and the DoH resolver provided by Cloudflare is a significant improvement in the privacy of my internet browsing. One thing that I do like is graphs, awesome and pretty graphs, which the Pi-Hole absolutely delivers on.
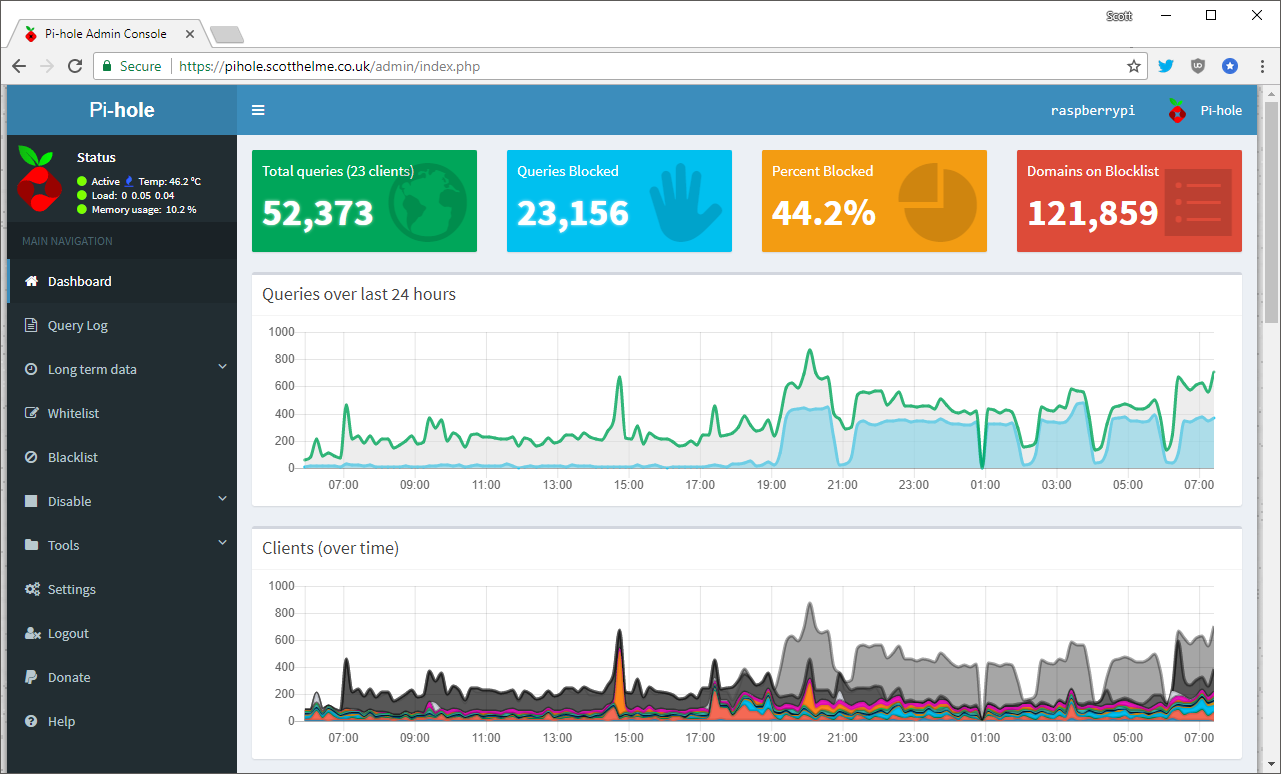
This is the main landing page for the Pi-Hole when you login and at a glance it gives you an awful lot of really cool and useful information from the last 24 hours of operation. You can see that my network has made a total of 52,000+ DNS queries, of which 23,000+ were blocked! That's a pretty high block rate of over 44% based on my rather small, default blocklist of ~121,000 domains. The time graphs are also nice and let you see where peaks and troughs in request rates happen and also which clients are responsible for those requests. The next page is the query log and allows you to see the raw queries that have recently taken place.

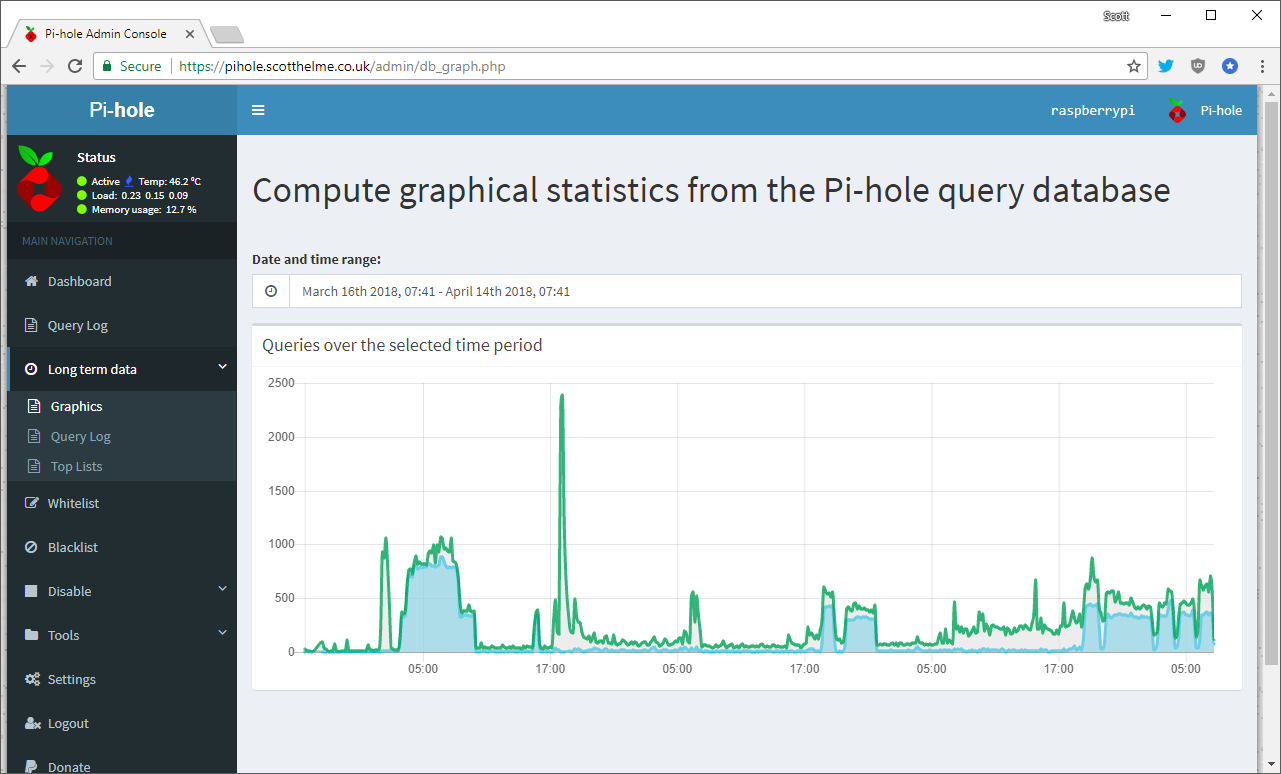
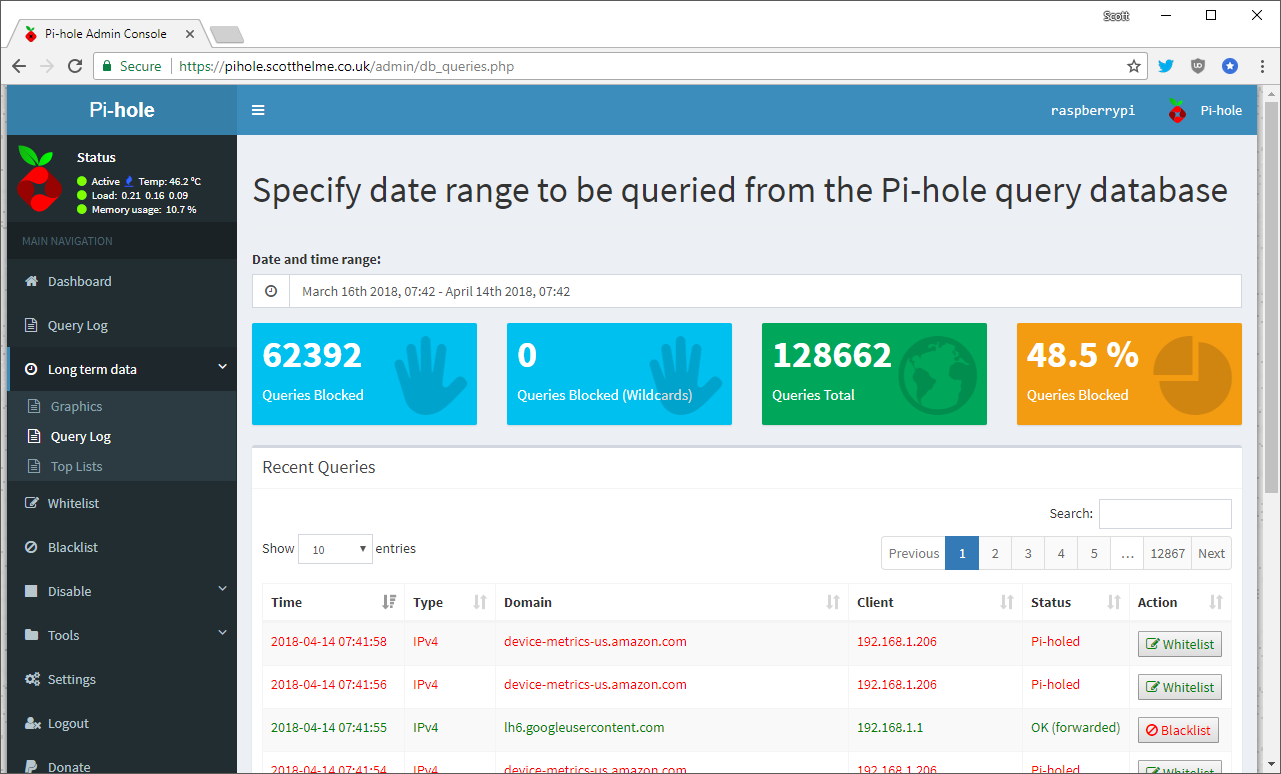
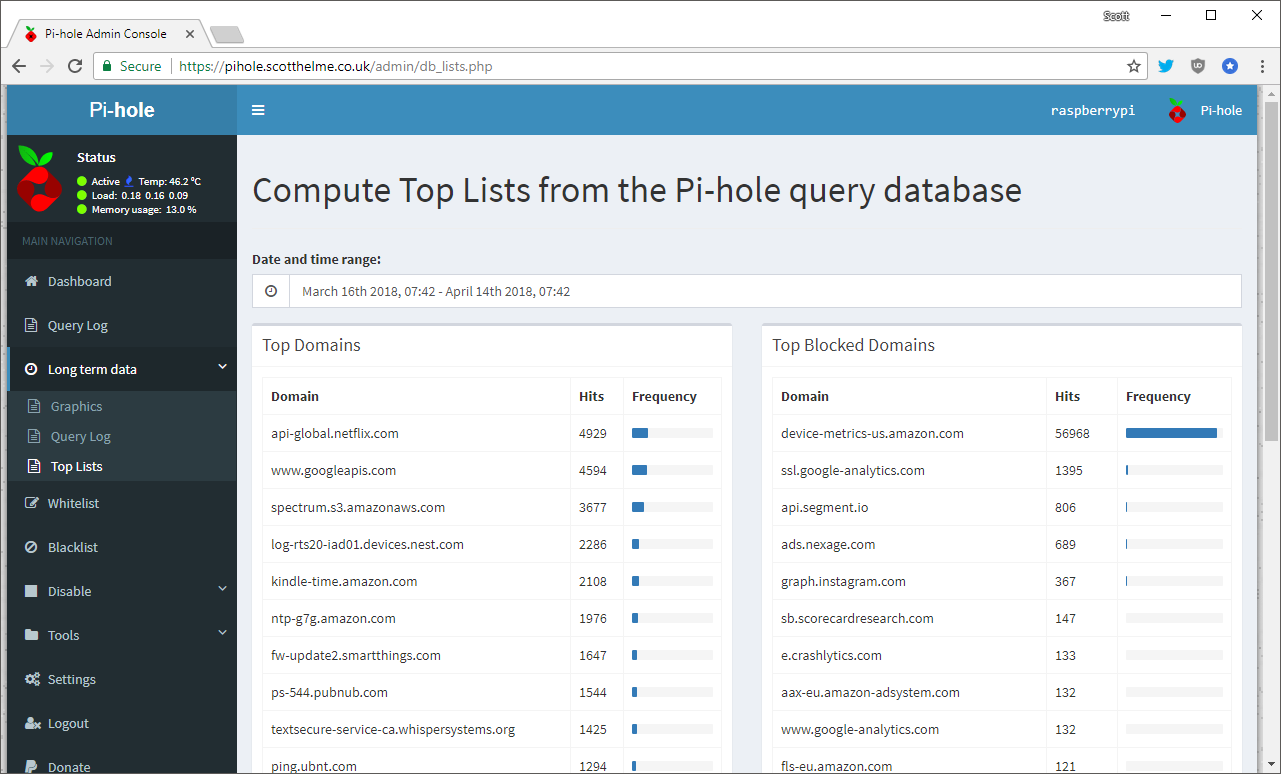
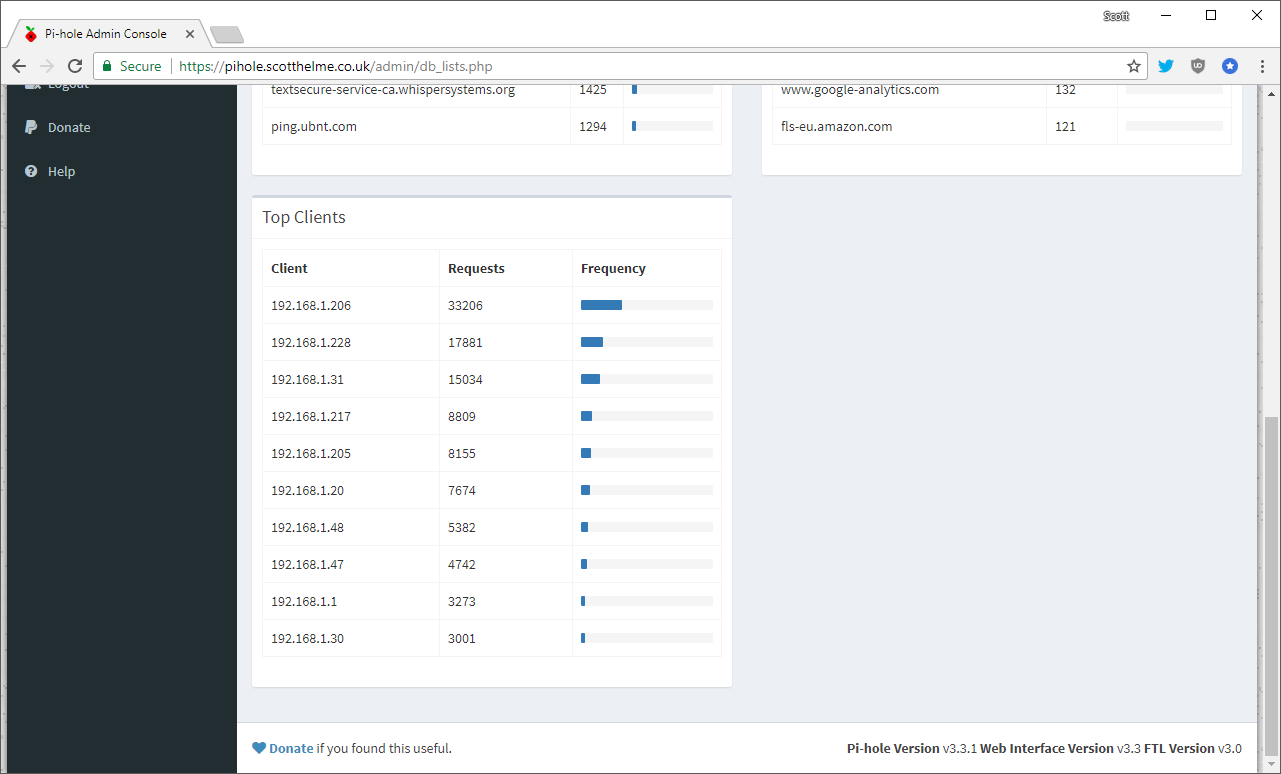
In the long term data section you can get the time based graphs for periods greater than the last 24 hours, view the query log including query/block numbers and then the lists of the top domains queried, domains blocked and most DNS heavy clients on your network.
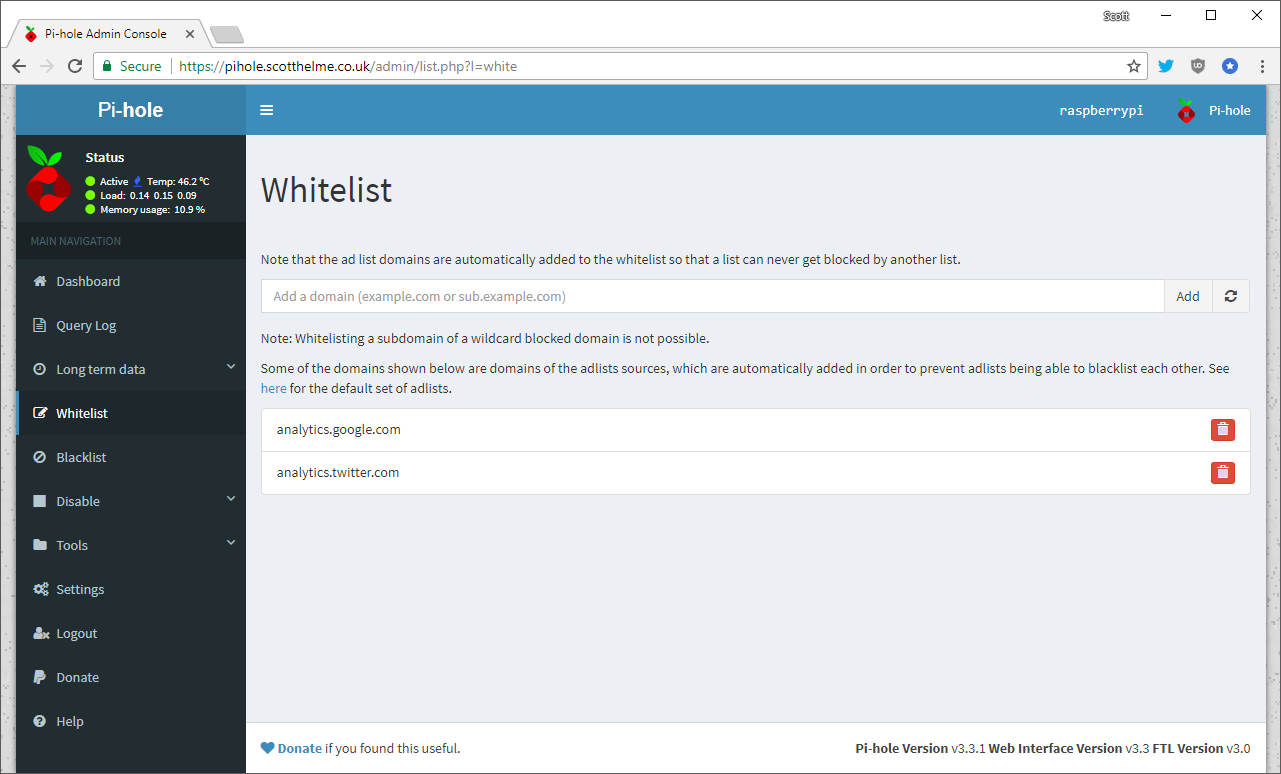
The Whitelist section lets you allow contact to domains that would otherwise be blocked by the Pi-Hole and so far I've only had to allow access to 2 domains that I needed. Both the analytics.google.com and analytics.twitter.com domains are blocked by default and of course I couldn't access them in the browser so I've manually added them to the whitelist.
The Blacklist section is fairly self explanatory and so are the Disable section, which lets you do permanent or time-based disabling of the filtering and the Tools section which has a few utilities for debugging and updating various parts of the system. The next interesting section for me is in Settings and one of the pages there allows you to manage the block lists that the Pi-Hole uses.
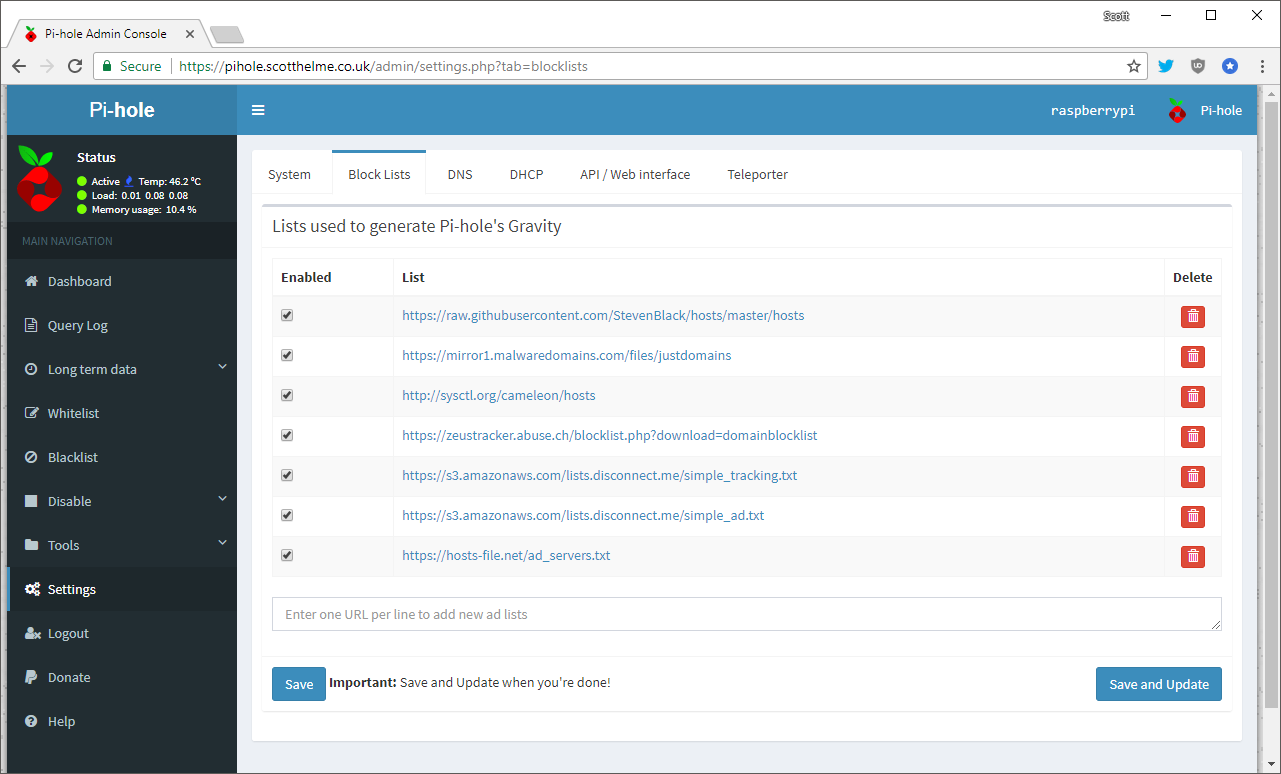
This makes it really easy to load in huge lists of bad domains to add them to your block list and filter them from your network. One of the ones I'm thinking of adding is this cryptomining domain list and another hostile site block list. There are plenty of these lists to go for and blocking more bad stuff on your network is always a good thing!
Not all devices behave themselves...
I'm quite fortunate to already run my home network on Ubiquiti hardware exclusively. You can see details of my setup in My Ubiquiti Home Network and it gives me visibility into all of the devices on my network, their traffic, activity and heap of other useful stuff thanks to the managed switches.
Boy is my wife going to be mad at @troyhunt when she gets home... 😂 pic.twitter.com/Xe465BQatn
— Scott Helme (@Scott_Helme) November 28, 2016
You can click through to that post to see all of the pretty graphs that the UniFi kit gives me but I've already had some insight into devices on my network that are very chatty even when not being used thanks to the traffic graphs. Given I was already skeptical of certain things on my network, I wasn't very surprised when checking the Pi-Hole graphs to see that some clients weren't making any DNS requests at all. That's pretty odd really because if the client isn't making any DNS requests, how is it resolving hostnames to communicate with, well, anything?
After some quick Googling around I found that it's very common for certain devices to ignore the DNS server addresses handed out via DHCP and to continue to use their own preferred DNS servers instead. How very respectful of them huh... As I have the UniFi Security Gateway sat at the edge of my network doing firewall duties my first thought went to blocking all outbound DNS requests there, but of course that's going to cause problems. Devices that try to reach out to their own preferred DNS resolvers are going to stop working, which is less than ideal. I needed a better solution and I quickly came across one on the Ubiquiti forums.
Intercepting DNS requests
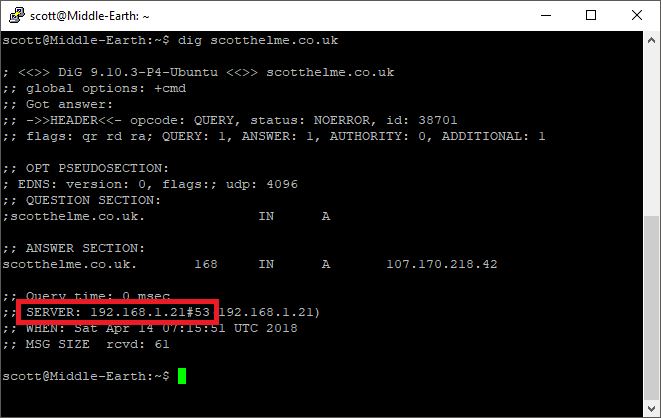
In my current setup with the Pi-Hole as my local DNS resolver the DHCP server is politely asking clients that it assigns IP addresses to to also use the provided DNS server. Politely asking devices to follow the rules isn't enough and the UniFi Security Gateway gives me the ability to force them to comply without them even knowing. The problem is simple, you can send your DNS requests anywhere you like. If I do a DNS lookup from a local device here on my network it will use the DNS server assigned by DHCP.
If I don't want to query the default DNS resolver though I can specify one that I want to query instead and the request will be sent there.
This bypasses the Pi-Hole along with all of the protections that it offers and the DNS request heads off into the wild. That's not so great. Rather than block any external DNS requests and break those clients what we can do instead is intercept external requests and force them through the Pi-Hole on the local network instead.
The UniFi Security Gateway allows for advanced configuration using the config.gateway.json file which can be deployed onto the CloudKey which will provision the USG. To setup the USG to force the redirection of all DNS traffic is fairly easy, first of all SSH onto the CloudKey and create the config file.
nano /usr/lib/unifi/data/sites/<site name>/config.gateway.json
This is the file that will contain the new configuration for the USG and the following JSON is what you need.
{
   "service": {
      "nat": {
         "rule": {
            "1": {
               "description": "DNS Redirect",
               "destination": {
                  "address": "!192.168.1.1",
                  "port": "53"
               },
               "inbound-interface": "eth1",
               "inside-address": {
                  "address": "192.168.1.21"
               },
               "log": "disable",
               "protocol": "tcp_udp",
               "type": "destination"
            }
         }
      }
   }
}
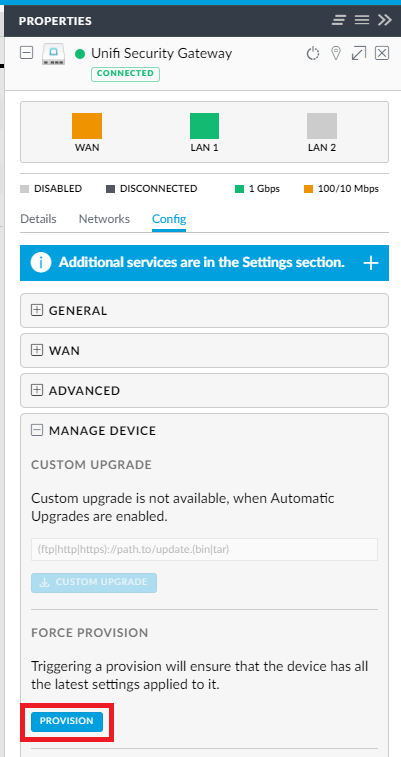
The destination address is set to any address other than that of your USG and the port is 53 for DNS queries. The inside-address is then set to that of your Pi-Hole and is where the requests will be sent to. With that file saved on the CloudKey jump over to the web interface and force a provision of the USG.
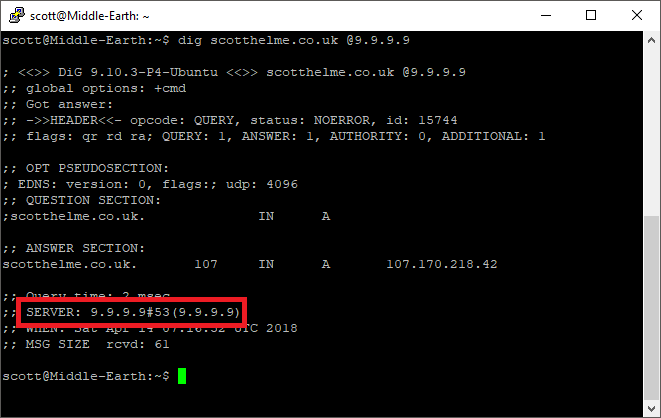
That shouldn't take long and once the rule is in place you can test that it is actually working. I'm going to use dig to issue a DNS request against the Google resolver this time and previously that would have left my network and made its way to Google and back.
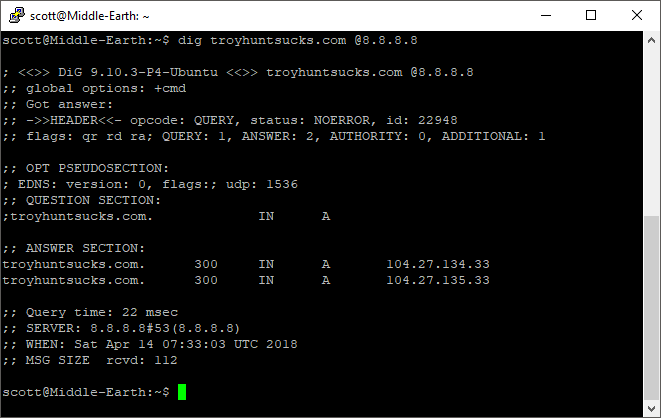
This time though if I jump over to the query log of the Pi-Hole we can see that the DNS request did not make it Google, it was actually redirected through the Pi-Hole which took care of the request instead!
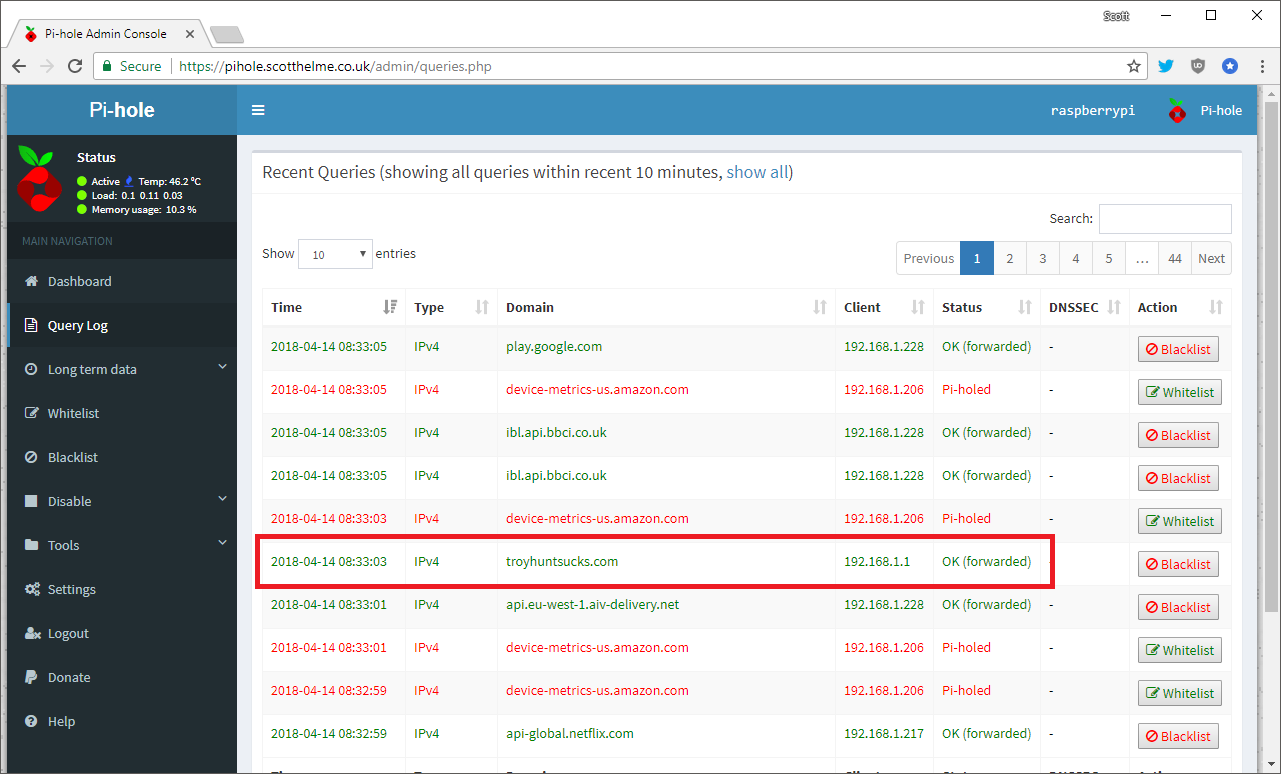
If you look at the dig command it still thinks it spoke to 8.8.8.8 as the server but in reality it didn't! You can also see in the query log that the DNS request came from 192.168.1.1 which is the IP address of my USG which is catching the request at the boundary and bringing it back in.
This should keep devices on my network happy, thinking they're talking to their preferred DNS resolver, when actually they going through the Pi-Hole without their knowledge and I still get all of the security and privacy benefits that brings. On my network it's my way or the highway 😎